Baños is a small town four hours south of Quito by bus. The full name of the town is Baños de Agua Santa, which translates to Baths of Holy Water. The town got it’s name from the abundance of natural hot springs and waterfalls in the region.
The mountainous region developed into what is essentially the adventure capital of Ecuador. It is here that you can engage in all sorts of outdoor activities, such as the adrenaline pumping sports of Canyoning, Puenting, White Water Rafting, Mountain Biking through to more sedate activities such as swinging over a cliffs edge, hiking, visiting waterfalls and bathing the natural hot springs.
The number of activities you engage in obviously depends on time, budget and interests. During my time in the rural Ecuadorian town of Salasaca, I made two weekend trips to Baños.
In that time I only got around to completing a few of the activities on offer…
Hiking Chimborazo
Cost: Free
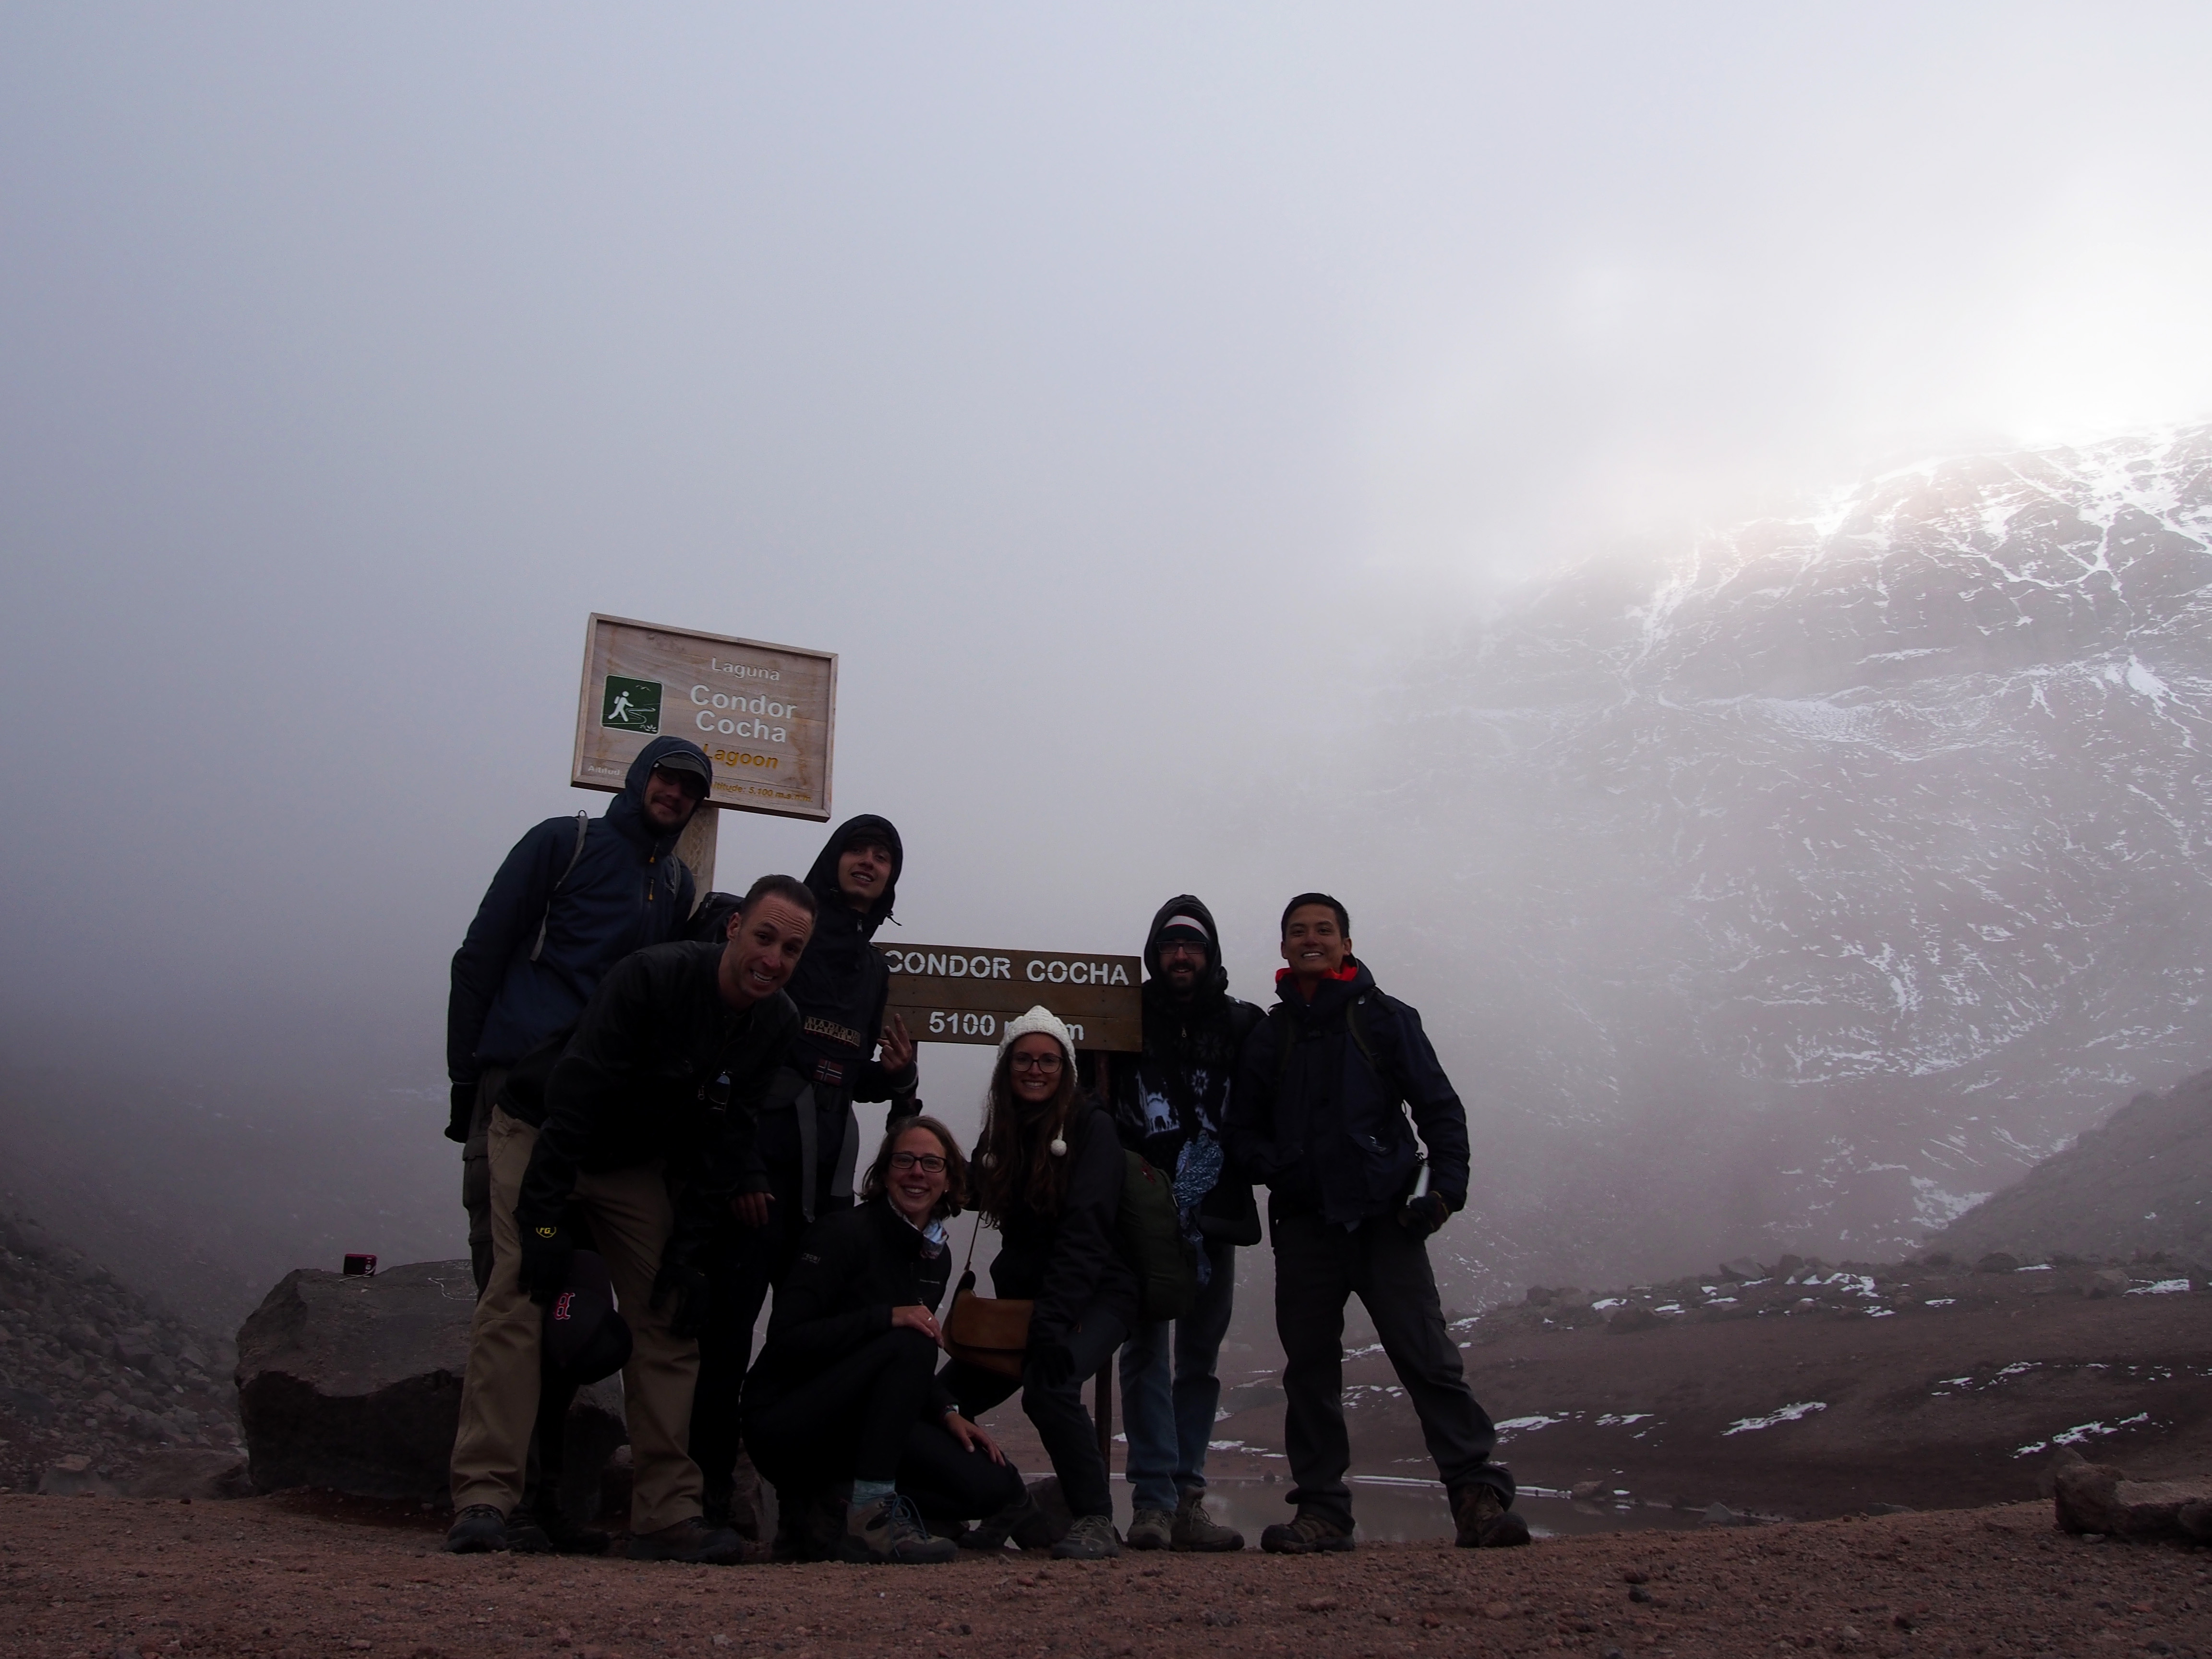
My first weekend adventure was spent together with eight other volunteers from the volunteer house in Salasaka. We headed to a volcano called Chimborazo, which claims to be the highest mountain in the world, 2 kilometres taller than Mount Everest when measure from the centre of the earth.
We caught the bus to a starting point at 4300 metres, signed in at the office and started walking upwards.
While we could see the volcano was snow-capped, the starting point was dry, dusty and to me, moon-like. There was very little vegetation and a few wild vicuñas on the lookout for food.
With the high elevation, walking was very slow going, but the company was fabulous and the views simply spectacular.
At 4800 metres we stopped for lunch and a hot drink, as we were all completely frozen and had burned all our energy with the uphill hike. After the brief respite, we continued onwards past the second refuge to the lake at top, Condor Cocha, our highest point of elevation at 5100 metres.
Puenting
Cost: $20 + $5 for the cd of photos and video
In Spanish the word Puente means bridge, the activity referred to as Puenting is a pendulum bridge swing.
There are a few bridges in the Baños region where you can go puenting, I simply walked to the bridge over Rio Pastaza behind the bus station and local market. I spoke to the people running the operation on the bridge, paid and jumped off.
You can book and pay for a puenting experience at any of the Adventure Centres around town.
Casa Del Arbol
Cost: $1
Casa Del Arbol is a treehouse on top of the hill overlooking Baños, with some swing attached. Perched on the hilltop, it appears as though you swing off the edge of the world.
Swinging off the edge of the world was Bucket List Item 35 for me, and despite it not being a particularly high thrill activity, I loved every second of it!
You can either book a trip to Casa Del Arbol with one of the adventure companies or catch a local bus up and down. With a company it may cost around $12 or more, independently using public transport will add up to a total of $3. Buses are infrequent, so check the times carefully.
Pialon del Diabolo
Cost: $1
Ideally with enough time and good weather I would recommend renting a bicycle and cycling Ruta de Los Cascadas – the waterfall route. Alternately you can book a trip on a camioneta with any one of the adventure companies and they will transport you from place to place for approximately $6, not including entrance fees..
There are so many waterfalls in the area and they are all simply stunning and worth a visit.
Due to time limitations not to mention the incessant rain, I caught a local bus to Rio Verde for 50 cents each way, and walked the short distance to Pialon del Diabolo, the Devil’s Cauldron.
If you want to have a really good look at the waterfall and explore the area, then ideally you should wear a swimsuit and leave your electronics at home. Pialon del Diabolo is an incredible waterfall, with a huge volume of water. No matter how far away you are, you will be splashed as the water rushes down the mountainside.
Canyoning
Cost: $30
On the recommendation of so many people I have met, Canyoning was added to my To Do list in Baños. Again, basically every company offers half and full day canyoning adventures.
Canyoning involves descending through a canyon, in the water, by means of rappelling, zip-lining, jumping and riding natural water slides. It is absolutely truck loads of fun!
A good friend of mine highly recommended the company Natural Magic for a canyoning trip, based on the professionalism and safety standards of the company. I was not disappointed at all!
My guide John was fantastic, there were no issues along the way, we all felt safe and had a brilliant adventure. We chose the half day canyoning adventure down Rio Blanco for $30.
My preference would have been the full day adventure down Cashaurco Canyon, but with temperatures of 2 -4 degrees celsius forecast, I was unwilling to spend quite so much time in the cold.
Food and Drink in Baños
It feels like there are literally hundreds of food and drink options in Baños. Some places I have been and like are:
Honey – good food coffee and cake
Hickory – delicious, good value, burgers
Pizza Al Pazo – reasonably good pizzas, well priced, quirky decor and friendly staff
Casa Hood – cosy atmosphere and a good range of cuisine at a reasonable price
Stray Dog Brewpub – some decent food such as burgers, also a nice (but expensive) range of beers
In one of the main food streets you will also find an opportunity to taste the local delicacy “Cuy”, known in the English language as Guinea Pig. A whole one costs $22, but assuming you just want to taste, a piece costs $3.
For two and a half weeks in July 2016, I worked as a volunteer teacher during Summer School at a community school in rural Ecuador. Escuela Katitawa can be found in the small town of Salasaka, approximately three hours by bus from Quito.
Salasaca
Salasaca is a really tiny town. It has one main street and the other few streets are residential. There are a few small stores, an ice creamery, a bar and a very small souvenir market.The locals are incredibly friendly and welcoming.
If you ever need to grocery shop, get laundry done or complete any other similar chores, then the neighbouring town of Pelileo is the place to go (a 25c bus ride down the road).
Day-to-Day Volunteering at Escuela Katitawa
The Volunteers
The school and library are primarily staffed by overseas volunteers, of which I was one. During my time at Escuela Katitawa my fellow volunteers included some men from the U.S.A, Italy, France, two women from Great Britain, a couple from Italy and a couple from Belgium. For the last twelve years an older gentleman from the U.S.A. has run the school.
The volunteers live together in a volunteer house and do everything together, eat, work, play games in free time. During the weekends there is nothing to do in Salasaka so the volunteers often go on a group adventure to nearby areas for hiking and other fun adventures. On one occasion nine of us hiked an inactive volcano, Chimborazo, to 5100 metres; before heading to the adventure capital of Ecuador, Baños to jump off the bridge in a bridge swing (puenting) and soak in the thermal pools.
The camaraderie amongst volunteers is what makes the experience worthwhile.
The School
The school is a 25 minute walk, or a five minute ride on the back of a truck, up the hill from the Volunteer House and Library. The walk can be a little daunting as the dogs from local properties tend to get defensive and bark at you as you walk by; some dogs also chase you. Typically they are all bluff.
The School has four main classrooms; one office for the Principal; two composting toilets; a yard to play in; an organic garden; and a kitchen and dining hall.
Each of the classrooms have some tables and chairs and a small whiteboard. Unfortunately though the school has no electricity and no heating, so both teachers and students are always rugged up in many layers of warm clothing.
Most, but not all doors lock, which means that overnight many items (including toilet paper) need to be relocated to prevent theft.
The Library
The Volunteer House and Library are two joined buildings that can be found by the roadside a few kilometers from central Salasaka.
Community members may purchase library membership for just a few dollars per year to have access to the books, or they may pay a few dollars per month for internet access.
In addition to functioning as a library, the library building is also used for private tuition lessons. It has two classrooms and one open space where the books and main desk are found.
The Volunteer House
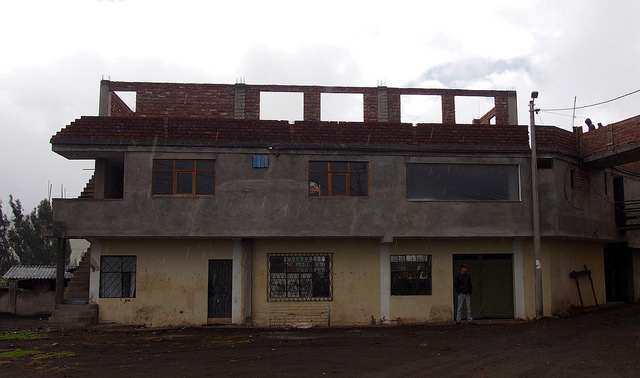
The Volunteer House is both the level above the Library and the building beside it. Several years after construction began, it is still under construction.
There is a communal kitchen, dining room, living room, wifi zone and bathroom. There are several dorm style bunkrooms. Most rooms have a small ensuite, though some lack doors, functioning sinks or toilets. None of the ensuites have a functioning shower. All volunteers share the bathroom above the library for access to the shower. The shower is the only place in the building where hot water can be found.
Several of the windows in the building lack glass, the living room window is a sheet of clear plastic and the kitchen has two holes where windows belong. There is no form of insulation or heating in the building, which once again means that all volunteers are permanently rugged up against the cold.
Laundry can be done either in a cold tub of water by hand, or it can be taken to the neighbouring town of Pelileo where rates are very reasonable.
In my second week we had no water for three days out of four, which creates major issues for cooking, bathing and going to the toilet.
If it weren’t for the amazing people I have worked with, I would not have stayed very long living in these rustic conditions.
It costs $7.50 per day to volunteer with Escuela Katitawa, or $20 per week. The money goes towards the running of the volunteer house (such as food for the volunteers, gas and electricity), school resources and construction materials.
The Daily Schedule
7:00 Porridge breakfast is prepared for the volunteers 7:30 The truck departs for the school, if you miss it, you walk 8:00 The first lesson of the day begins 9:30 Students have a short break, during which time they can buy crisps from the kitchen and play in the yard 10:00 The second lesson of the day begins 11:00 Students have a short five minute break to run around, some students change classes at this point in time eg. The five year olds switch from Mathematics to English 12:00 Lessons finish for the day 12:30 Lunch is provided for the volunteers in the school dining hall. It is typically vegetable soup or rice with vegetables 1:00 Volunteers typically walk back to the volunteer house to hang out, or perhaps travel into Salasaka or Pelilieo to do groceries or laundry 4:00 From 4pm until 8pm, volunteers are assigned hour long private tuition sessions with students. Students range in age from 5 years old through to adults. They may study subjects such as English, French or Mathematics. I suspect tutoring would be provided in any subject requested 8:00 Around 8pm the student are provided with a delicious vegetarian meal prepared by Margarita
Summary of the experience
After a 12 month sabbatical from the classroom I was quite excited about this volunteer teaching opportunity. Overall I felt I was able to help the students a little bit, but generally I found the experience more frustrating and disappointing than anything else.
The living conditions were incredibly rustic and I couldn’t cope with being freezing the whole time, no matter how many layers of clothes I wore.
I really appreciated the opportunity to get to know some of the locals and feel welcomed into their community. I also really enjoyed getting to know and work with other volunteers.
Some aspects of the volunteering program were enjoyable, but if I were to volunteer elsewhere, I would certainly look for a placement that was more effectively organised, with better overall conditions.
The Galapagos Islands are ancient islands formed through volcanic activity, off the west coast of Ecuador. They were discovered by a man from Panama, named Tomás de Berlanga in 1535. The islands were claimed by Ecuador in 1832. In 1835 Charles Darwin visited the region in order to explore the islands and research the geology, botany and zoology, in order to find evidence supporting his theory of evolution. Despite Darwin having not spent a great deal of time on the islands, his name has since been tightly coupled with any references to the Galapagos.
The Galapagos Islands are particularly special because there is an incredible biodiversity, and they have been well protected from human influence and damage. It is on the islands that you can see a wide variety of land and sea creatures that are not seen elsewhere in the world.
Despite being a volcanic region, there are currently only two islands with active volcanoes: Isabella and Fernandina. Unsurprisingly, we did not visit either of these two islands.
Galapagos Islands Tour
In July 2016 I ticked off bucket list item number 2, which was to take my mum to see the Galapagos Islands, something that was a life long dream for her. For ten days we toured together with family, friends and strangers on the Intrepid Travel Tour: Complete Galapagos (Daphne). The tour was all on a boat called the Daphne and our guide Wilo had recently been awarded “Best Guide in South America” by Intrepid. The crew were brilliant: Luis was a great Captain who got us everywhere safely; Benny and Herman took us everywhere in the zodiacs; Luis was a fantastic barman/waiter; Eric and Segundo prepared delicious meals for us daily; and Carlos kept the boats running.
There are a few reasons why I regularly tour with Intrepid, one of which is their commitment to supporting the community. Their stand on community support is in the case of the Galapagos backed up by legal requirements. Anyone who works as a guide or in any other capacity in the Galapagos Islands MUST be a resident of the Galapagos. This ensures the economic support of the islands, by providing income and jobs. It also means that you typically encounter people that have a vast amount of knowledge and passion for their home.
When to visit
I am sure the Galapagos Islands are amazing to visit at any time of the year. Despite the cold currents and high winds, July was a great time to visit as we were able to see many of the birds nesting. In some cases, July is the only time of year when certain birds are seen on land. For the bird lovers in my group, this was a dream come true.
Isla Baltra
As the plane descended to land on Isla Baltra I can say I have never experienced such an intense buzz of anticipation emanating from all the passengers in the plane. We were all so curious to see what awaited us!
Baltra is an arid island, and for us, was only the point of arrival and departure. Within an hour of landing we headed across to Isla Santa Cruz by ferry.
Isla Santa Cruz
Santa Cruz is one of the few inhabited islands, with a population of approximately 23,000 people.
The main visit on Isla Santa Cruz was to a private farm where Giant Tortoises can be found after wandering into the highlands from the National Park. The land has been cleared, making it easy for the tortoises to find a greater variety and quantity of food.
The tortoises typically eat large quantities in the cold season, then travel to the lowlands to lay eggs.
A large old male can weigh up to 250kilograms. Tortoises never stop growing, though over time their growth rate simply slows down.
To see Giant Tortoises, Santa Cruz is the best island to visit.
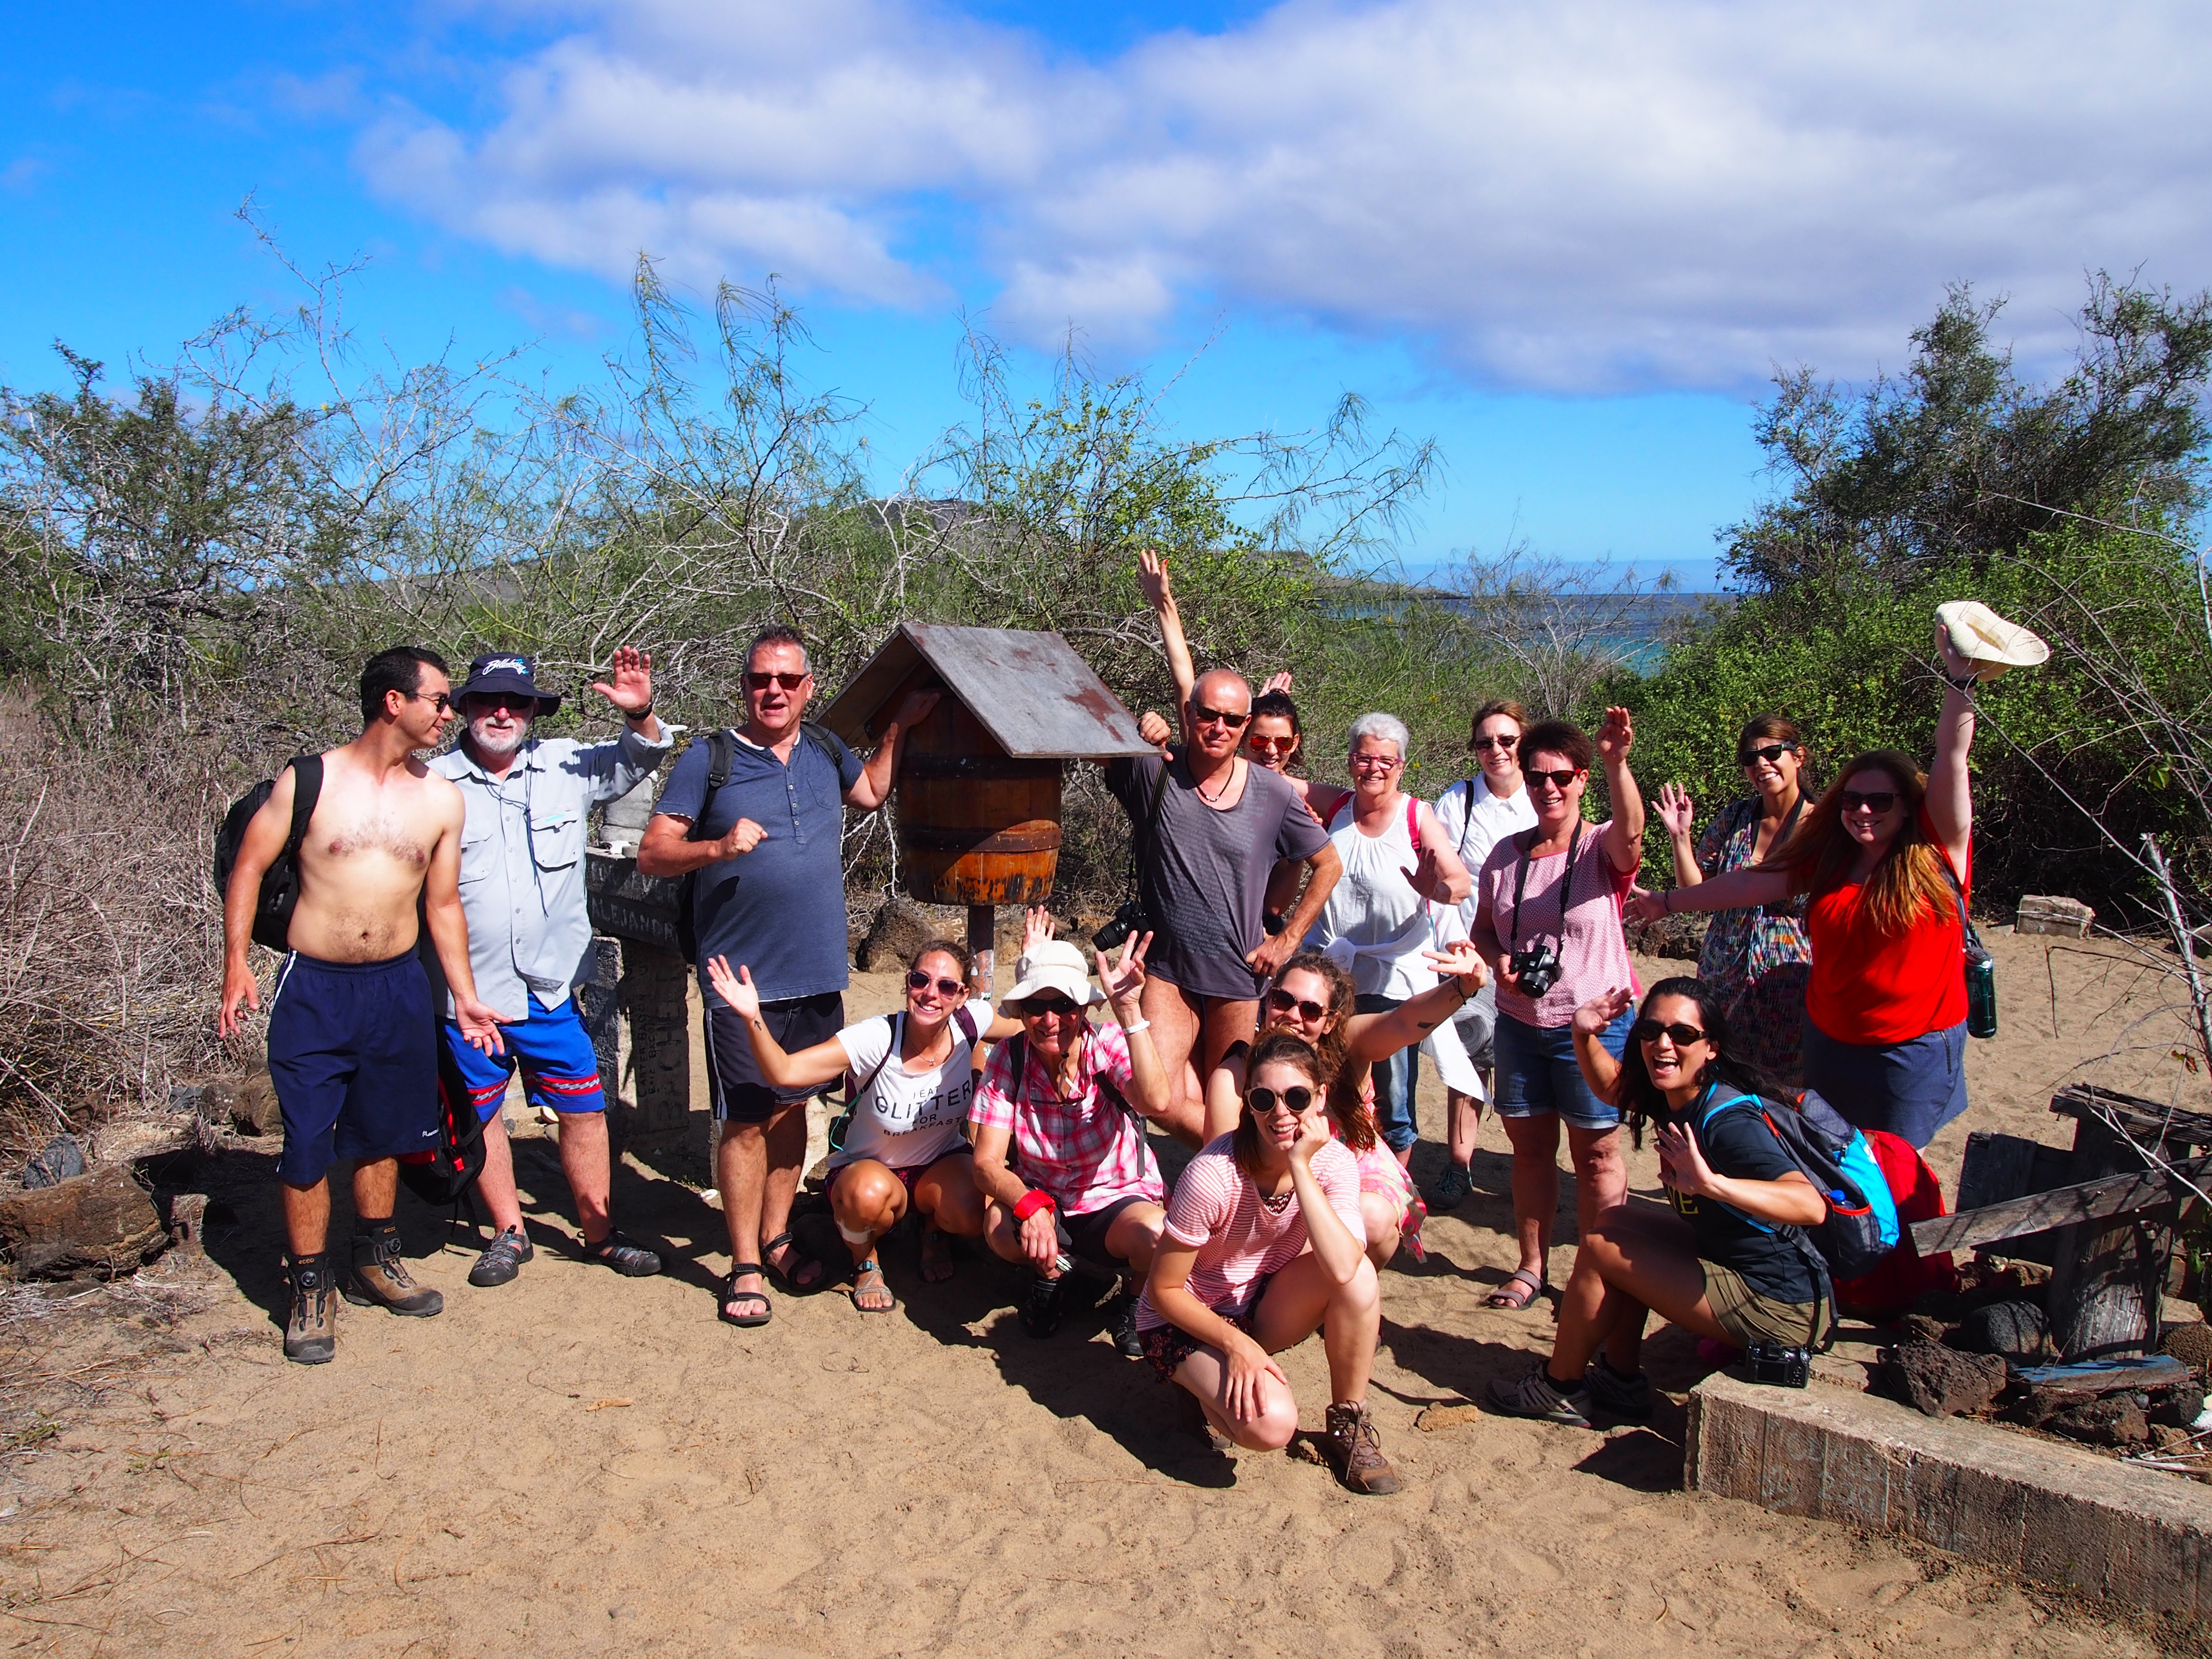
Floreana
Floreana is another inhabited island, with a population of just 120. We visited an uninhabited portion of the island.
Our first stop was to Post Office Bay. Post Office Bay has a large barrel containing mail (letters and postcards), traditionally sailors would stop by here to collect the post to deliver mail to other islands they were heading to. Now tourists leave postcards there, so that other tourists may hand deliver them if the destination is near their home. It’s a really fun idea!
From there we walked to a lava tunnel where we did a short exploration in the dark and even swam to the end. The idea of hiking and swimming in a lava tunnel is so cool! But realistically, the one we visited was just like many caves I have visited.
Back on the beach, we went for our first snorkel in the Galapagos. We had the brilliant fortune of being able to see a large number of Sea Turtles in a range of sizes. We also saw some stingrays and fish.
The Sea Turtles were however, the highlight for me. They are such beautiful creatures, moving so gracefully through the water. I was also very impressed that they did not pay much attention to us and happily went about their business of eating, breathing and swimming as we watched in awe.
Devil’s Crown
Just off the coast of Floreana Island is a volcanic crater with a coral reef in the centre referred to as Devil’s Crown, and one of the best snorkelling sites in the Galapagos.
Dropping into the chilly water was rewarded with fantastic visibility and an abundance of sea life. We saw a huge variety of fish, not to mention a shark, eagle ray and marble ray.
Punta Cormorant
We finished our visit to Floreana with an afternoon walk across the island from one side to the other at a place referred to as Punta Cormorant.
Through the centre we were able to observe flamingos eating in the lagoon.
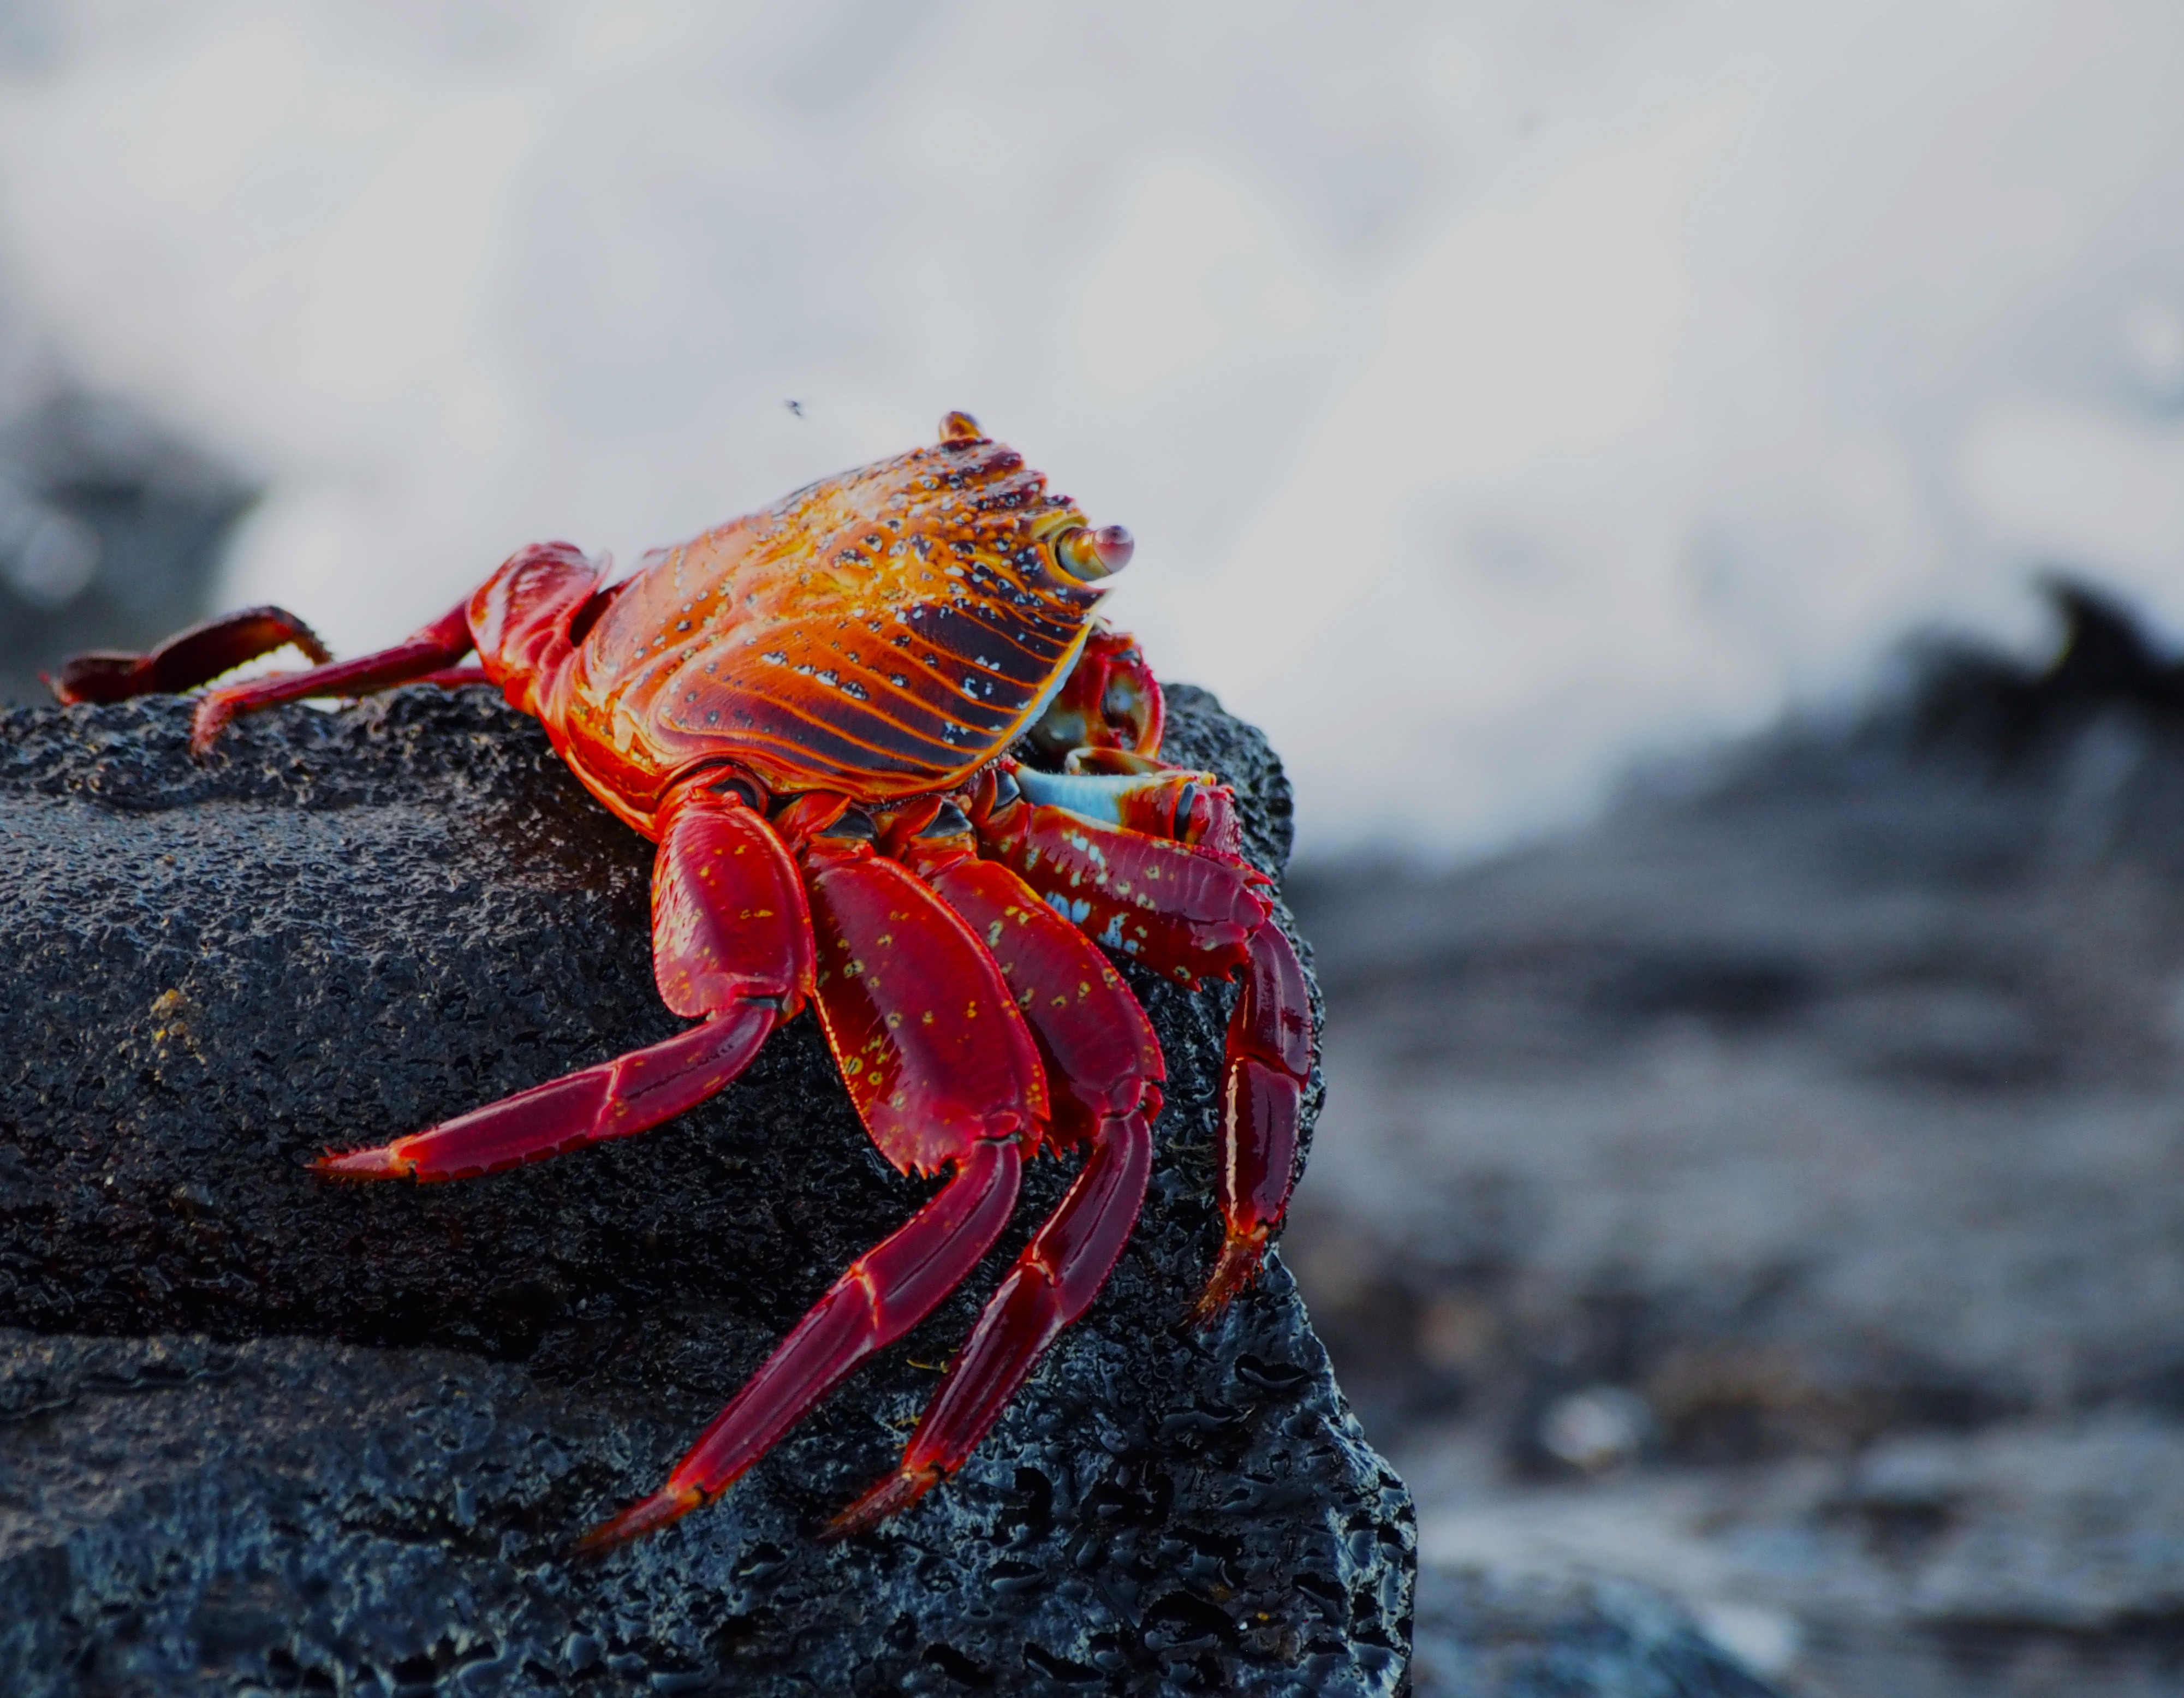
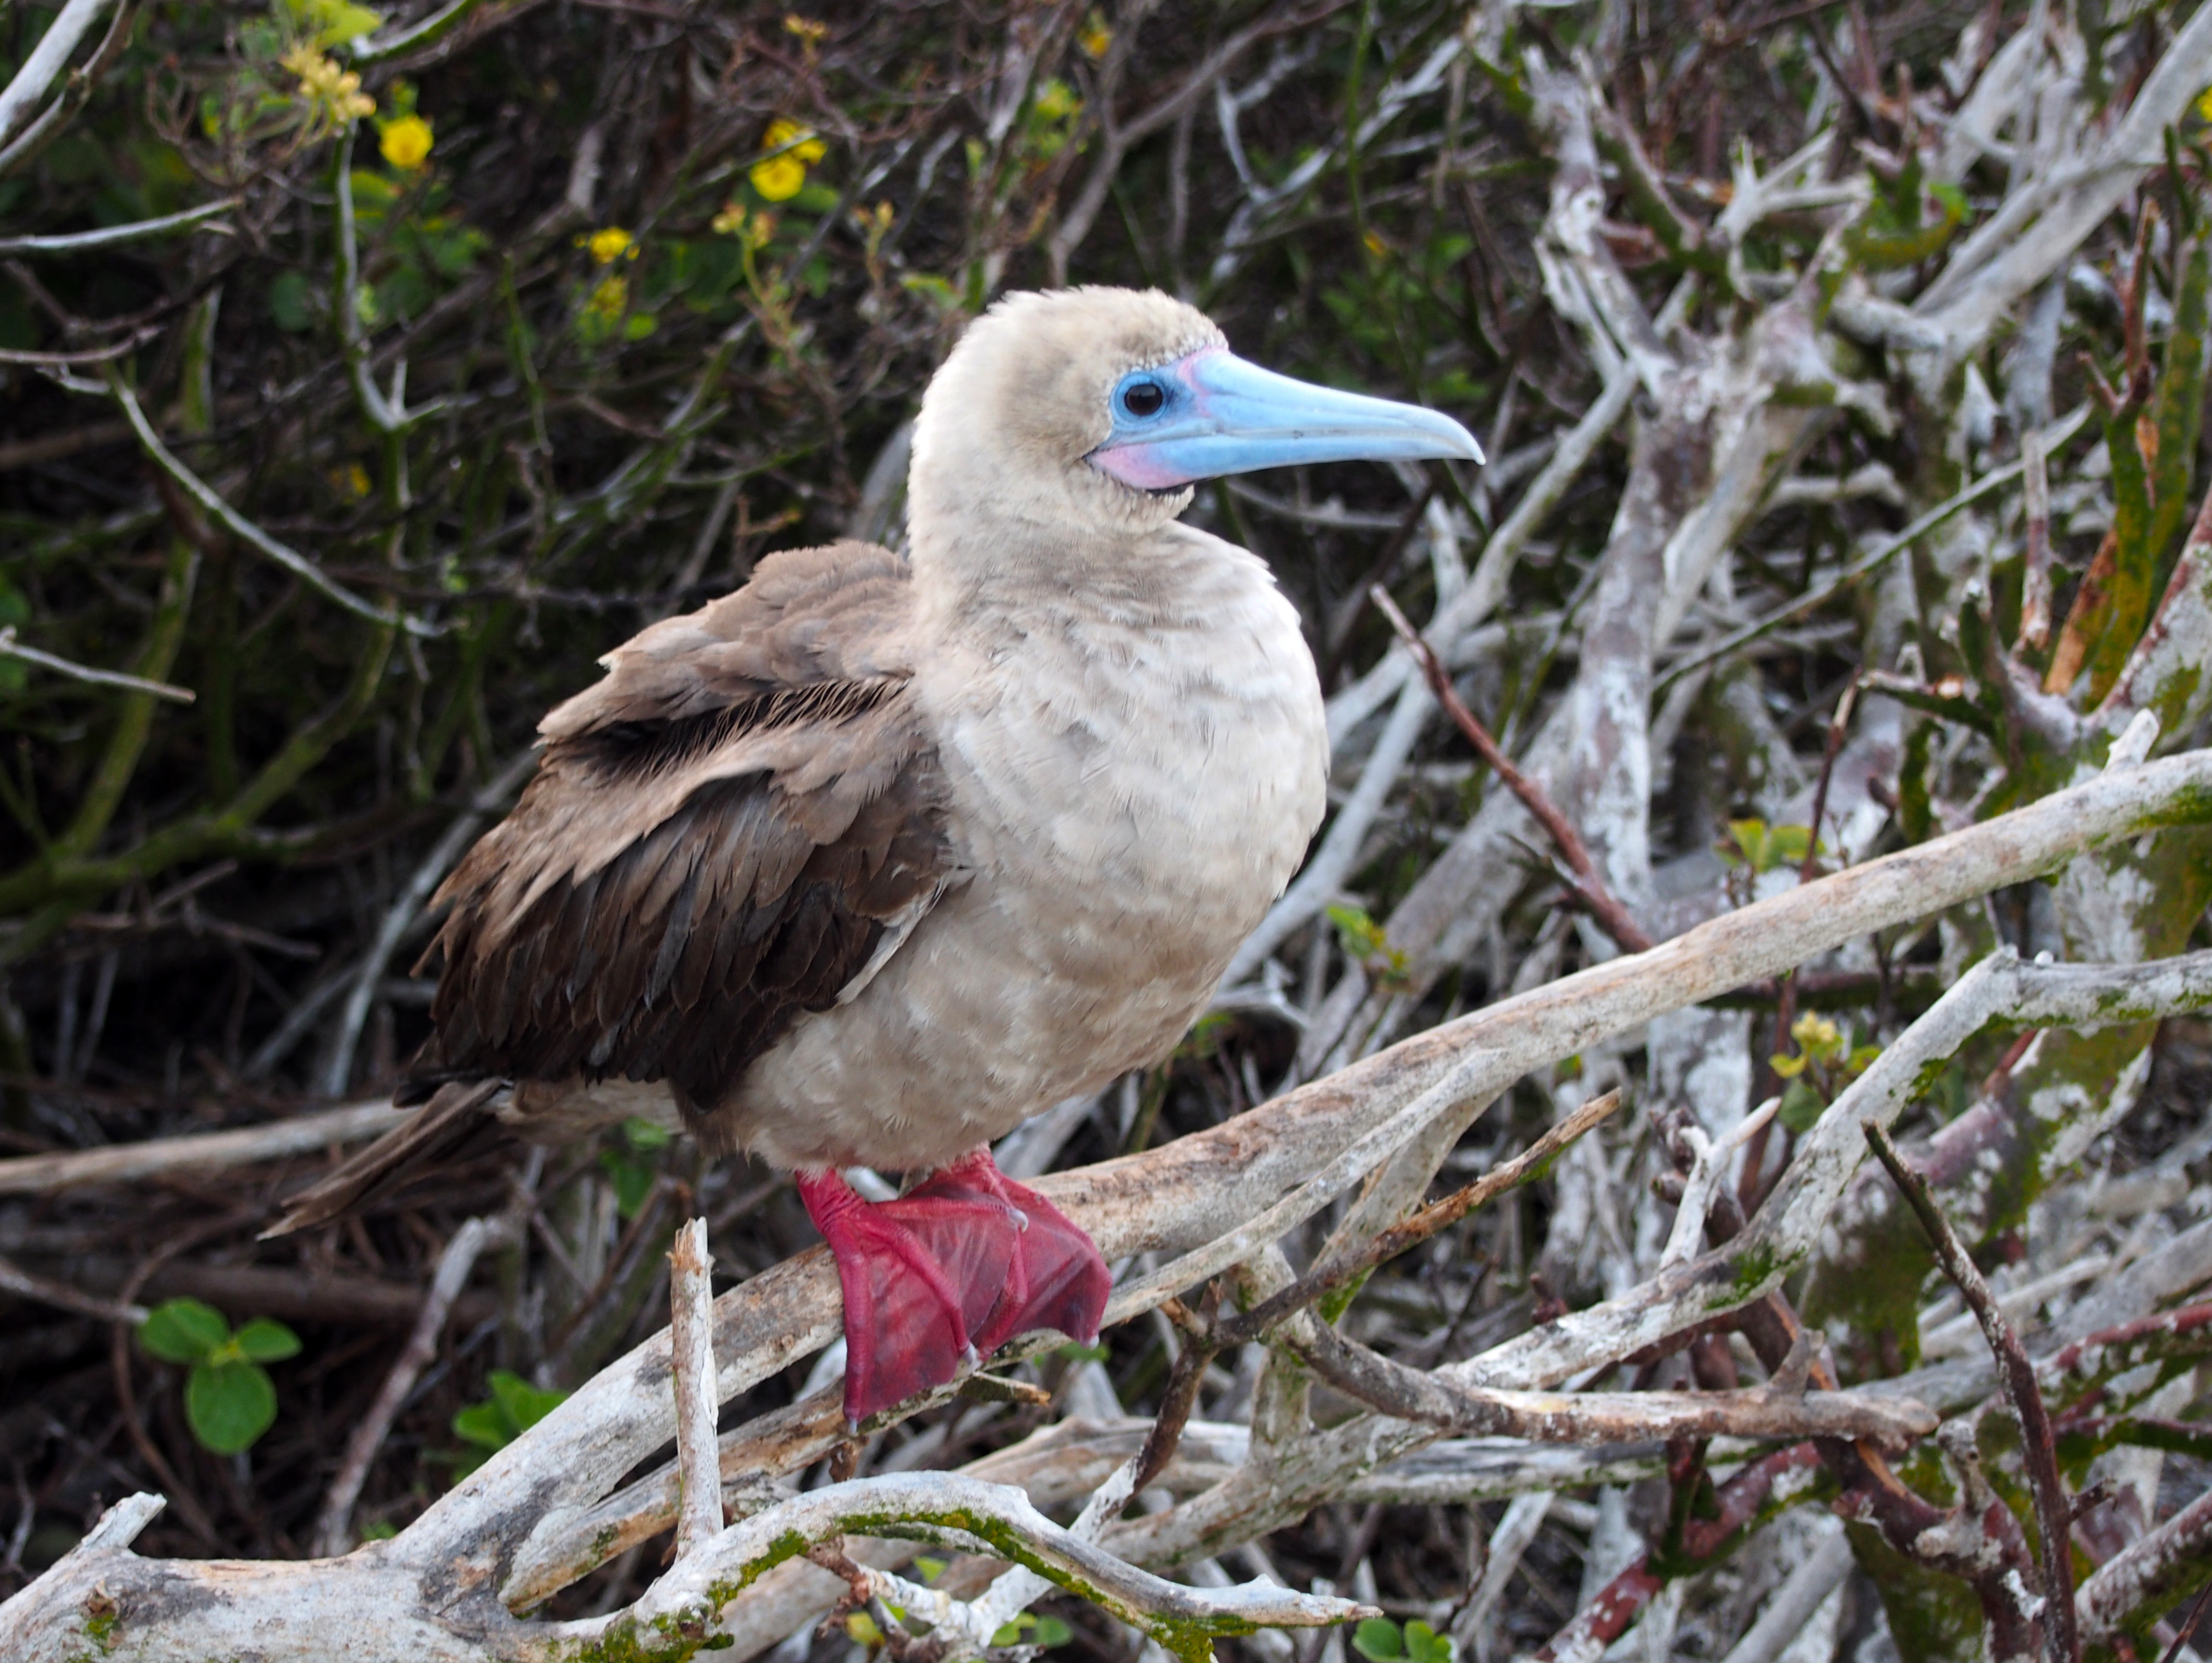
Across the island was a beautiful beach where we were able to observe the brightly coloured sally lightfoot crabs scampering over the rocks. We also watched the pelicans and blue footed boobies diving into the water to feed off fish.
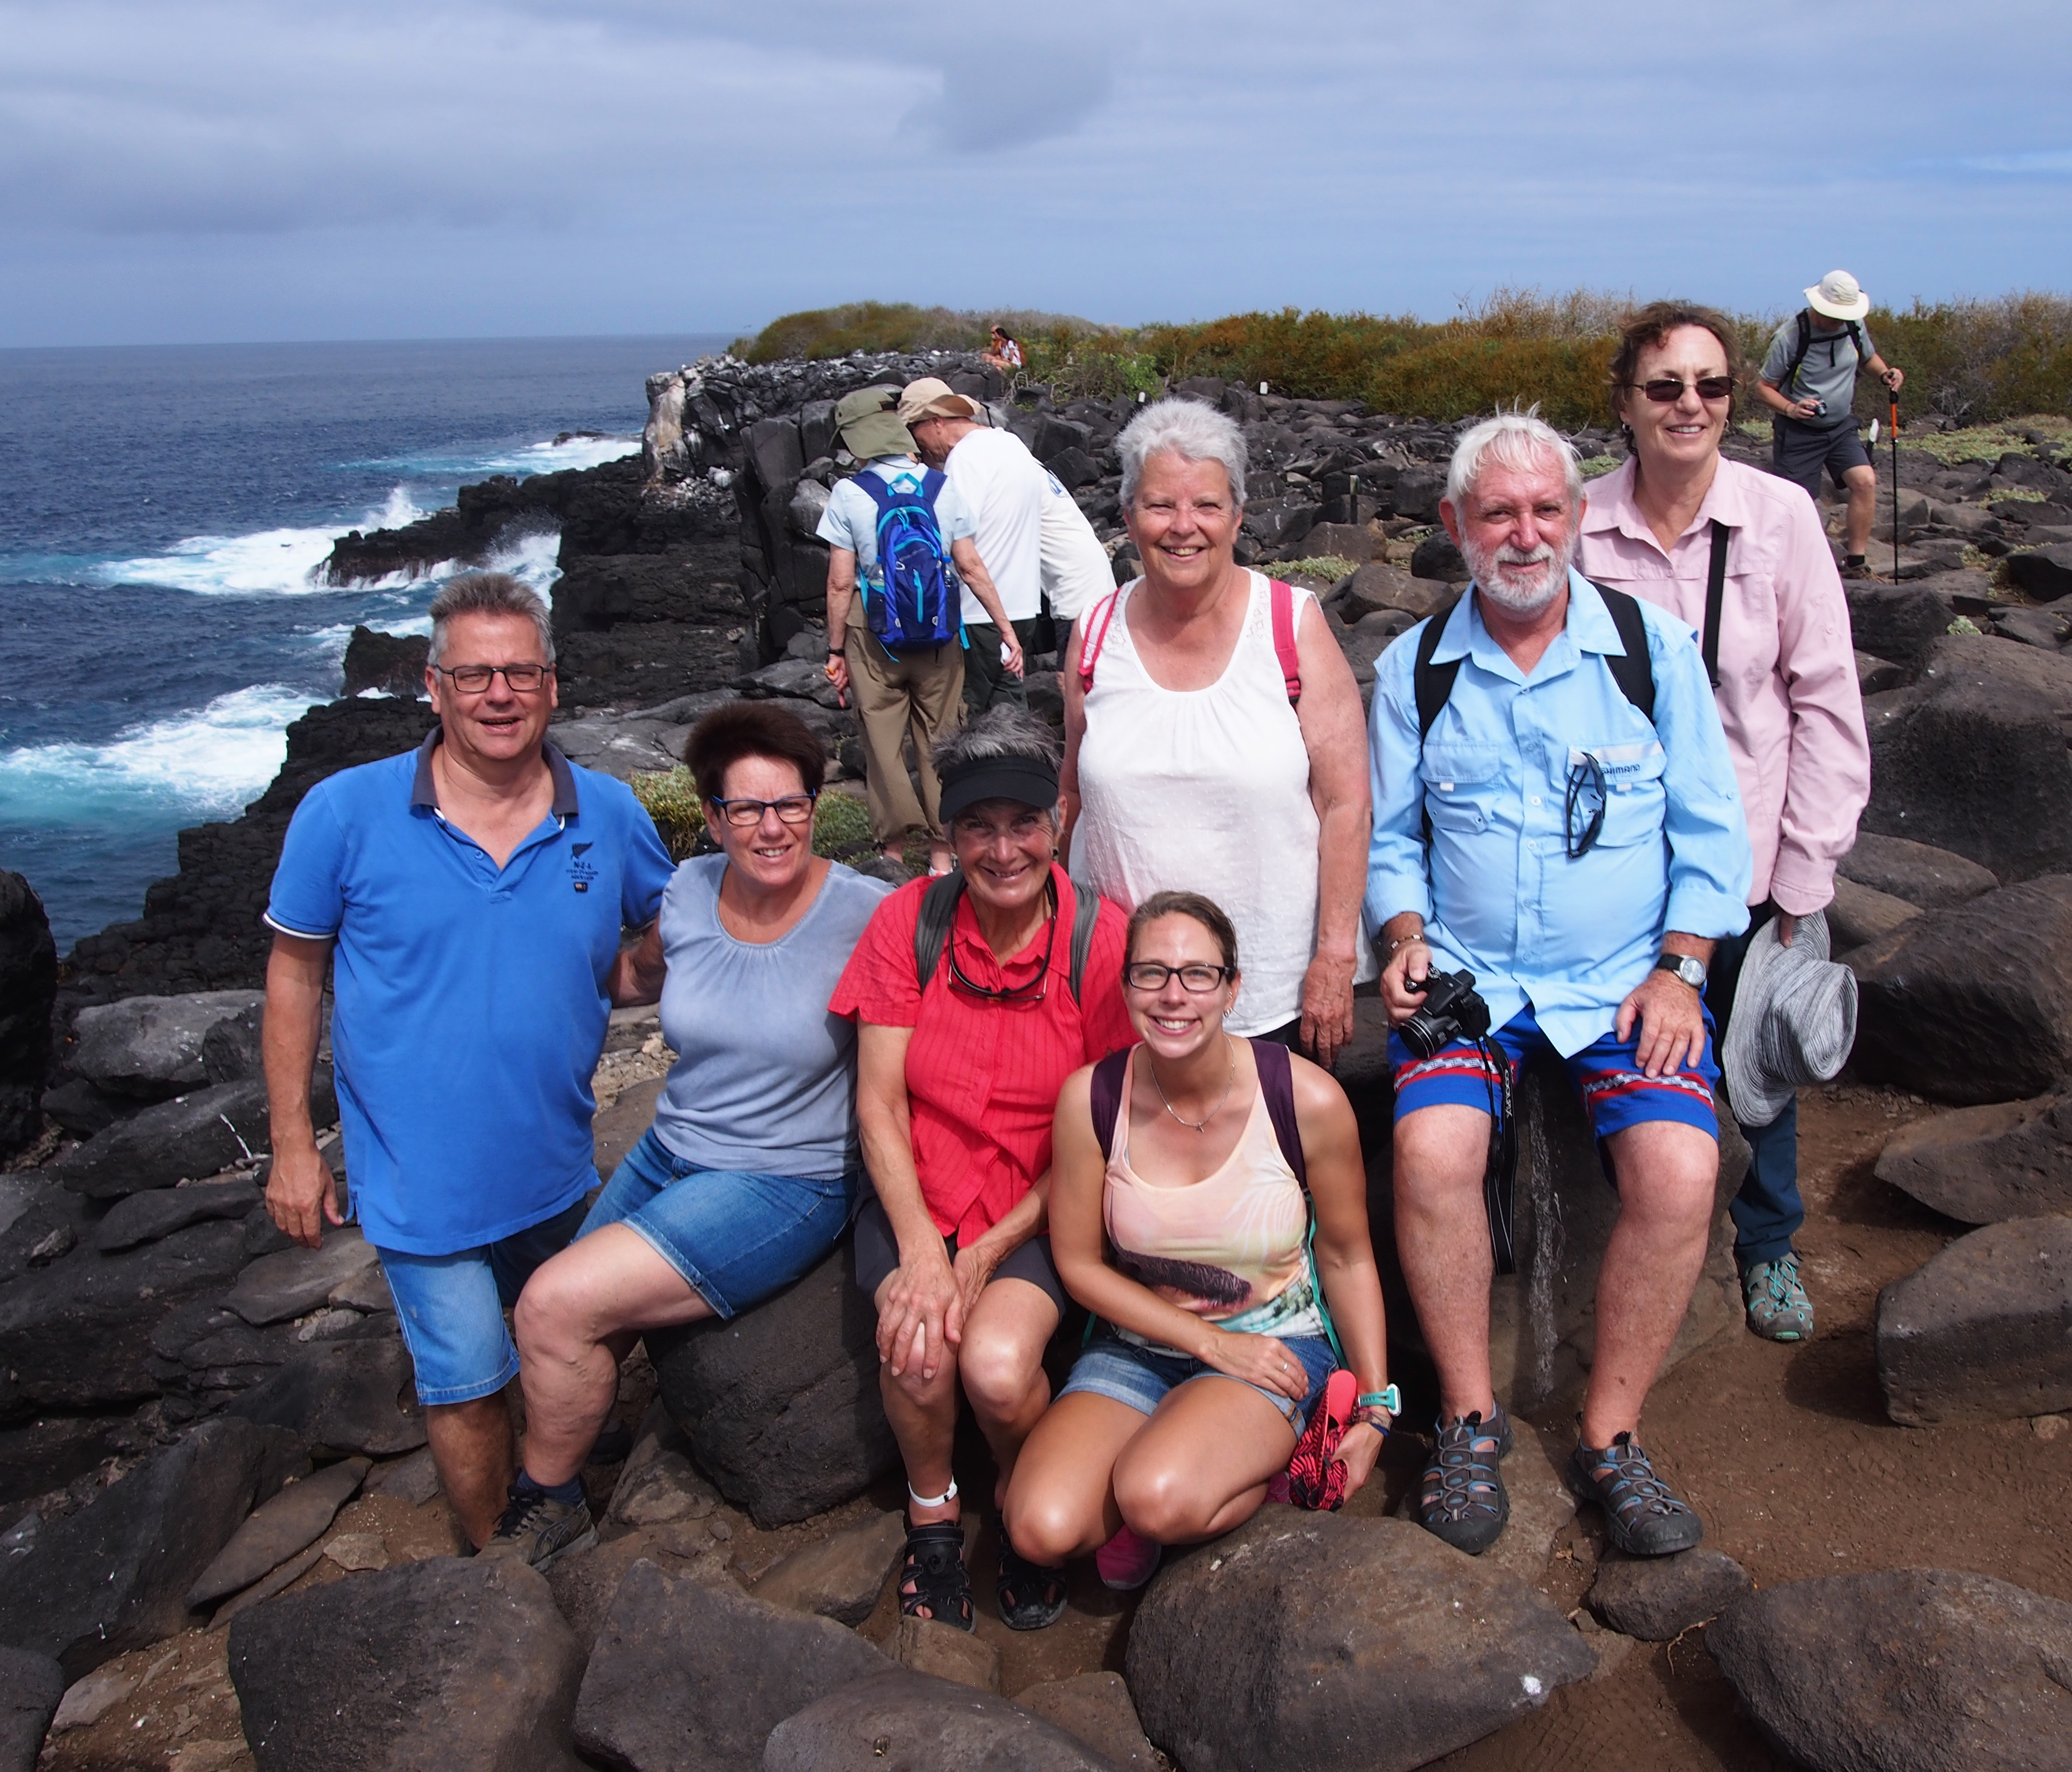
Espanola
Española was the first uninhabited island we visited. An island where we made two stops.
Punta Suarez
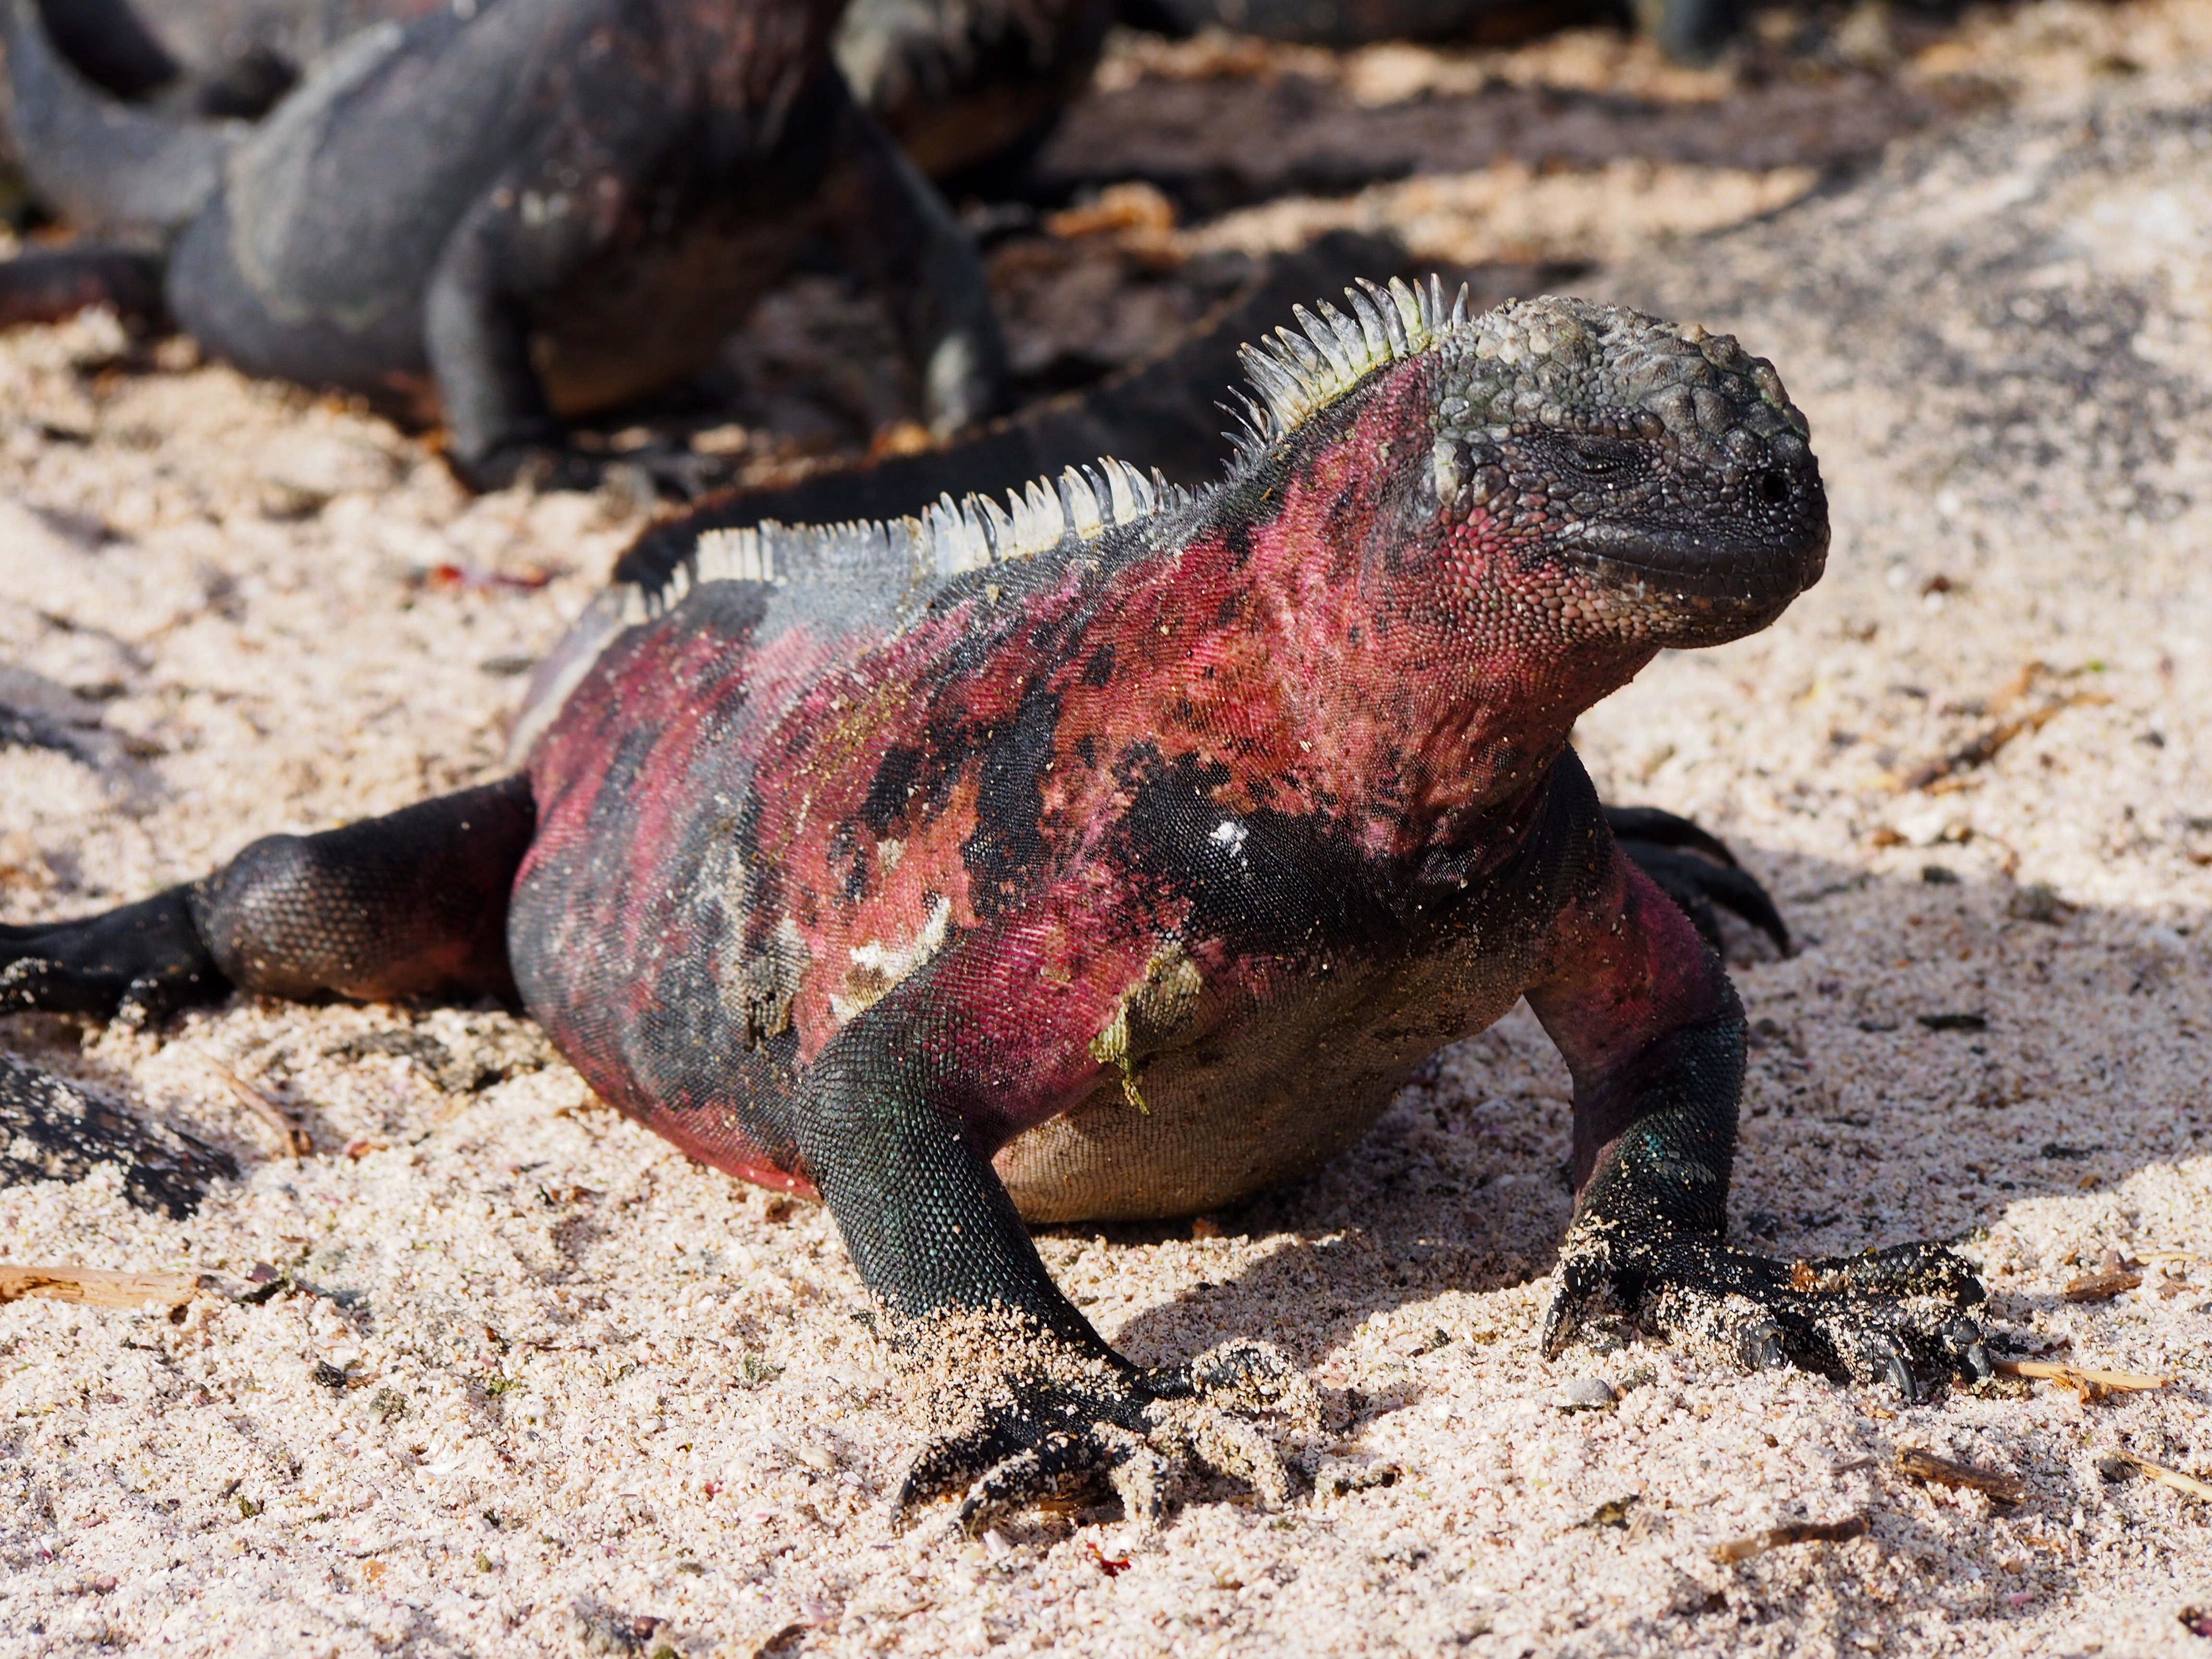
Punta Suarez was our landing point on the island for a nature stroll. Instantly upon landing we were surprised to see hundreds of Marine Iguanas chilling out, soaking up the sun on the black rocks and warm sand. The Marine Iguanas eat red and green algae that grows on the rocks under the water, through their diet their skin has acquired a red colour and sometimes you can also see the green colour.
The Iguanas on Española are so abundant, it makes it challenging to walk, as every few steps you almost tread on one who has blended into the environment so well and is laying to perfectly still.
In addition to the Igaunas, we saw Lava Lizards, Frigate Birds, Nazca (Masked) Boobies and Albatross’.
The Nazca Boobie, was previously known as the Masked Boobie. In 2001 the name was changed to Nazca Boobie after the name of the tectonic plate on which the Galapagos Islands can be found.
Gardner Bay
We spent a lazy afternoon soaking up the sunshine and hanging out with the Sea Lions and Pelicans on the beach of Gardners Bay.
On the way back to the boat, Wilo, Andrea and I took one last dive to check out a sleeping Galapagos Shark on the reef.
As the sun began to drop and we motored our way to the next island, we were incredibly lucky to get an escort. A pod of bottlenose dolphins, jumped, swam and spiralled in the bow wave of the boat for about 15 minutes as we shrieked in delight.
San Cristobal
Mid way through our tour we made a visit to the inhabited island of San Cristobal. The population of San Cristobal is around 8000.
It was here that we said goodbye to some of our tour buddies and said hello to some new ones.
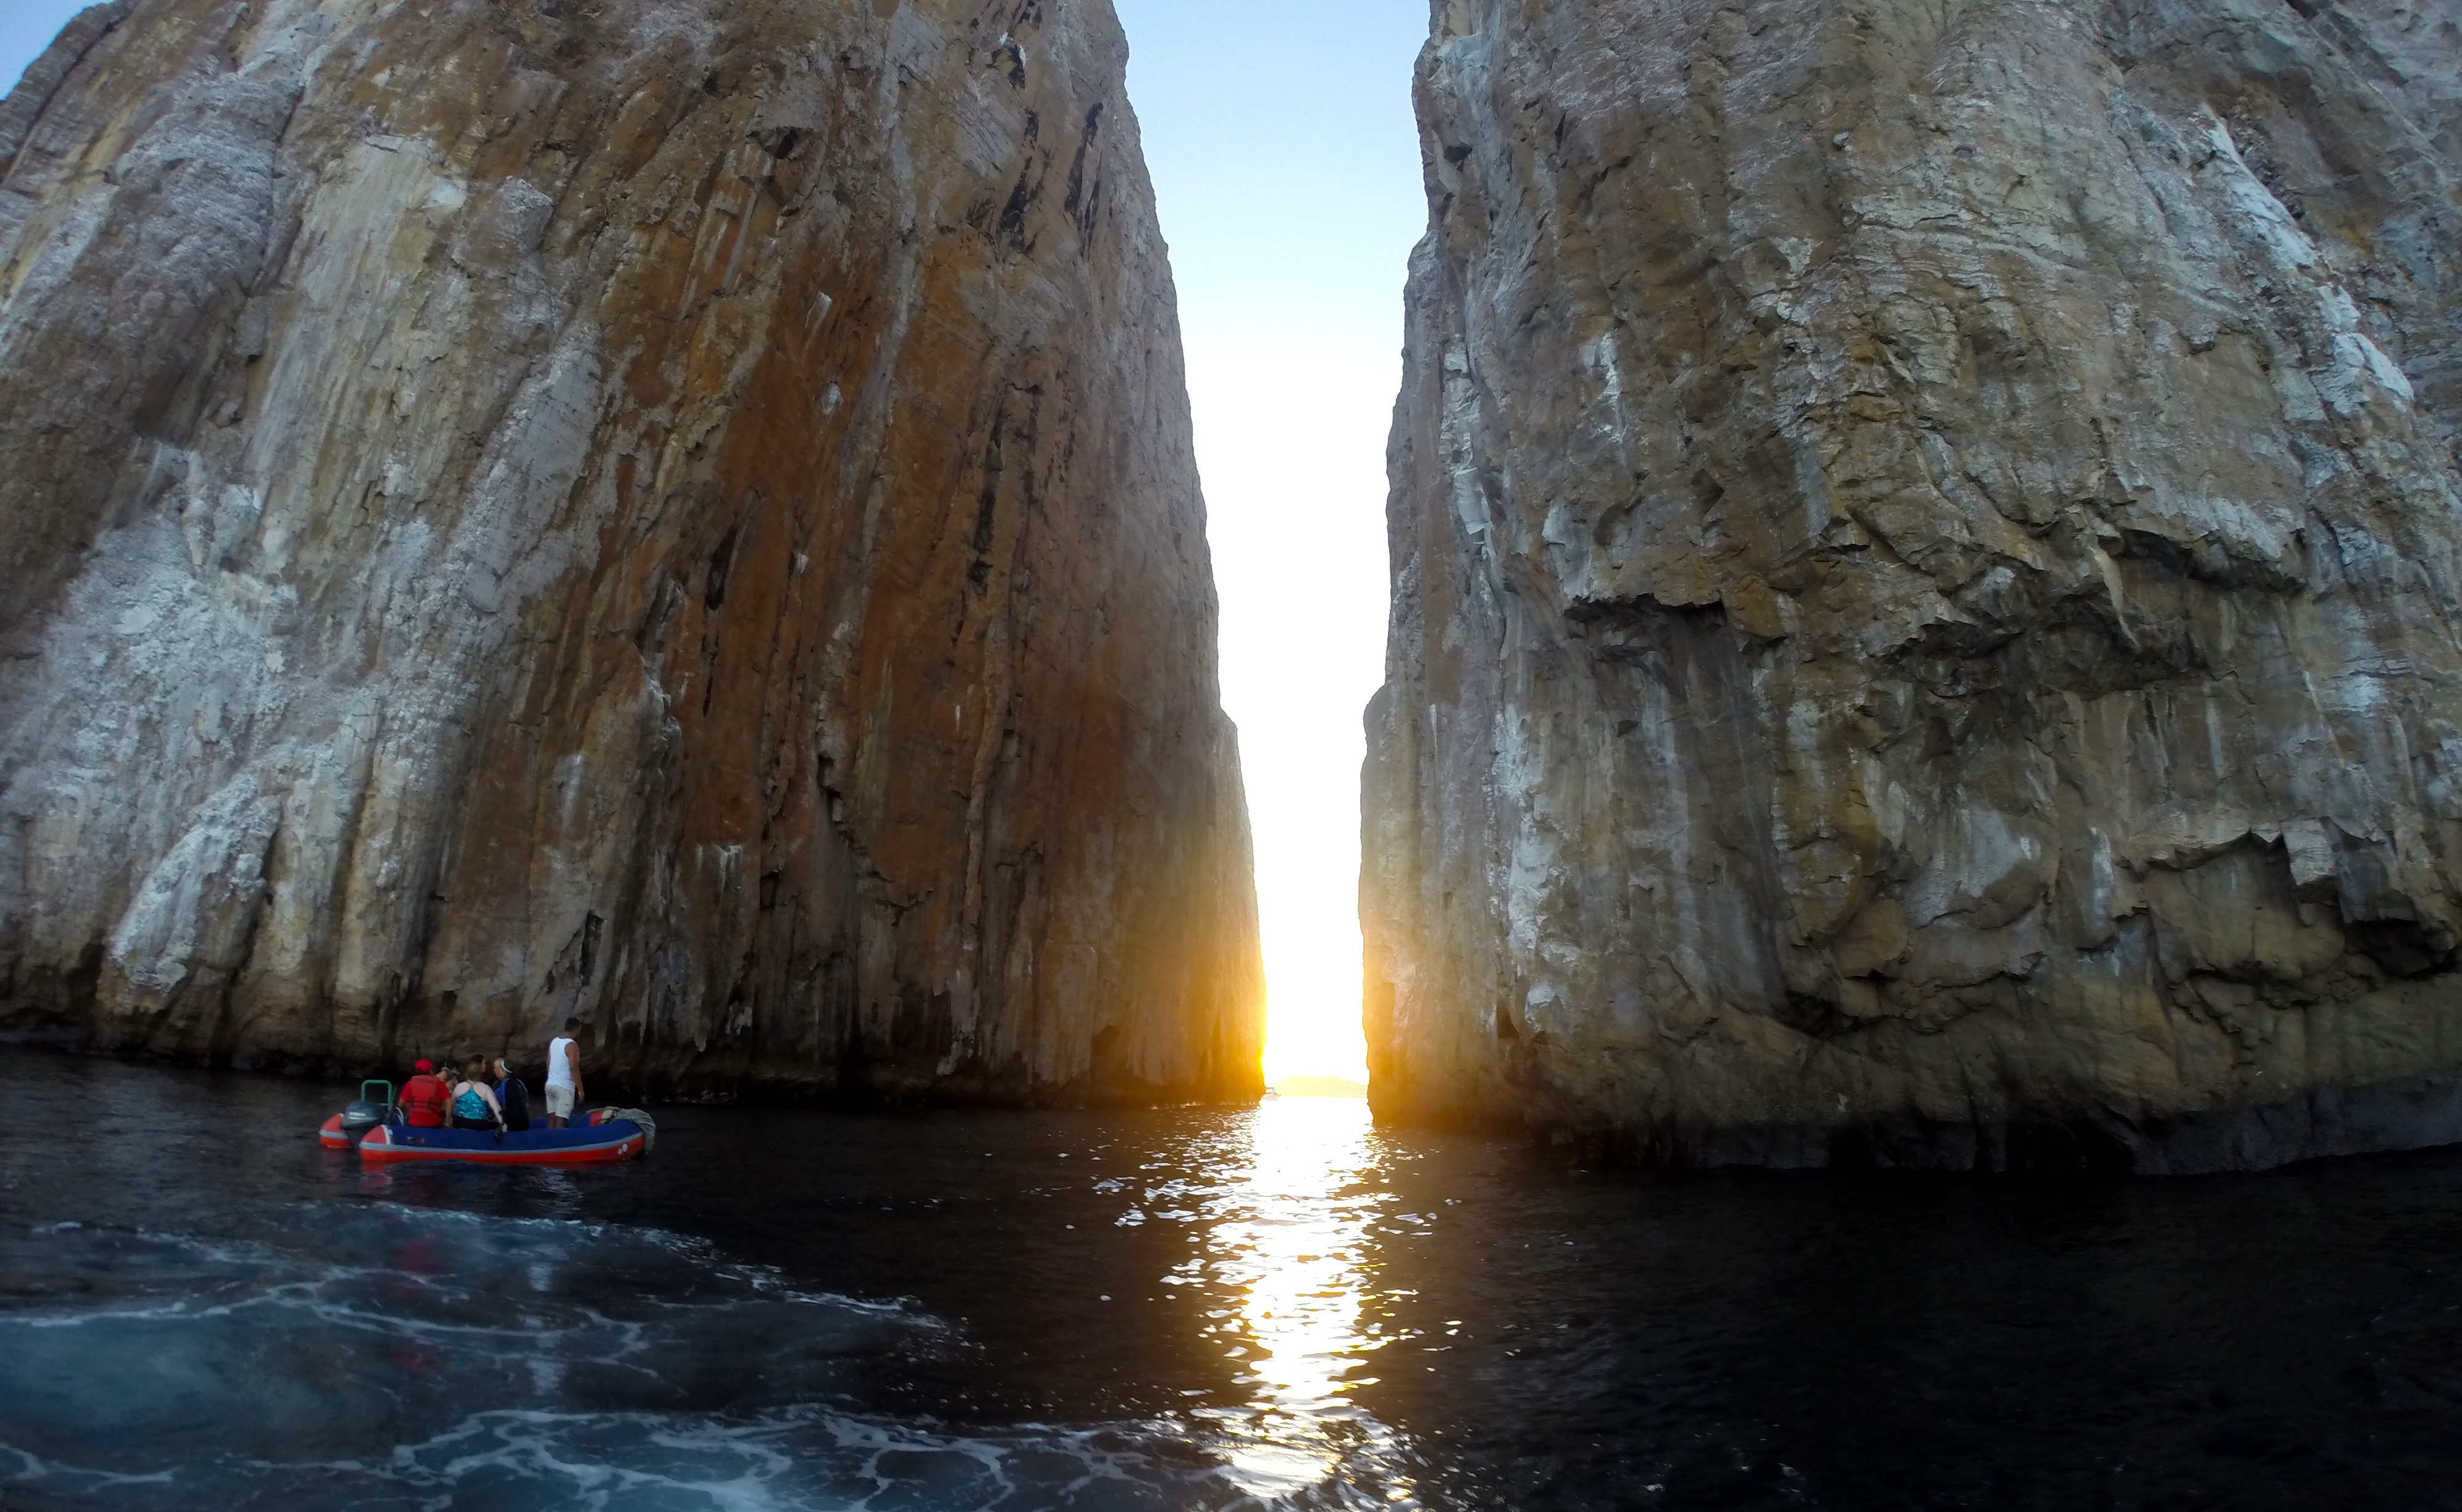
Kicker Rock
Prior to arriving at San Cristobal we had a 6am snorkel at Kicker Rock. Kicker Rock looks like an island with a hill, but to one side it appears to have split. It was through this split in the rocks that we snorkelled in search of sharks.
Everyone was an incredibly good sport about getting into the icy waters at 6am. Unfortunately our early morning diligence was not rewarded with good visibility. Close to the rocks you could see some nice coral, fish and algae. But through the center of the chasm all you could see was blue. At one stage through this blue a galapagos shark was spotted heading straight for my aunt and I. Hearing our tiny shrieks of surprise, the shark disappeared as quickly as it had appeared.
Island Adventures
On land, we said our goodbyes and gave hugs, before enjoying a spot of souvenir shopping as well as coffee and wifi connections.
Having recruited our new tour members, we enjoyed a brief land excursion starting with a visit to the Interpretation Centre.
The Interpretation Centre provided some geological facts about the islands and their formation. It also covered the history of the islands, and other information regarding its inhabitants, lifestyle, geology, botany and zoology. We continued through the visitor centre up to the viewpoint and statue of Charles Darwin, which was great for some photos.
From downtown San Cristobal we headed into the highlands to see another farm for Giant Tortoises, so that our new tour buddies would have an opportunity to see them.
We finished the day with a visit to Lake Junco which is at the peak of the island. This gave us a great panoramic view of the island as a whole, as well as the crater lakes nearby.
Isla Santa Fe
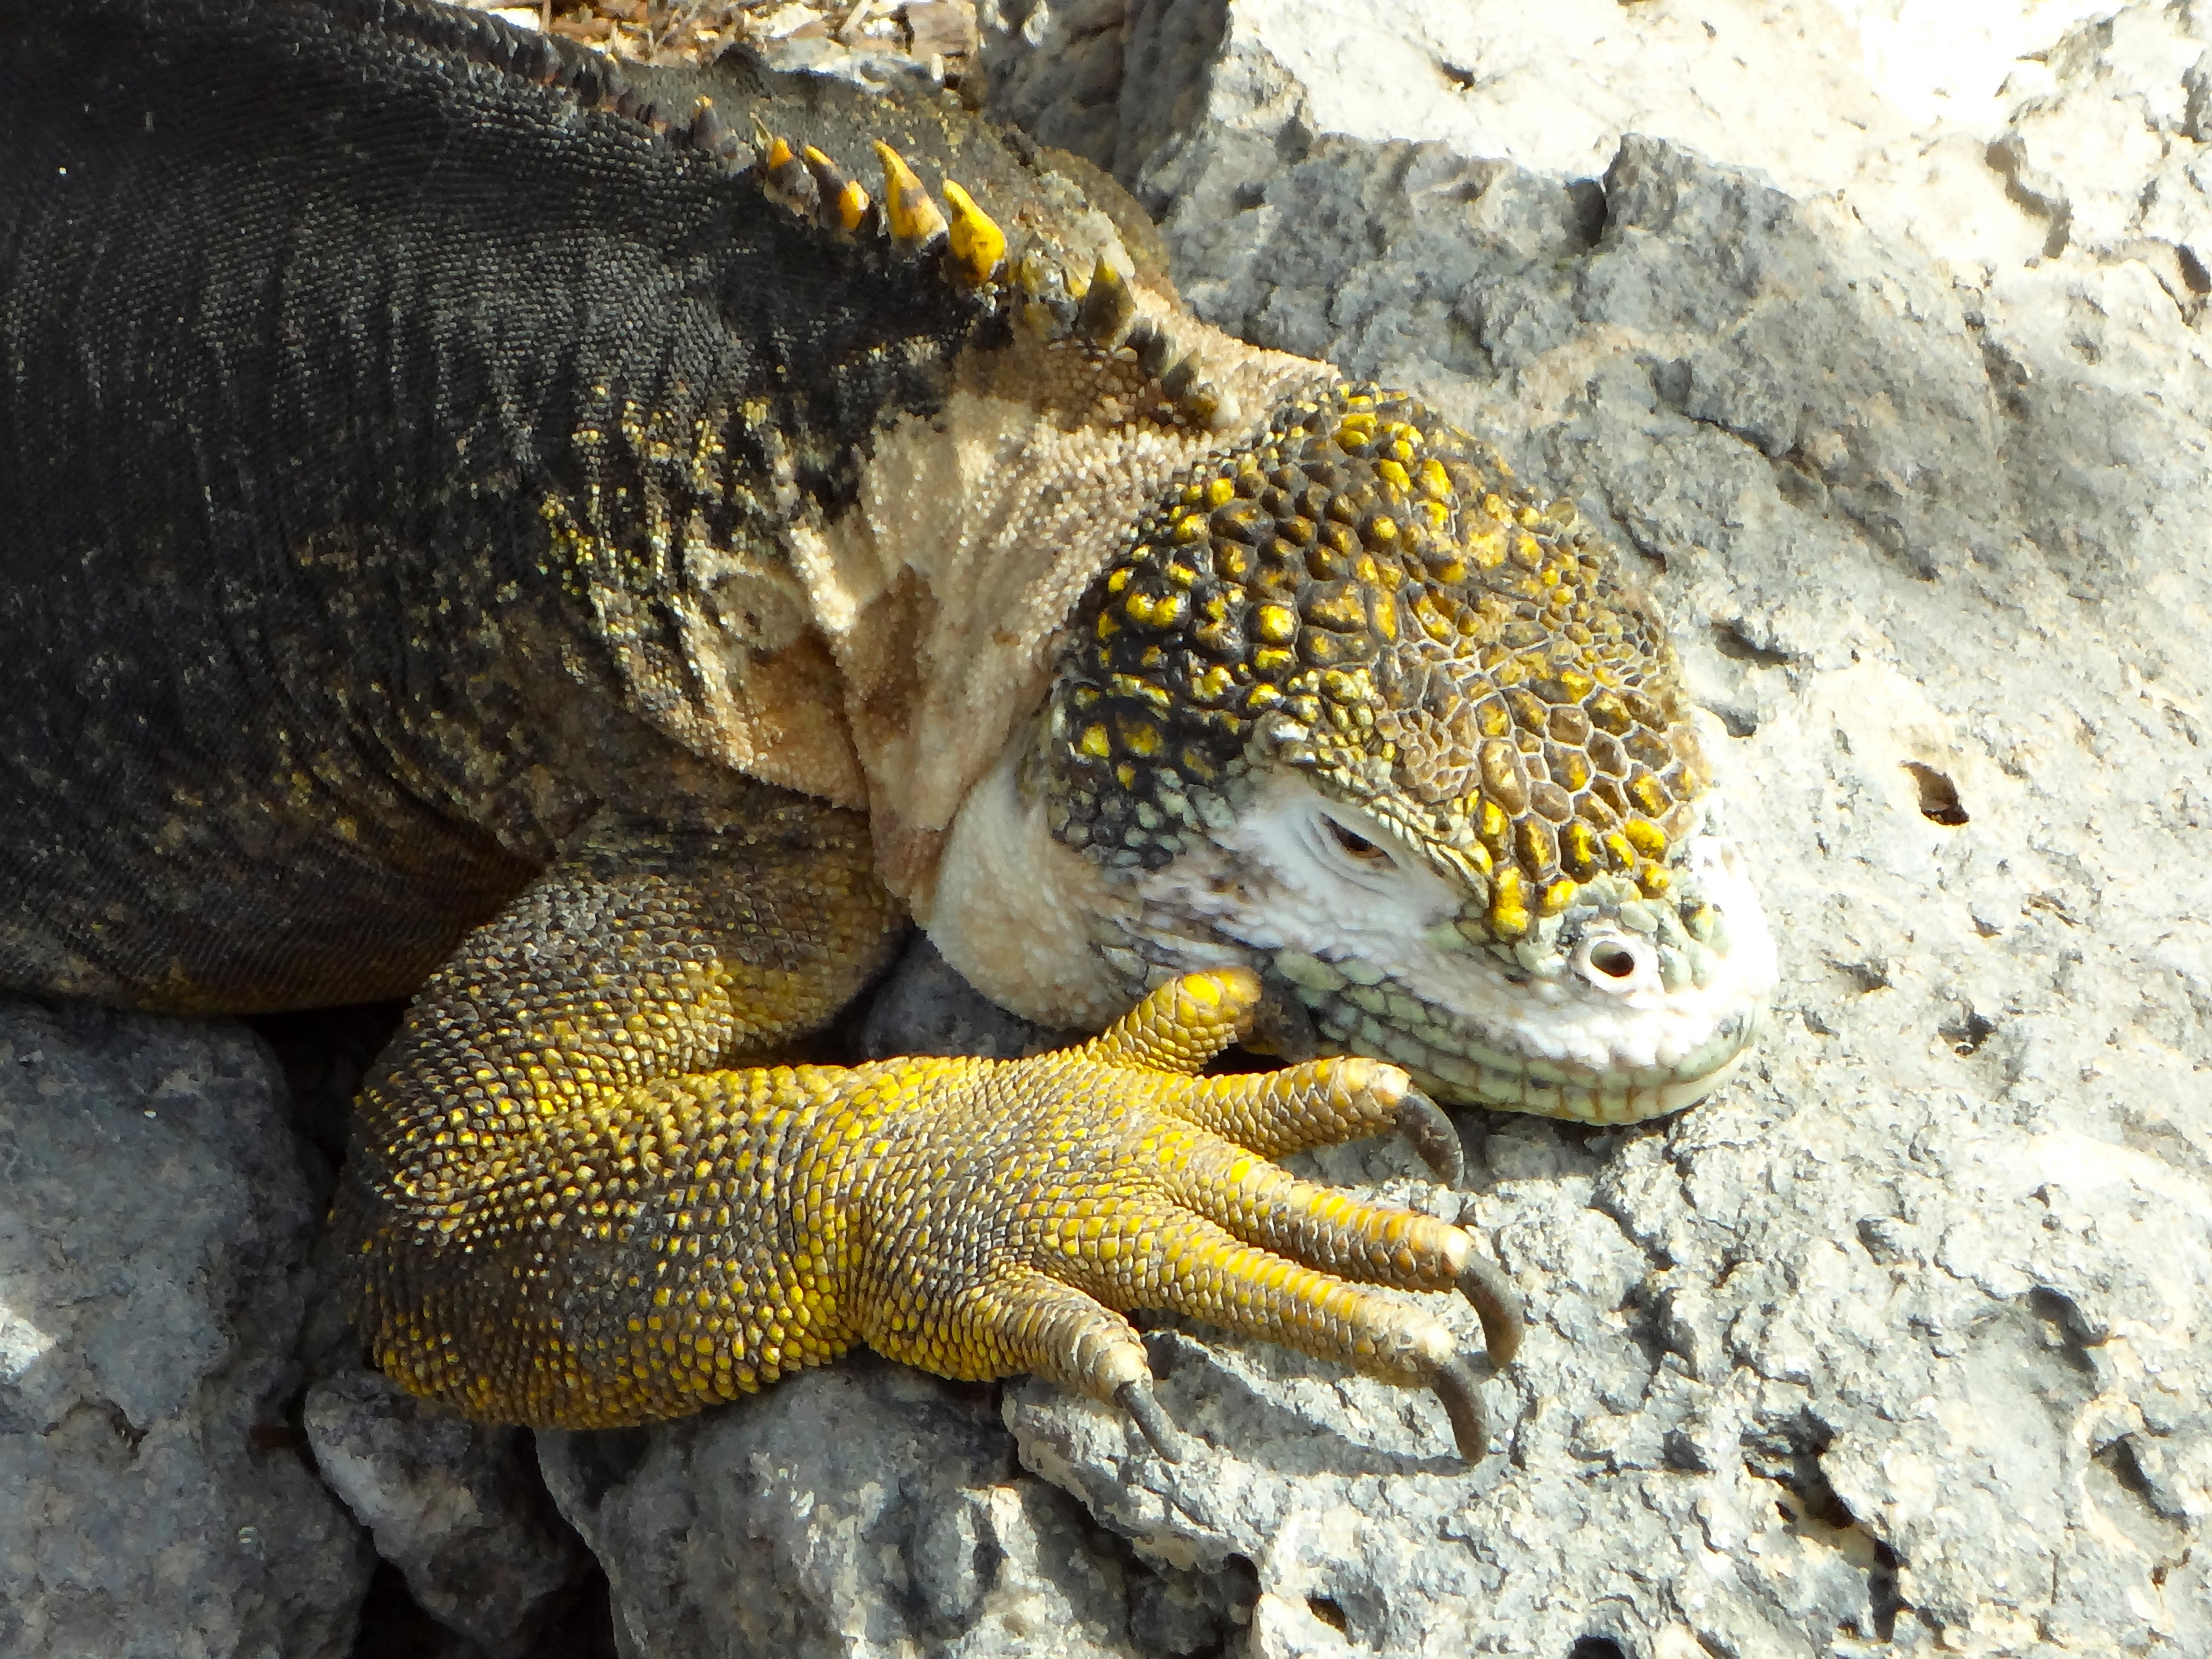
Exploring the uninhabited island of Santa Fe was indeed a treat as it was the first chance we had to see the Yellow Land Iguanas. Much like the Marine Iguanas, these guys were super chilled out, and only occasionally opened their eyes to check where you were in relation to them. I was impressed too, by the bright yellow in their skin, perhaps coming from their diet of Prickly Pear Cactus.
During our walk we also saw Sea Lions, and a variety of different birds.
Snorkelling
With our new tour buddies we dropped into the ocean once more. At this site we again saw a huge variety of sea life. The notable fish I saw included a Scorpion Fish, Mexican Hawkfish, Blue-Eyed Damselfish and Cornet Fish. We also got the opportunity to swim with playful Sea Lions and a lethargic (thankfully) White Tipped Reef Shark.
Plaza Sur
The Plazas Islands are a pair of Islands: Plaza Sur and Plaza Norte.
Plaza Norte is heavily protected and no one is allowed to visit. Plaza Sur is however a great spot to go for a walk along the island trails to see both Land and Marine Iguanas, Sea Lions, Tropical Birds, Swallow Tailed Gulls, Red Billed Tropic Birds and Blue Footed Boobies.
Genovesa
Genovesa is another uninhabited island where we took some opportunities to snorkel and walk.
Snorkelling
This was the place I was most excited about as it provided the opportunity to swim with Hammerhead Sharks! Unfortunately, the visibility wasn’t fantastic and I got only the tiniest snippet of video footage and no photographs before my GoPro went flat, but I was lucky enough to see five or six of these majestic, not to mention HUGE creatures! I was bouncing off the walls with excitement!
The other highlight of snorkelling here was to see a huge school a Manta Ray swimming directly below me. It was amazing to see them swimming as such a tight cluster.
In addition to the Hammerheads and Mantas, we saw a large range of fish species including Parrot Fish and Angelfish.
Walking
We made two land trips, one in the morning and one in the afternoon.
In the morning we landed on the beach and wandered along the rocks to see Red Footed Boobies, Frigate Birds, Swallow Tailed Gulls and Nazca Boobies.
Our afternoon walk started with a steep ascent up the Prince Phillip Steps. Named after the prince who stumbled down them in 1972. Up on the clifftops we found the nesting grounds for a variety of the bird species’. We saw the Swallow Tailed Gulls, Red Footed and Nazca Boobies with their chicks.
We were also incredibly lucky to spot the Short Eared Owl (seven of them in fact, when spotting even just one is a rarity). The Short-Eared Owls are quite evil creatures, to hunt they don’t swoop down on their prey. Rather they hide in the burrows of their prey, awaiting their arrival before attacking them as they enter their home. It seems rather evil to me, but clearly it is effective as the birds haven’t starved into extinction.
Santiago Island
Sullivans Bay on Santiago Island was the place that I considered most fascinating in terms of the landscape. The entire landscape that we explored was 140 year old, cooled black lava.
What I found so fascinating were the patterns in the lava, the lava flow visibly change direction at some points. Some sections had tight ripples, other loose ripples and other sections were flat and smooth.
Over time, the layers of lava have occasionally split and cracked, enabling you to see the layers in the dried lava, with it’s various degrees of density and colour. Unsurprisingly, there was no animal life to be found here.
An afternoon snorkel around the islands’ coast was also fascinating, seeing the rippled lava under the water. It was here that we saw a beautiful juvenile turtle enjoying lunch, a variety of fish and for the first and last time, a Tiger Eel.
Bainbridge Rocks
In our travels from one island to the next, we passed by Bainbridge Rocks. A volcanic crater with a lagoon in the middle. The lagoon is often home to flamingoes, but on this occasion we weren’t lucky enough to see any.
Despite missing the flamingoes, I personally found the island/crater to be simply stunning and was not in the least bit disappointed at the lack of flamingoes!
Rabida Island
Our visit to the uninhabited Rabida Island was our last island visit. We enjoyed a walk and a snorkel.
Walking around Rabida
On first seeing Rabida Island, I feel we were all surprised at how red it was. The earth was a deep ochre colour everywhere you looked. The red looked magnificent set against the silver coloured, bare, incense trees and the lush green prickly pear cactus’.
Snorkelling along Rabida’s Coast
Our last snorkelling trip of the Galapagos Adventure was around the coastline of Rabida from one bay to another. As usual we saw a large variety of fish, some Sea Turtles and Starfish.
We were also on the lookout for more sharks, at least I was. I was not disappointed, and in fact was a little put out by the large number of sharks we came across. To start with I enjoyed swimming a few metres above a large a wonderfully graceful Galapagos shark. Soon he crossed paths with two others. As I continued on, another two were not simply swimming along the bottom, but headed upwards towards me. While I am sure we would not have been snorkelling if these sharks posed a threat, having a two metre shark swimming in your direction is not a comforting feeling.
I continued on and soon the number of sharks increased to about seven, mostly staying low in the water, until one swam past me at chest height, in the two metre gap between me and the rocks. This was incredibly exciting, but at the same time, I felt I had had my fill of sharks for the day and I climbed aboard one the zodiacs to get a birds eye view of the shark ‘infested’ waters while soaking up some warmth from the sun.
Santa Cruz
We finished our tour back where we started, on the Island of Santa Cruz. Before packing and disembarking, we had one last boat trip on the zodiacs into Black Turtle Cove.
It was a very relaxing way to start the day, so serene between the mangroves, with the serenity of sunrise and the perfectly still water.
Looking through the waters surface amongst the red and black mangroves we managed to see baby Black Tip Sharks, Eagle Ray, baby Puffer Fish and Sea Turtles.
It was with this last picture in our minds that we packed up, hugged the crew and headed back to civilization.
What an amazing adventure, the words simply don’t describe how awesome this experience was!!
The tour on this occasion cost $45 per person for five people, excluding lunch and the pools entry fee of $8.50.
The drive from Quito to Papallacta took around two hours, with the highest point a pass at 4100 metres. The variation in landscape at the changing altitudes was gorgeous! Also we all had our eyes glued to the road and roadside bushes in the hope of seeing a spectacled bear, but we were sadly disappointed.
The thermal hot springs are at an altitude of 3250 metres, they are set in the mountains with a river running by. The pools water is said to be good for: “respiratory, digestive, renal and skin conditions; bones and articulation pain; improves circulation blood and removing toxins; stress, insomnia and anxiety; and relax muscles and relieve tensions.”
The day we visited was ridiculously cold, so we headed straight for the hottest pool and didn’t move for at least an hour, when we were well cooked.
It was so calming to sit in the pools, soak up all the natural minerals into our tired and sore bodies, watch the steam rise from the pools and look into the skies at the mountain pics searching for condors.
After the exhaustion of continuous travel, the time out in the hot pool was just what I needed!
Once again Ruben from Southern Paradise Tours came through for my family and friends by lining up a day trip to Otavalo. Jose Luis was once again our guide for the day. Setting off at 8am, we headed north.
For a group of five we paid $50 each, not including lunch or entrance to the Condor Park.
Viewpoint of San Pablo Lake
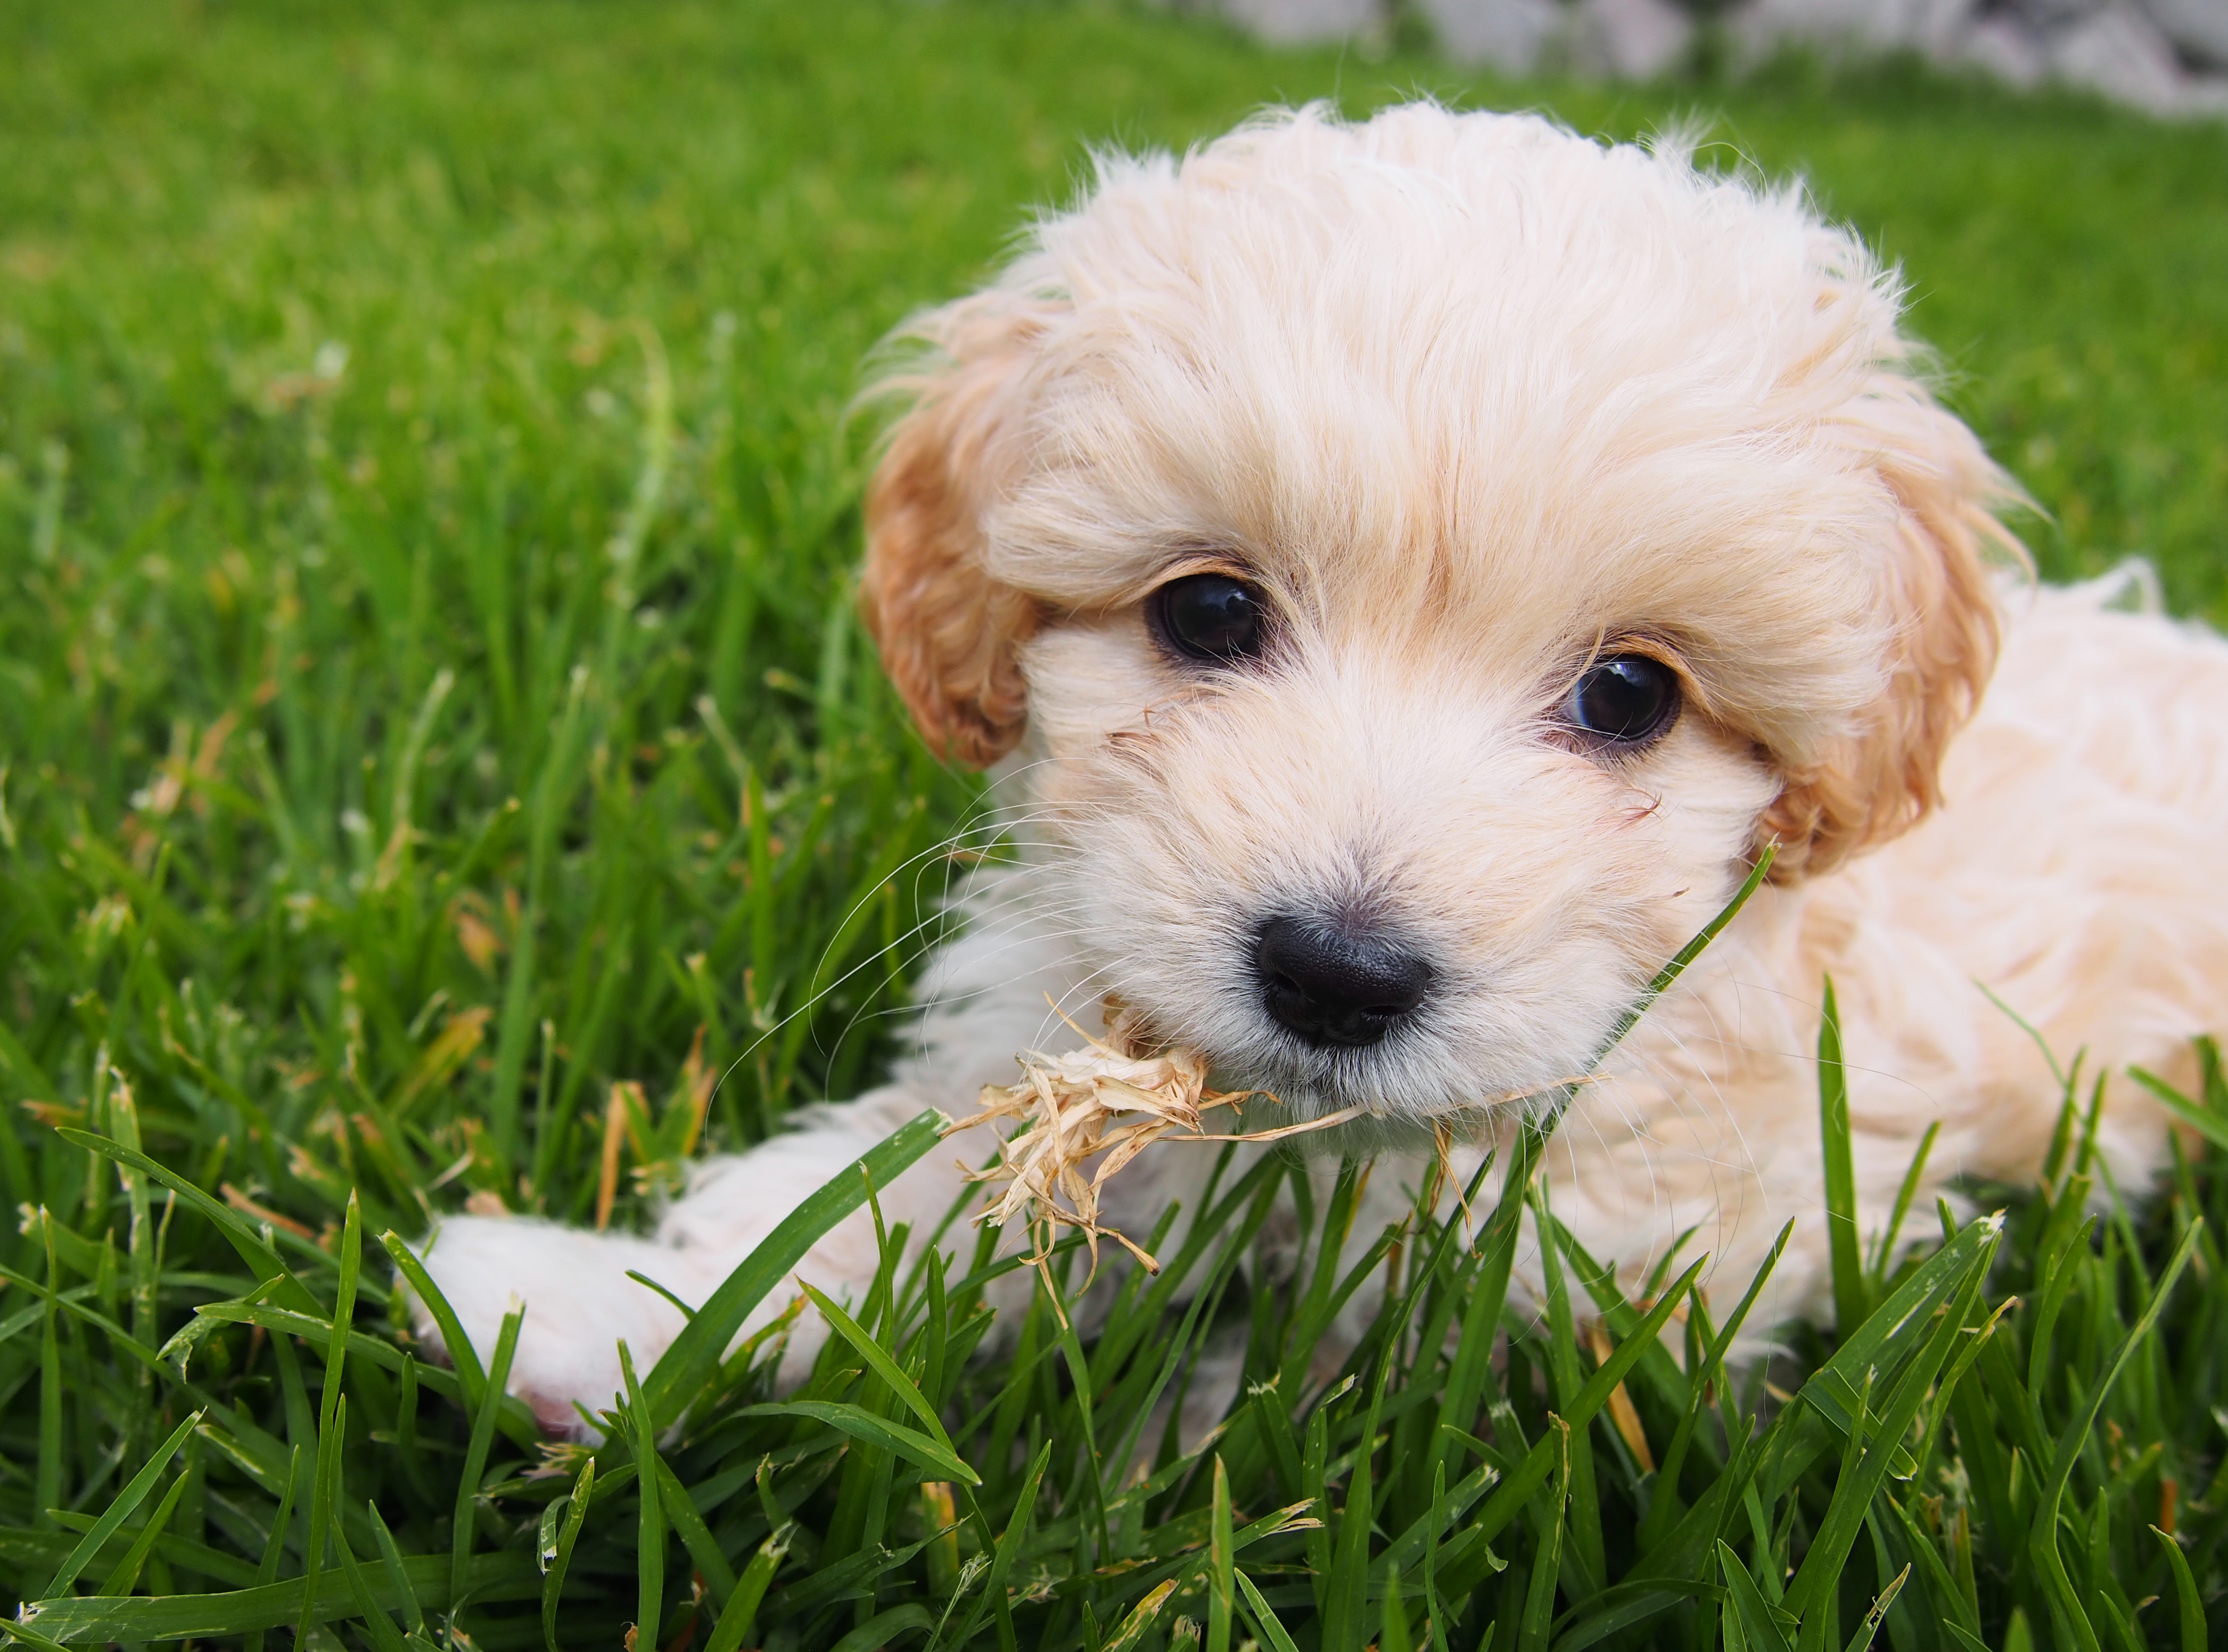
Our first stop as we neared Otavalo was a viewpoint over the San Pablo lake, one of the more well known lakes in the area. The view was lovely, but honestly I was mostly distracted by the super cute puppy dog.
We enjoyed a cup of coffee, some Biscocho with dulce de leche and some Queso de Hoja. The Biscocho and Queso de Hoja are traditional treats in the area.
Condor Park
Cost: $4.75
For the birds lovers in our group we visited to Condor Park on the hill overlooking Otavalo. The park was established and is still run by a Dutch owner, but the majority of staff are local Otavaleñans.
Walking around the park we got to see all sorts of varieties of owls, eagles, hawks and of course the Andean Condor.
The park has a show which runs daily at 11:30am and 3:30pm, but the shows are in Spanish. Without understanding what was said, it was great to see the birds freed from their cages and confinements to get a chance to fly free for a few moments.
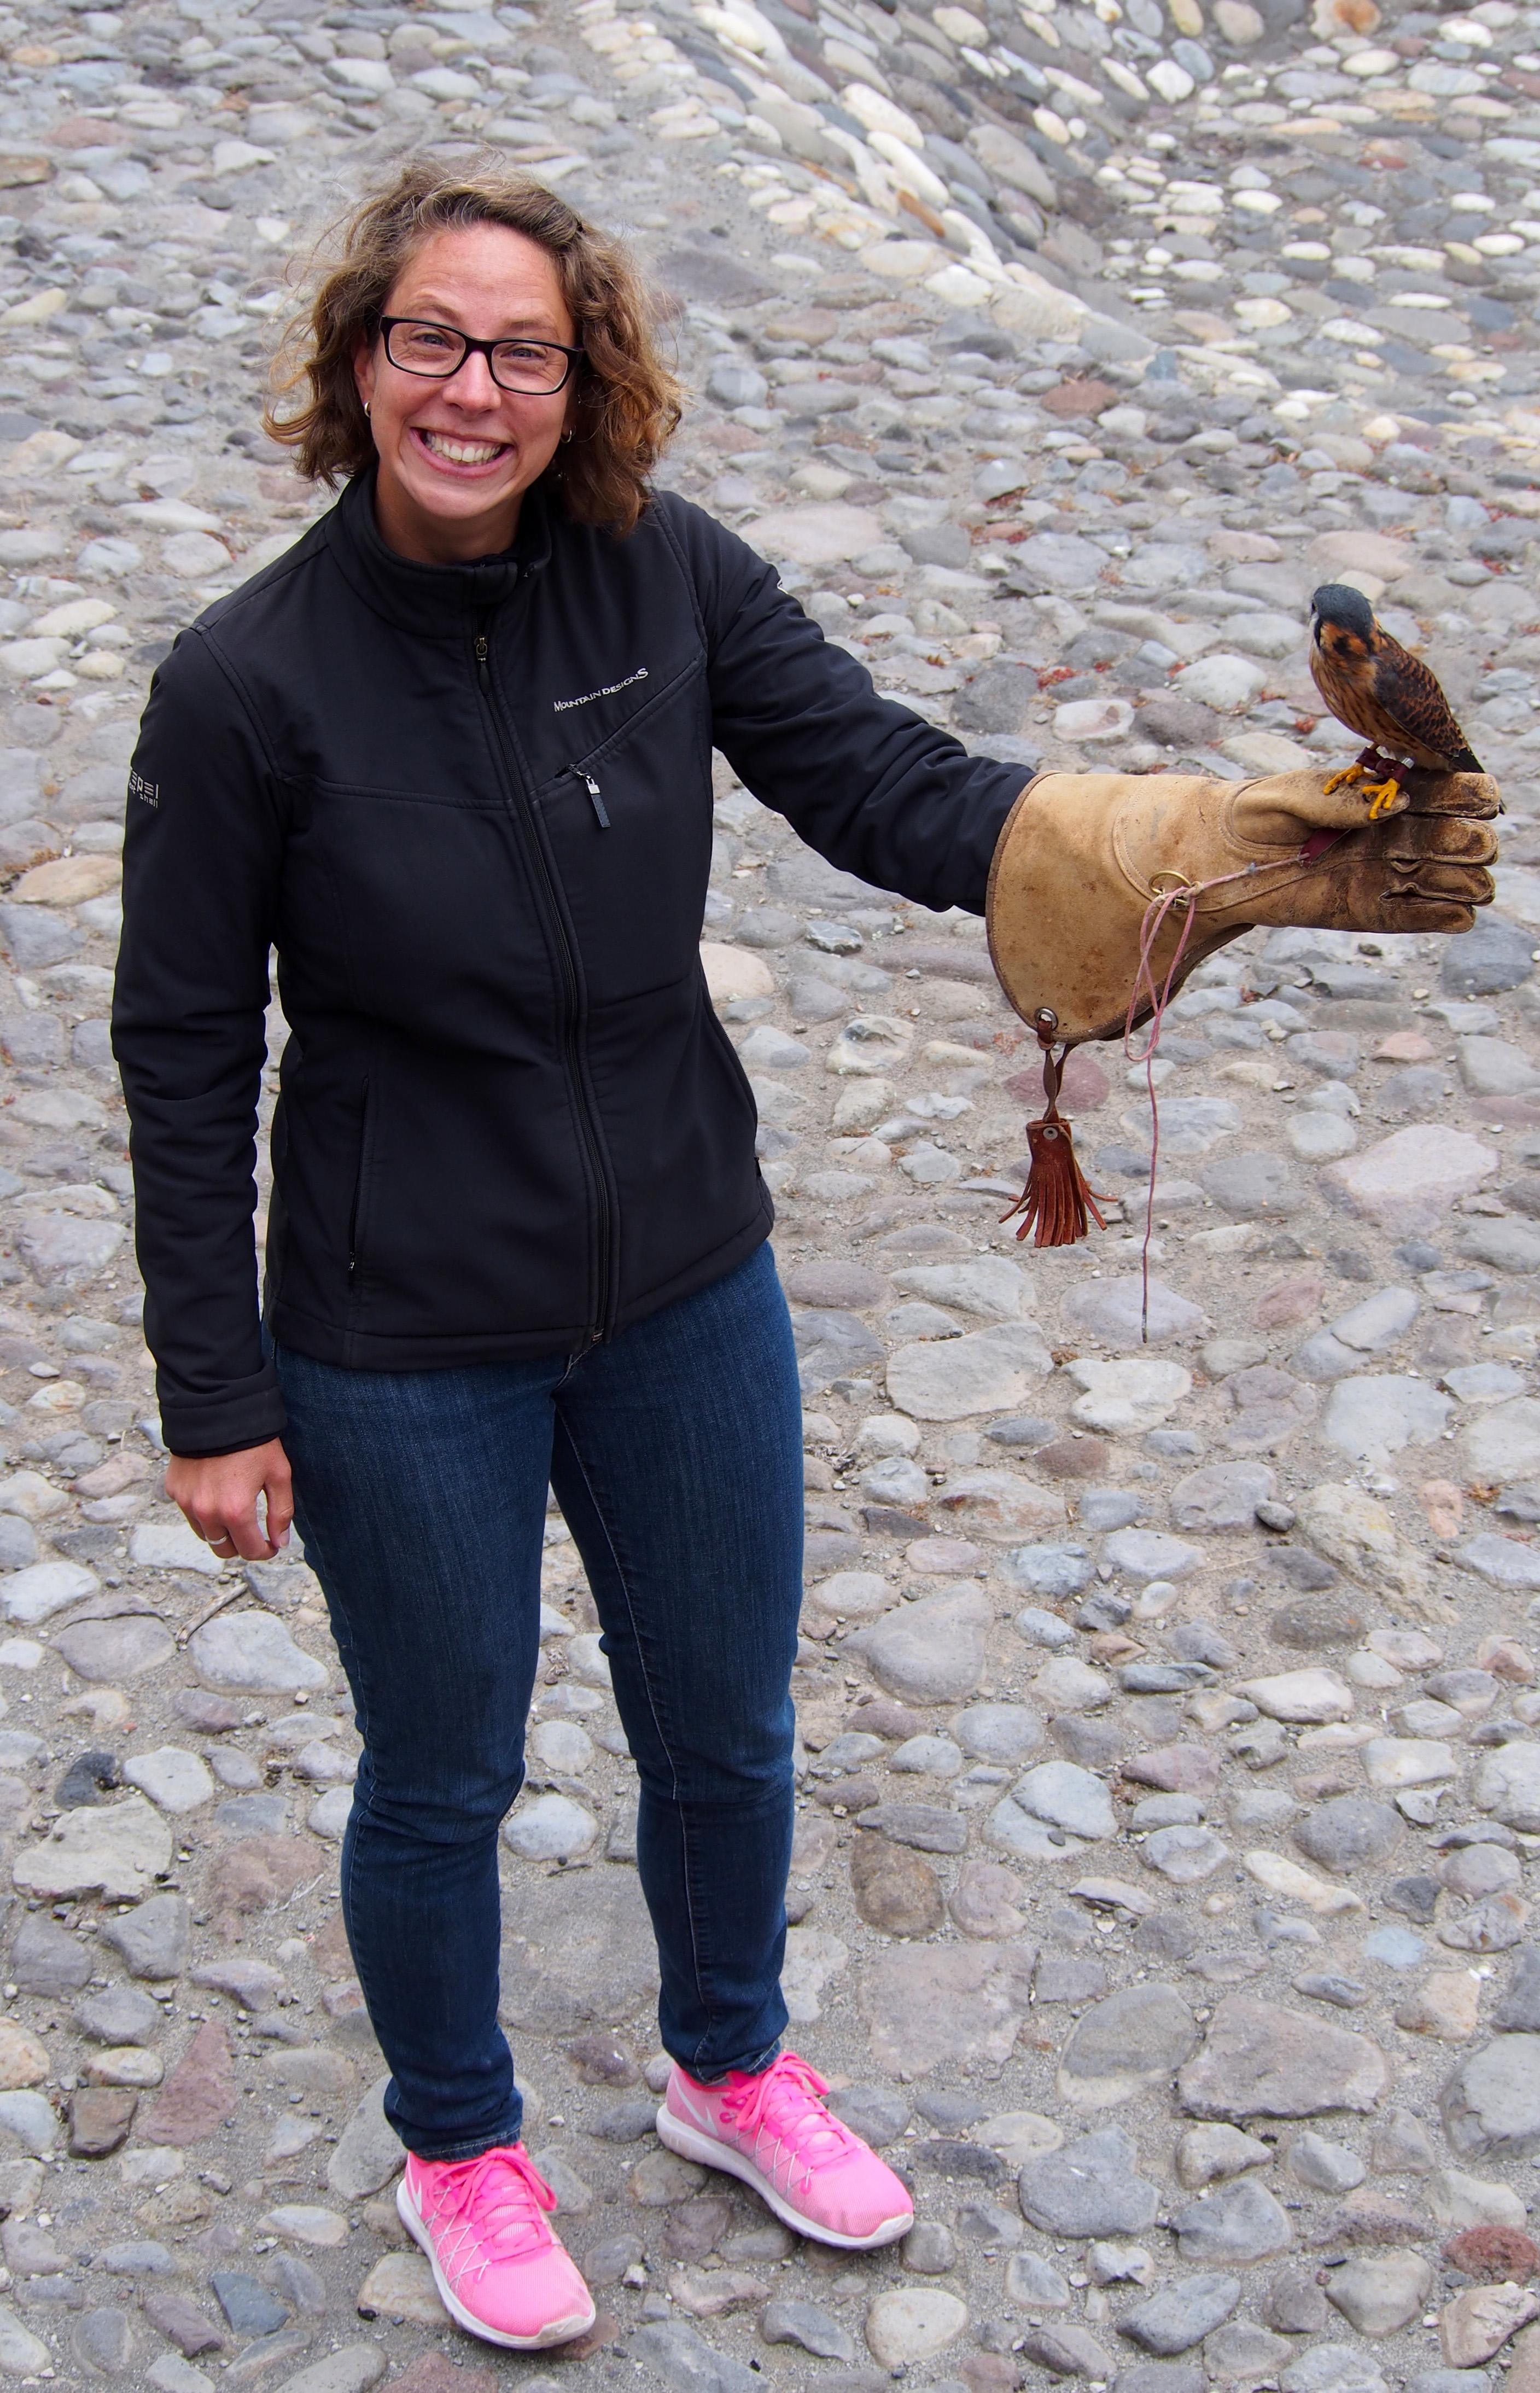
For a bet, I took the opportunity during the show to hold an American Kestrel. Despite it only being a small bird, I was still incredibly apprehensive, but I have photographic evidence that I did it!
El Lechero
Since we were already in the neighbourhood and in a car, I asked Jose Luis if we could stop by El Lechero, so I could finally see the Sacred Tree that TripAdvisor lists as one of the things to do in the area.
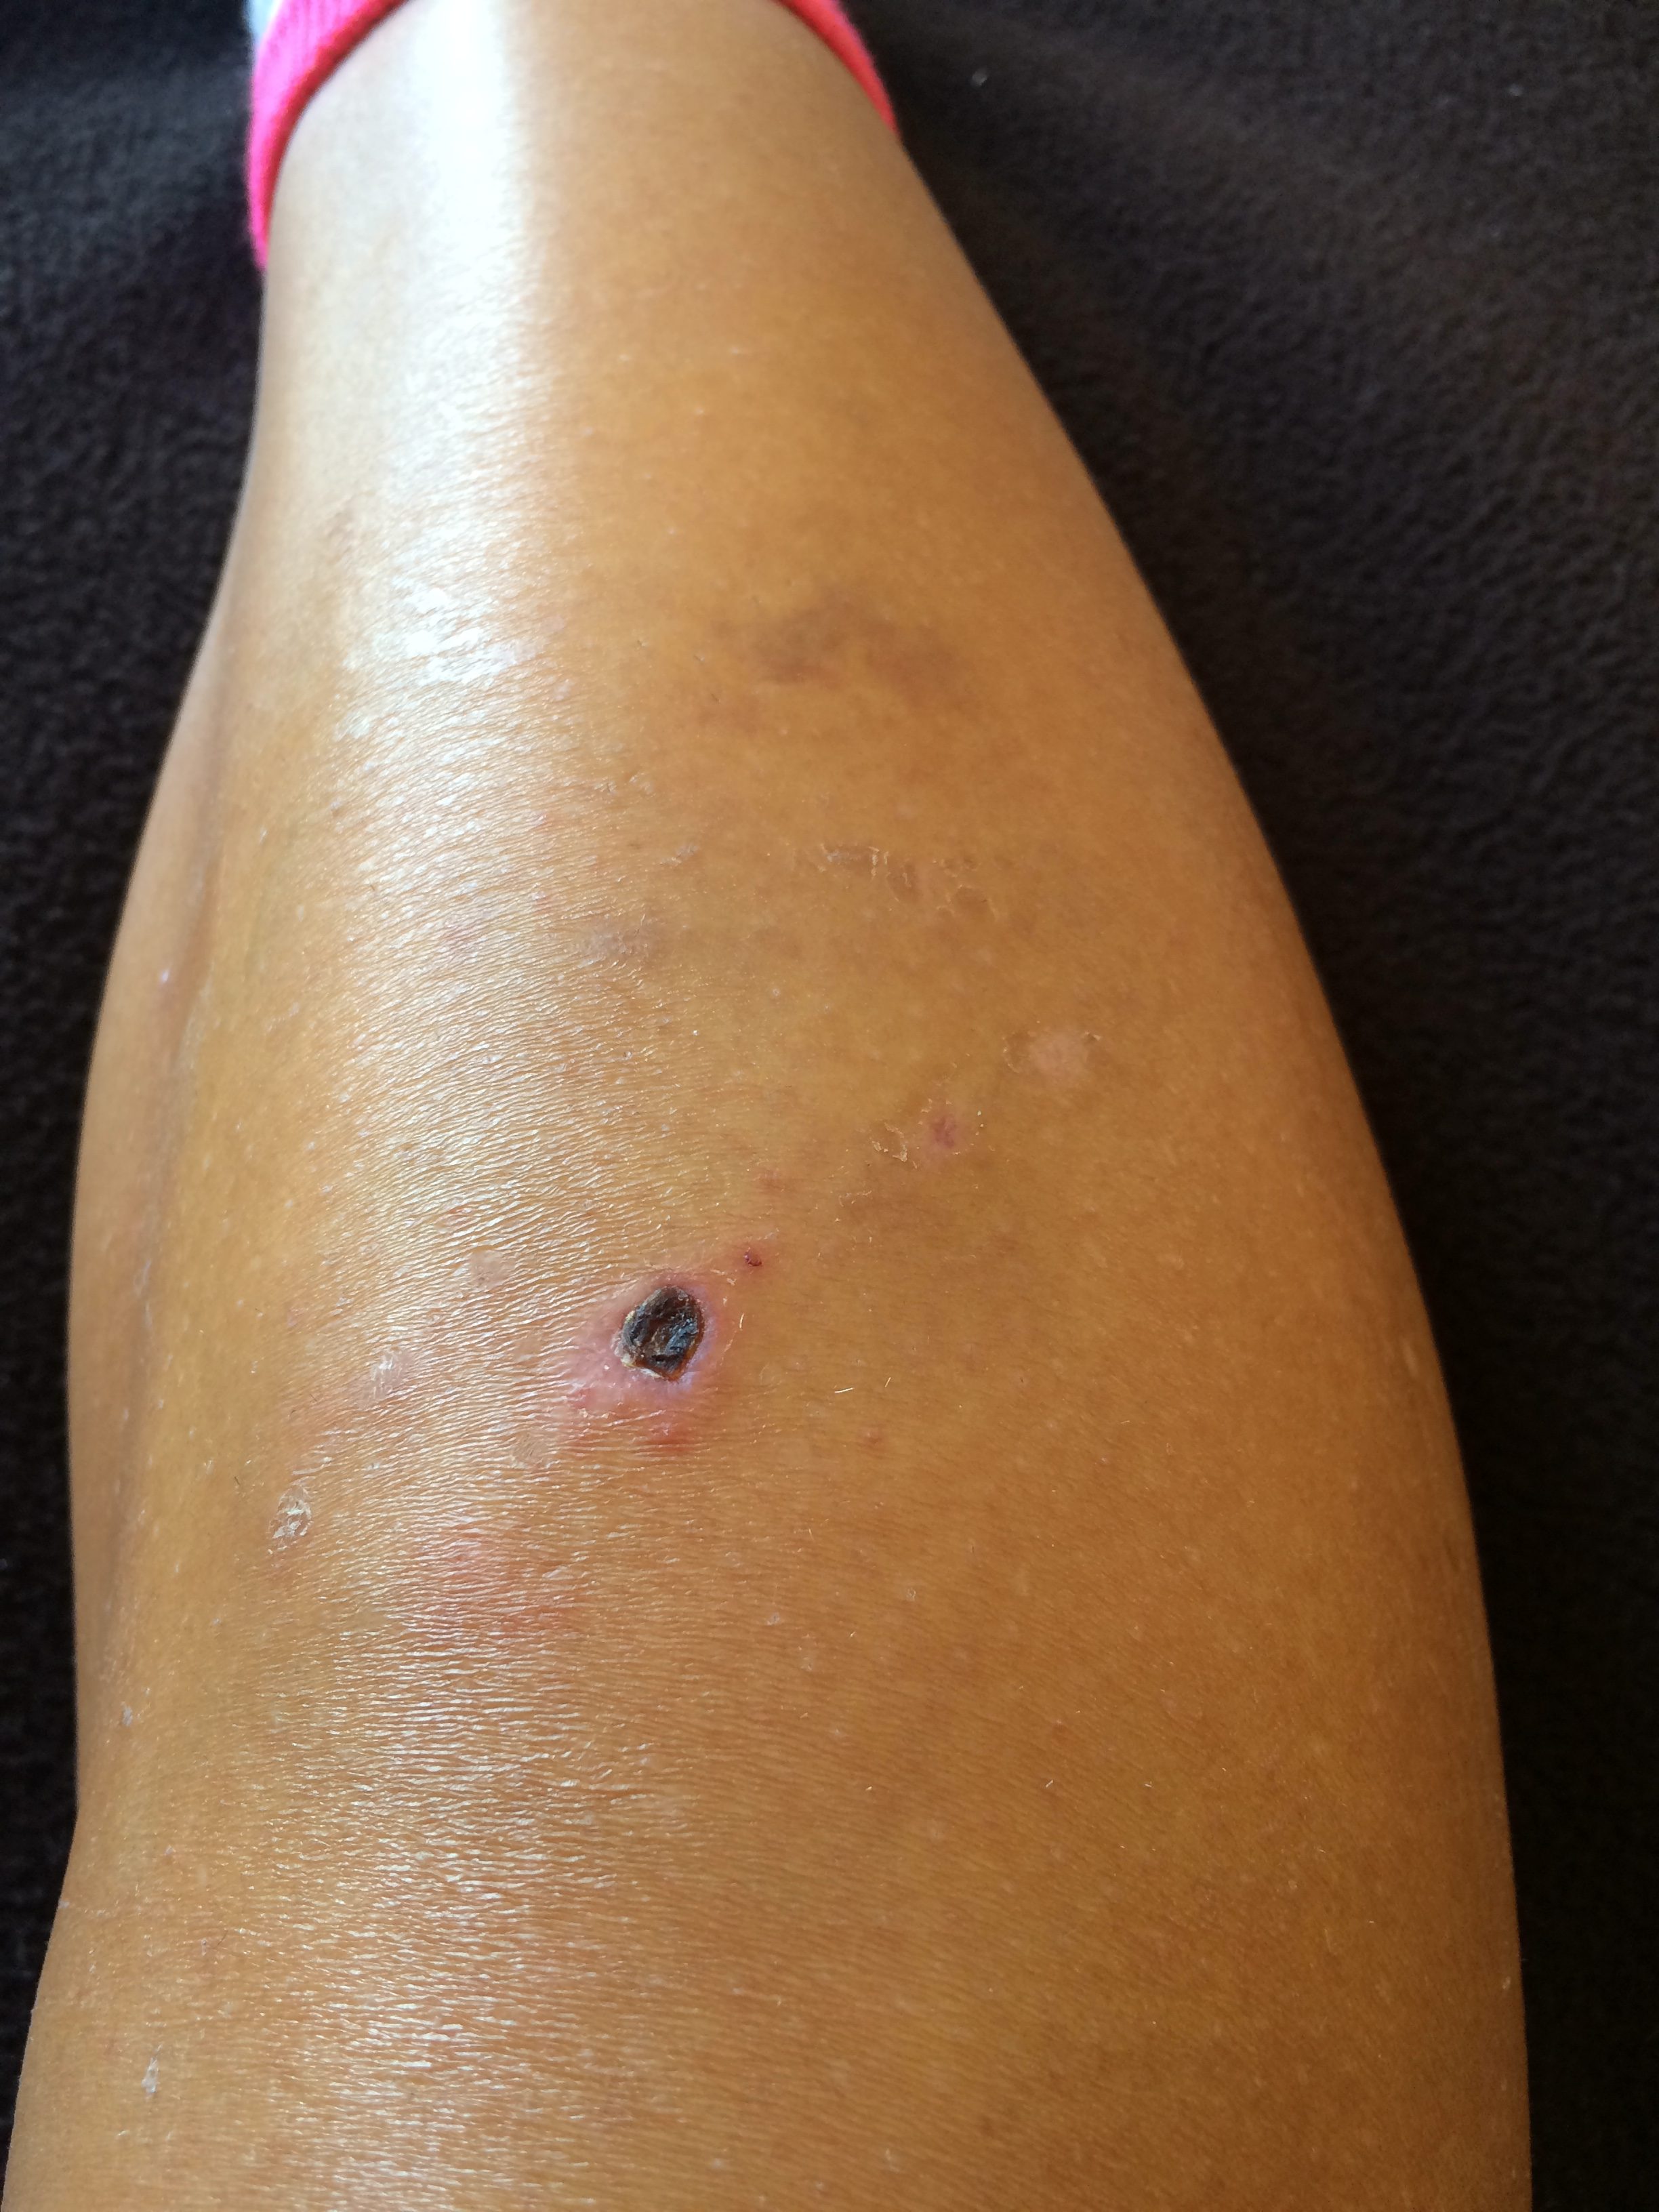
As you may recall, my last attempt to visit El Lechero ended badly with a hospital visit following a dog attack. The wound is healing very well in case you were wondering.
So we arrived at El Lechero and the first thing I saw was dogs. Nervously I picked up a rock to put in my pocket, just in case threats would be required. I walked nervously and close to my friend Andrea as I walked up to the tree. The dogs turned out to be super relaxed and didn’t even glance in my direction, and the sacred tree ended up being quite beautiful.
The tree stands as a solitary tree atop a hill overlooking Otavalo and surrounds. It probably wouldn’t rank as a ‘must see’ for Otavalo, but it was beautiful and I am glad to have finally seen it.
Otavalo Indigenous Market
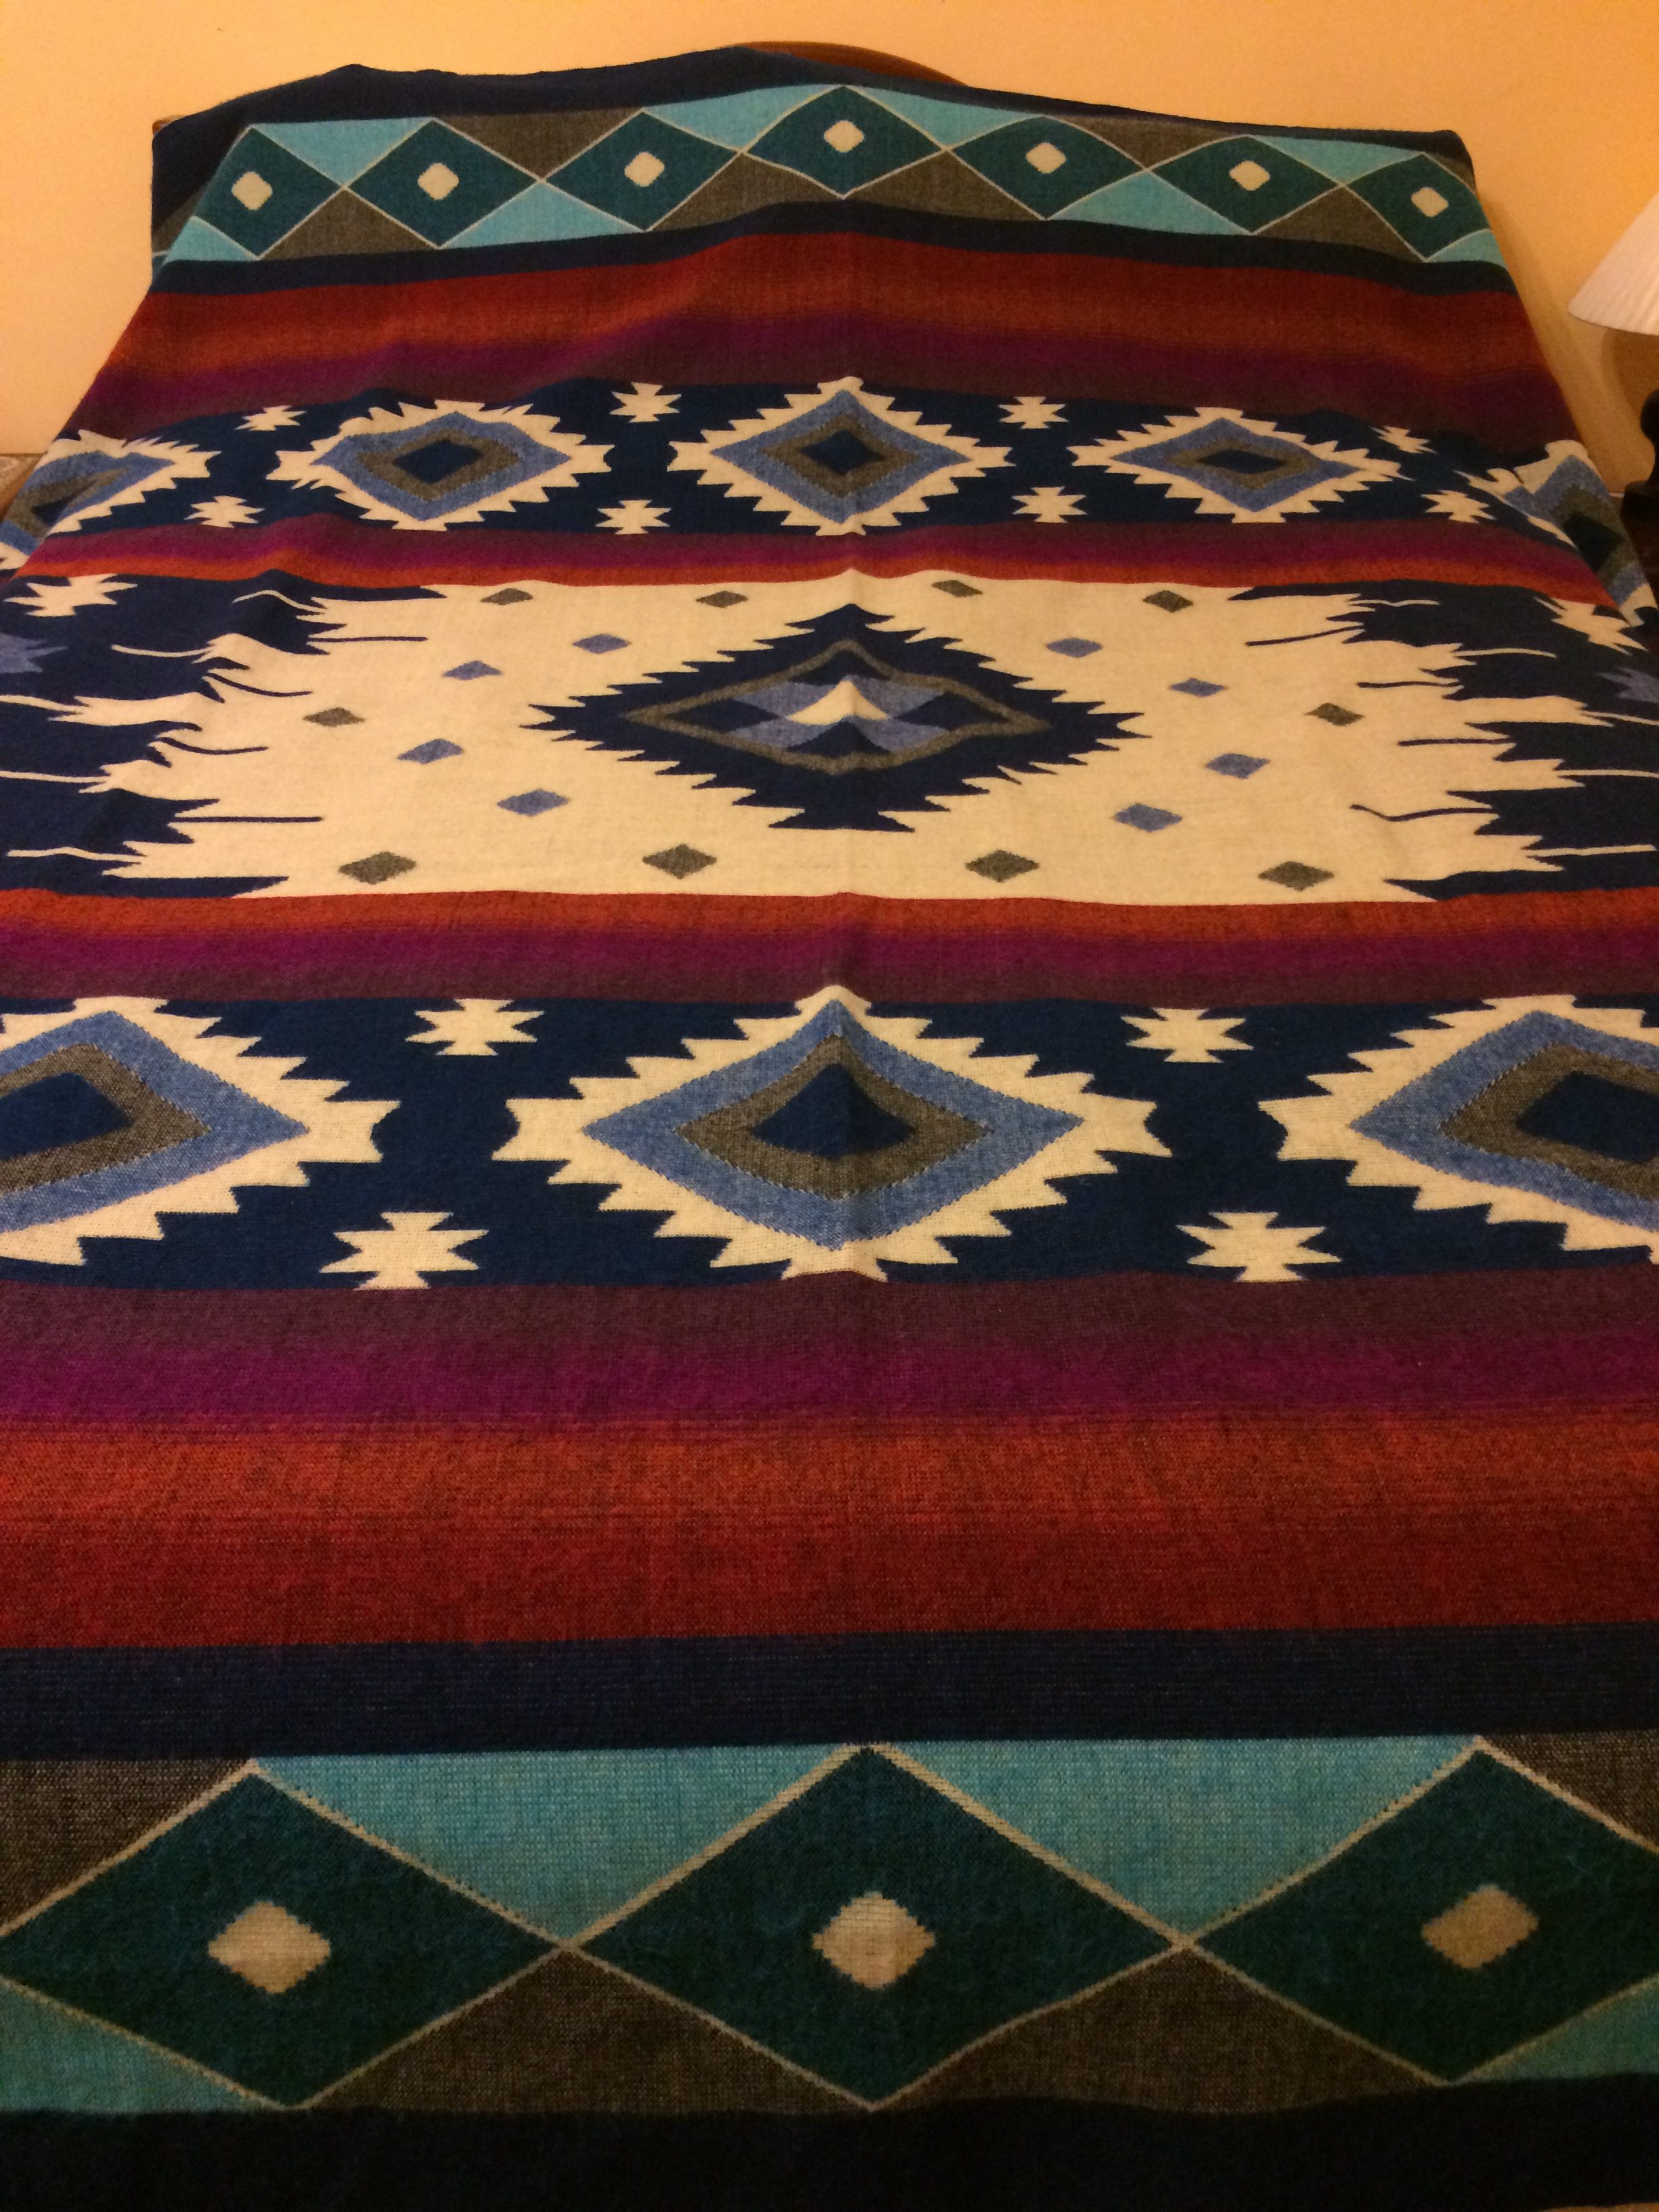
The Otavalo Indigenous market was, as per usual, the highlight of a trip to Otavalo. The locals are so friendly, though they do harass you a little bit to buy their products. The colours and textures are absolutely fabulous.
Even though I am a budget traveller, I caved and bought the most wonderfully soft, beautifully coloured alpaca wool blanket. It will cover a queen size bed, and I managed to negotiate the price down to $21. Also a huge thank you to my mum, for taking it back to Australia for me in her luggage! (I don’t want to carry it around for the next however many months I keep travelling)
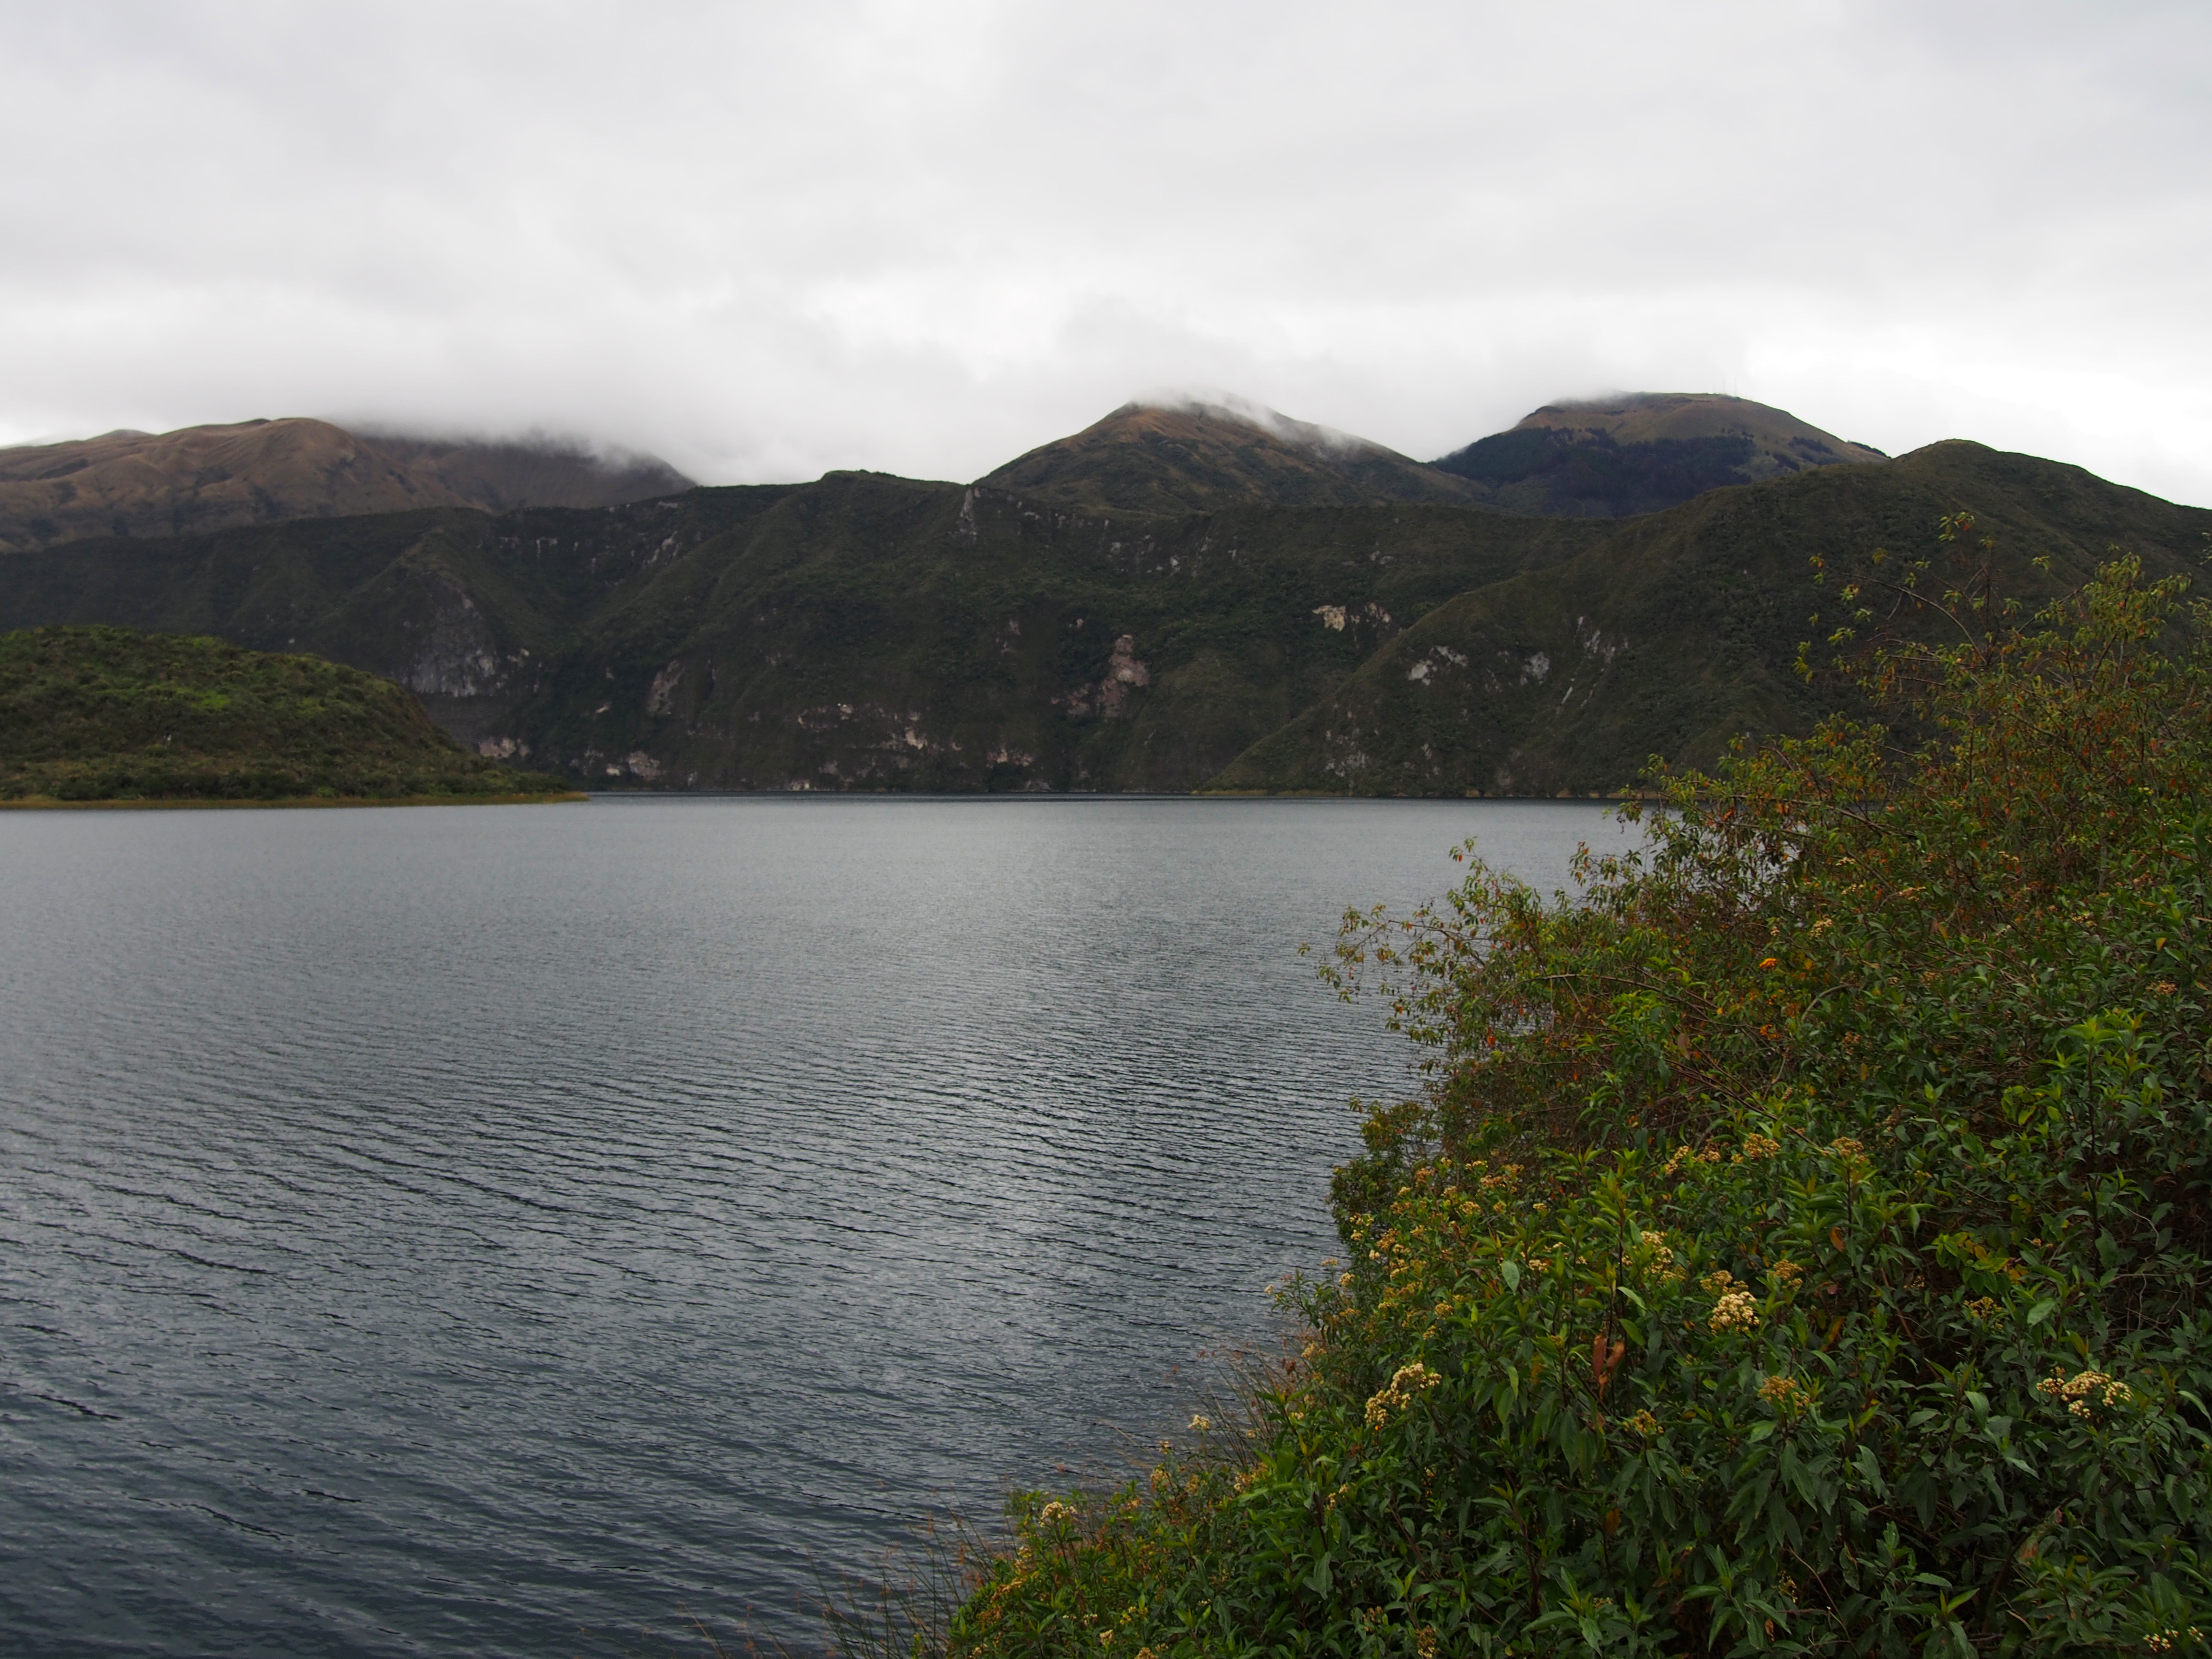
Cuichocha Lake
By the time we traveled from Otavalo, through Cotocachi up to Lake Cuicocha it was quite late in the day and very cold. This resulted in a very brief visit.
Cuicocha is a 3000 year old caldera of a volcano, the neighbouring
hills were created by the ash of a volcanic eruption 1500 years ago. The caldera is approximately 1.5 kilometres in diameter and the water in the caldera is 140 metres deep.
One day if I return to Cuicocha, I would like to hike around the lake. I have been advised it takes around 5 hours and is beautiful.
While Quito is a beautiful city with much to offer, it’s also fantastic to go beyond walking distance and see the surrounding areas. When riding the TeleferiQo I met a lovely guide called Ruben who has his own tour company, Southern Paradise Tours. After some messaging via Whatsapp Ruben organised a private tour for my friends and family to visit the Mindo Cloud Forest, with his colleague Jose Luis.
For a group of seven people we paid $40 per person, excluding lunch and entrance fees to Nathaly and El Quetzal.
Mindo Loma
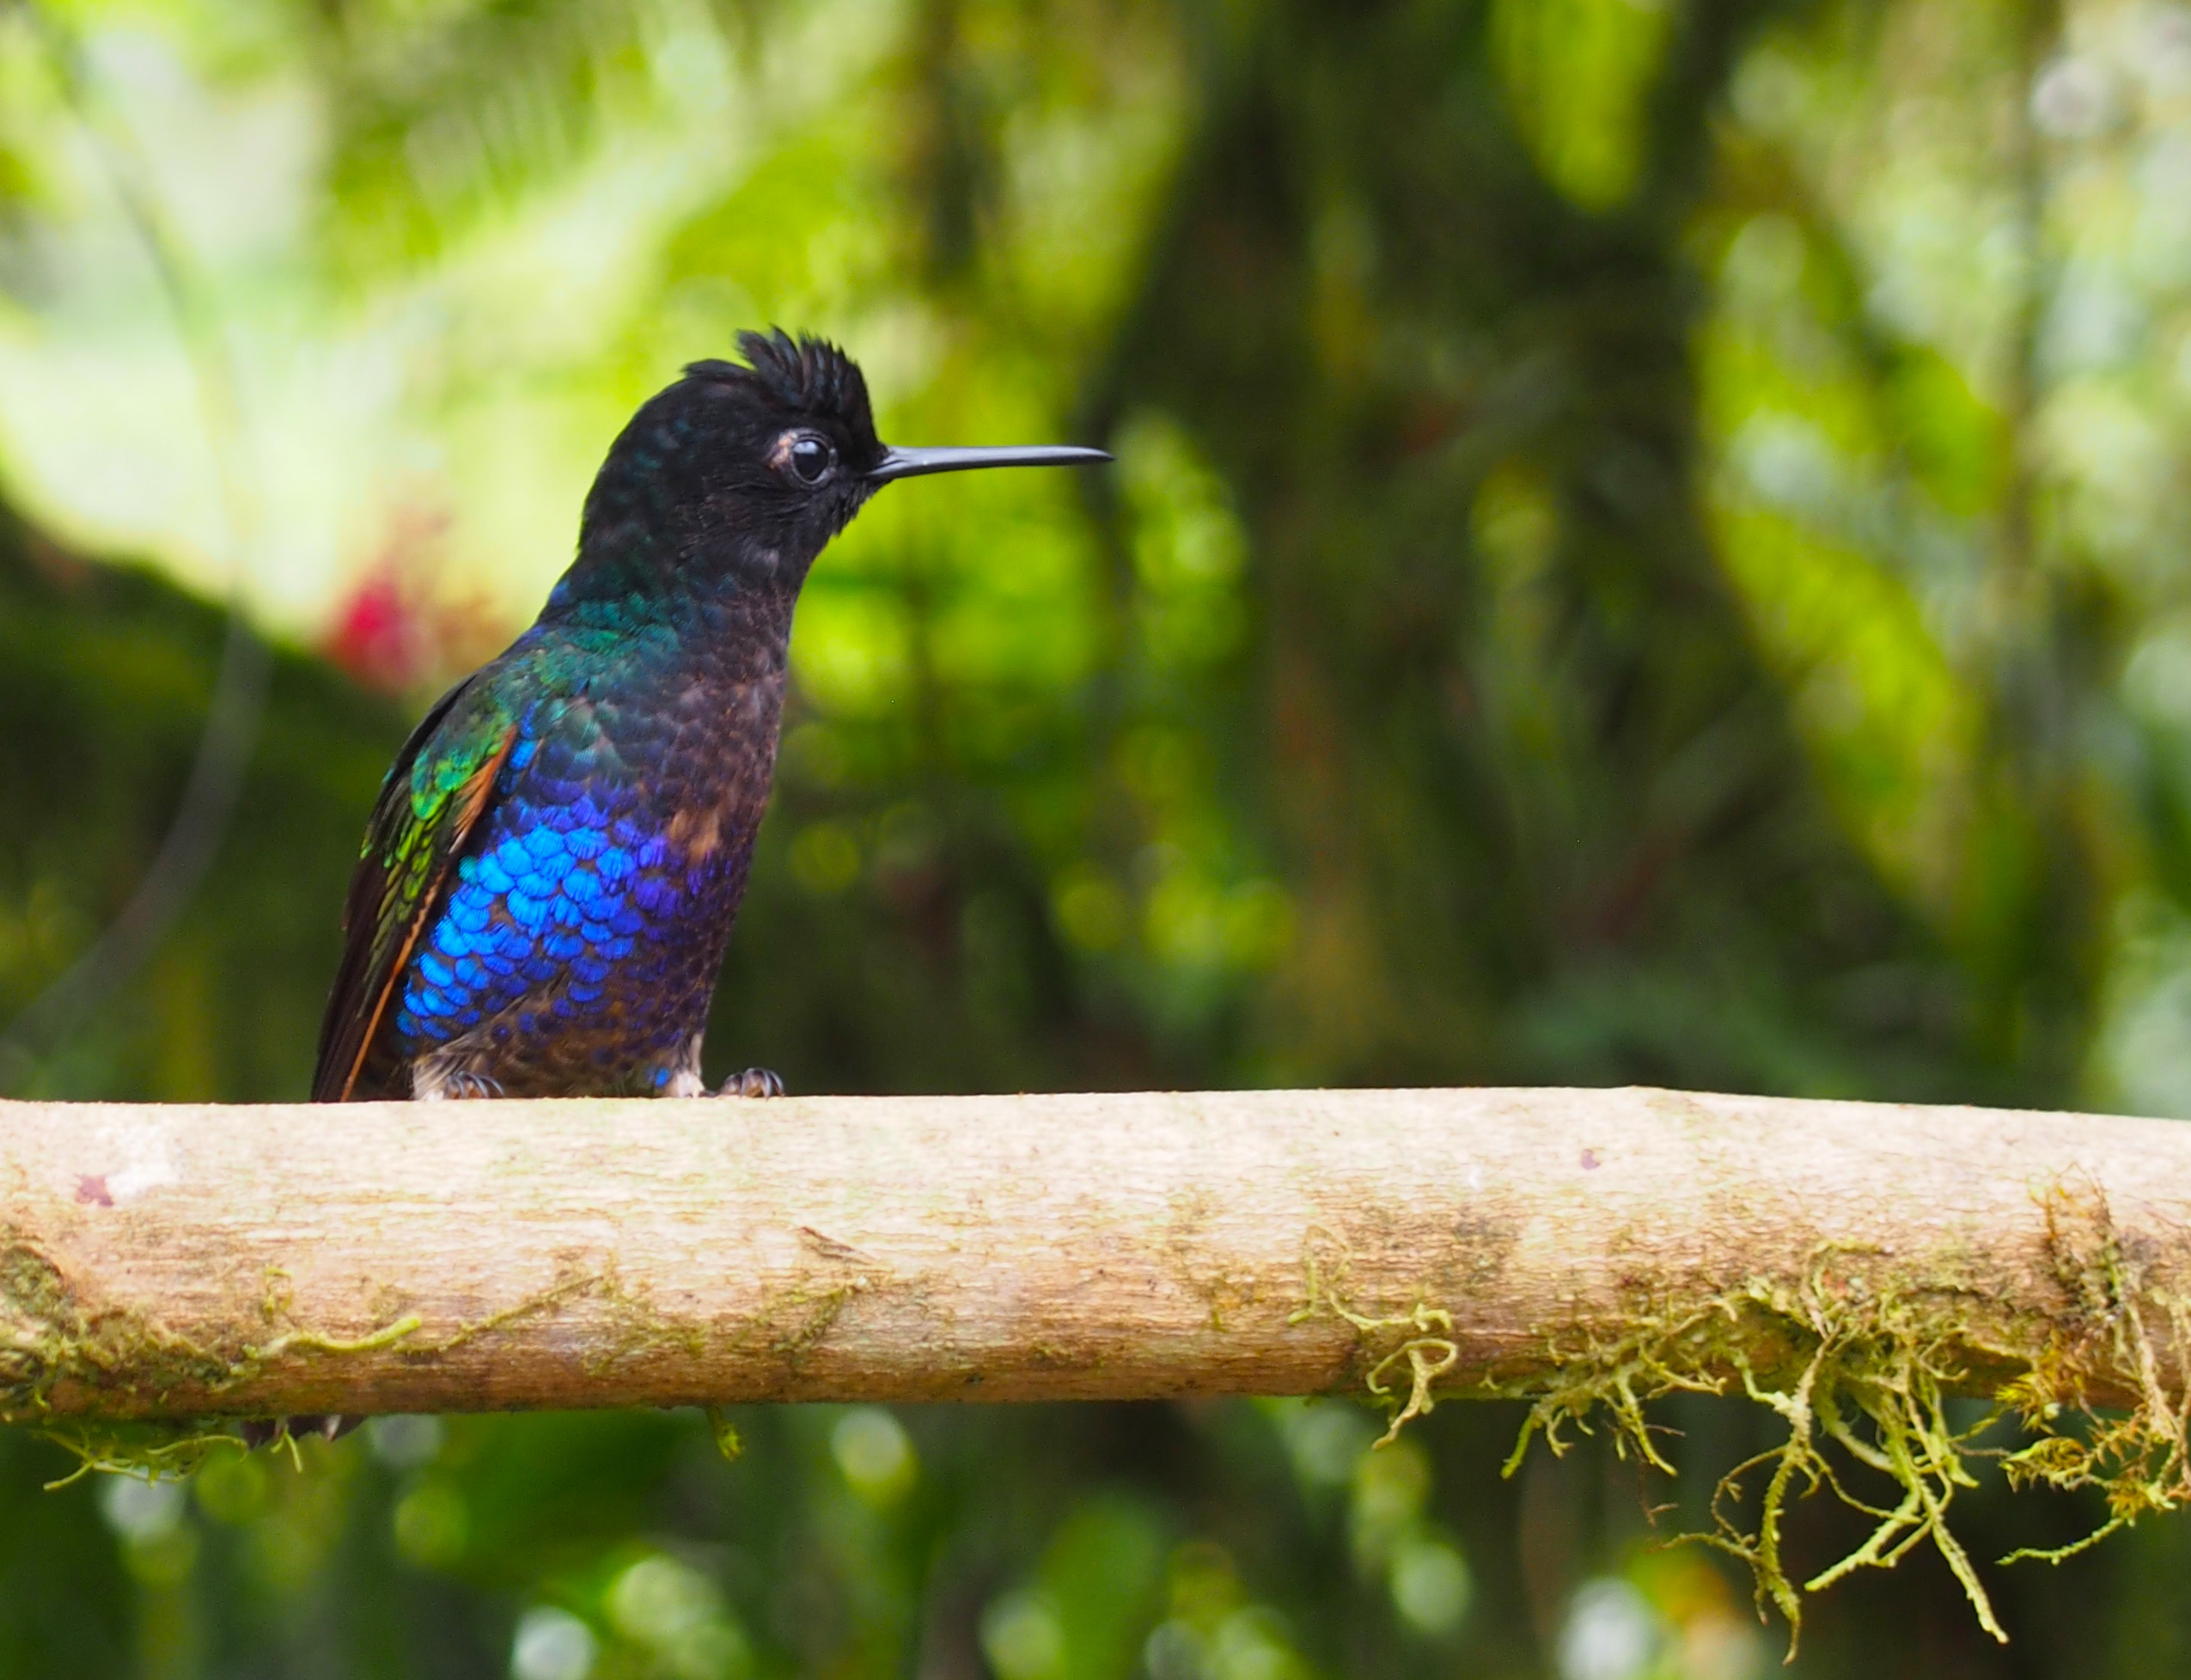
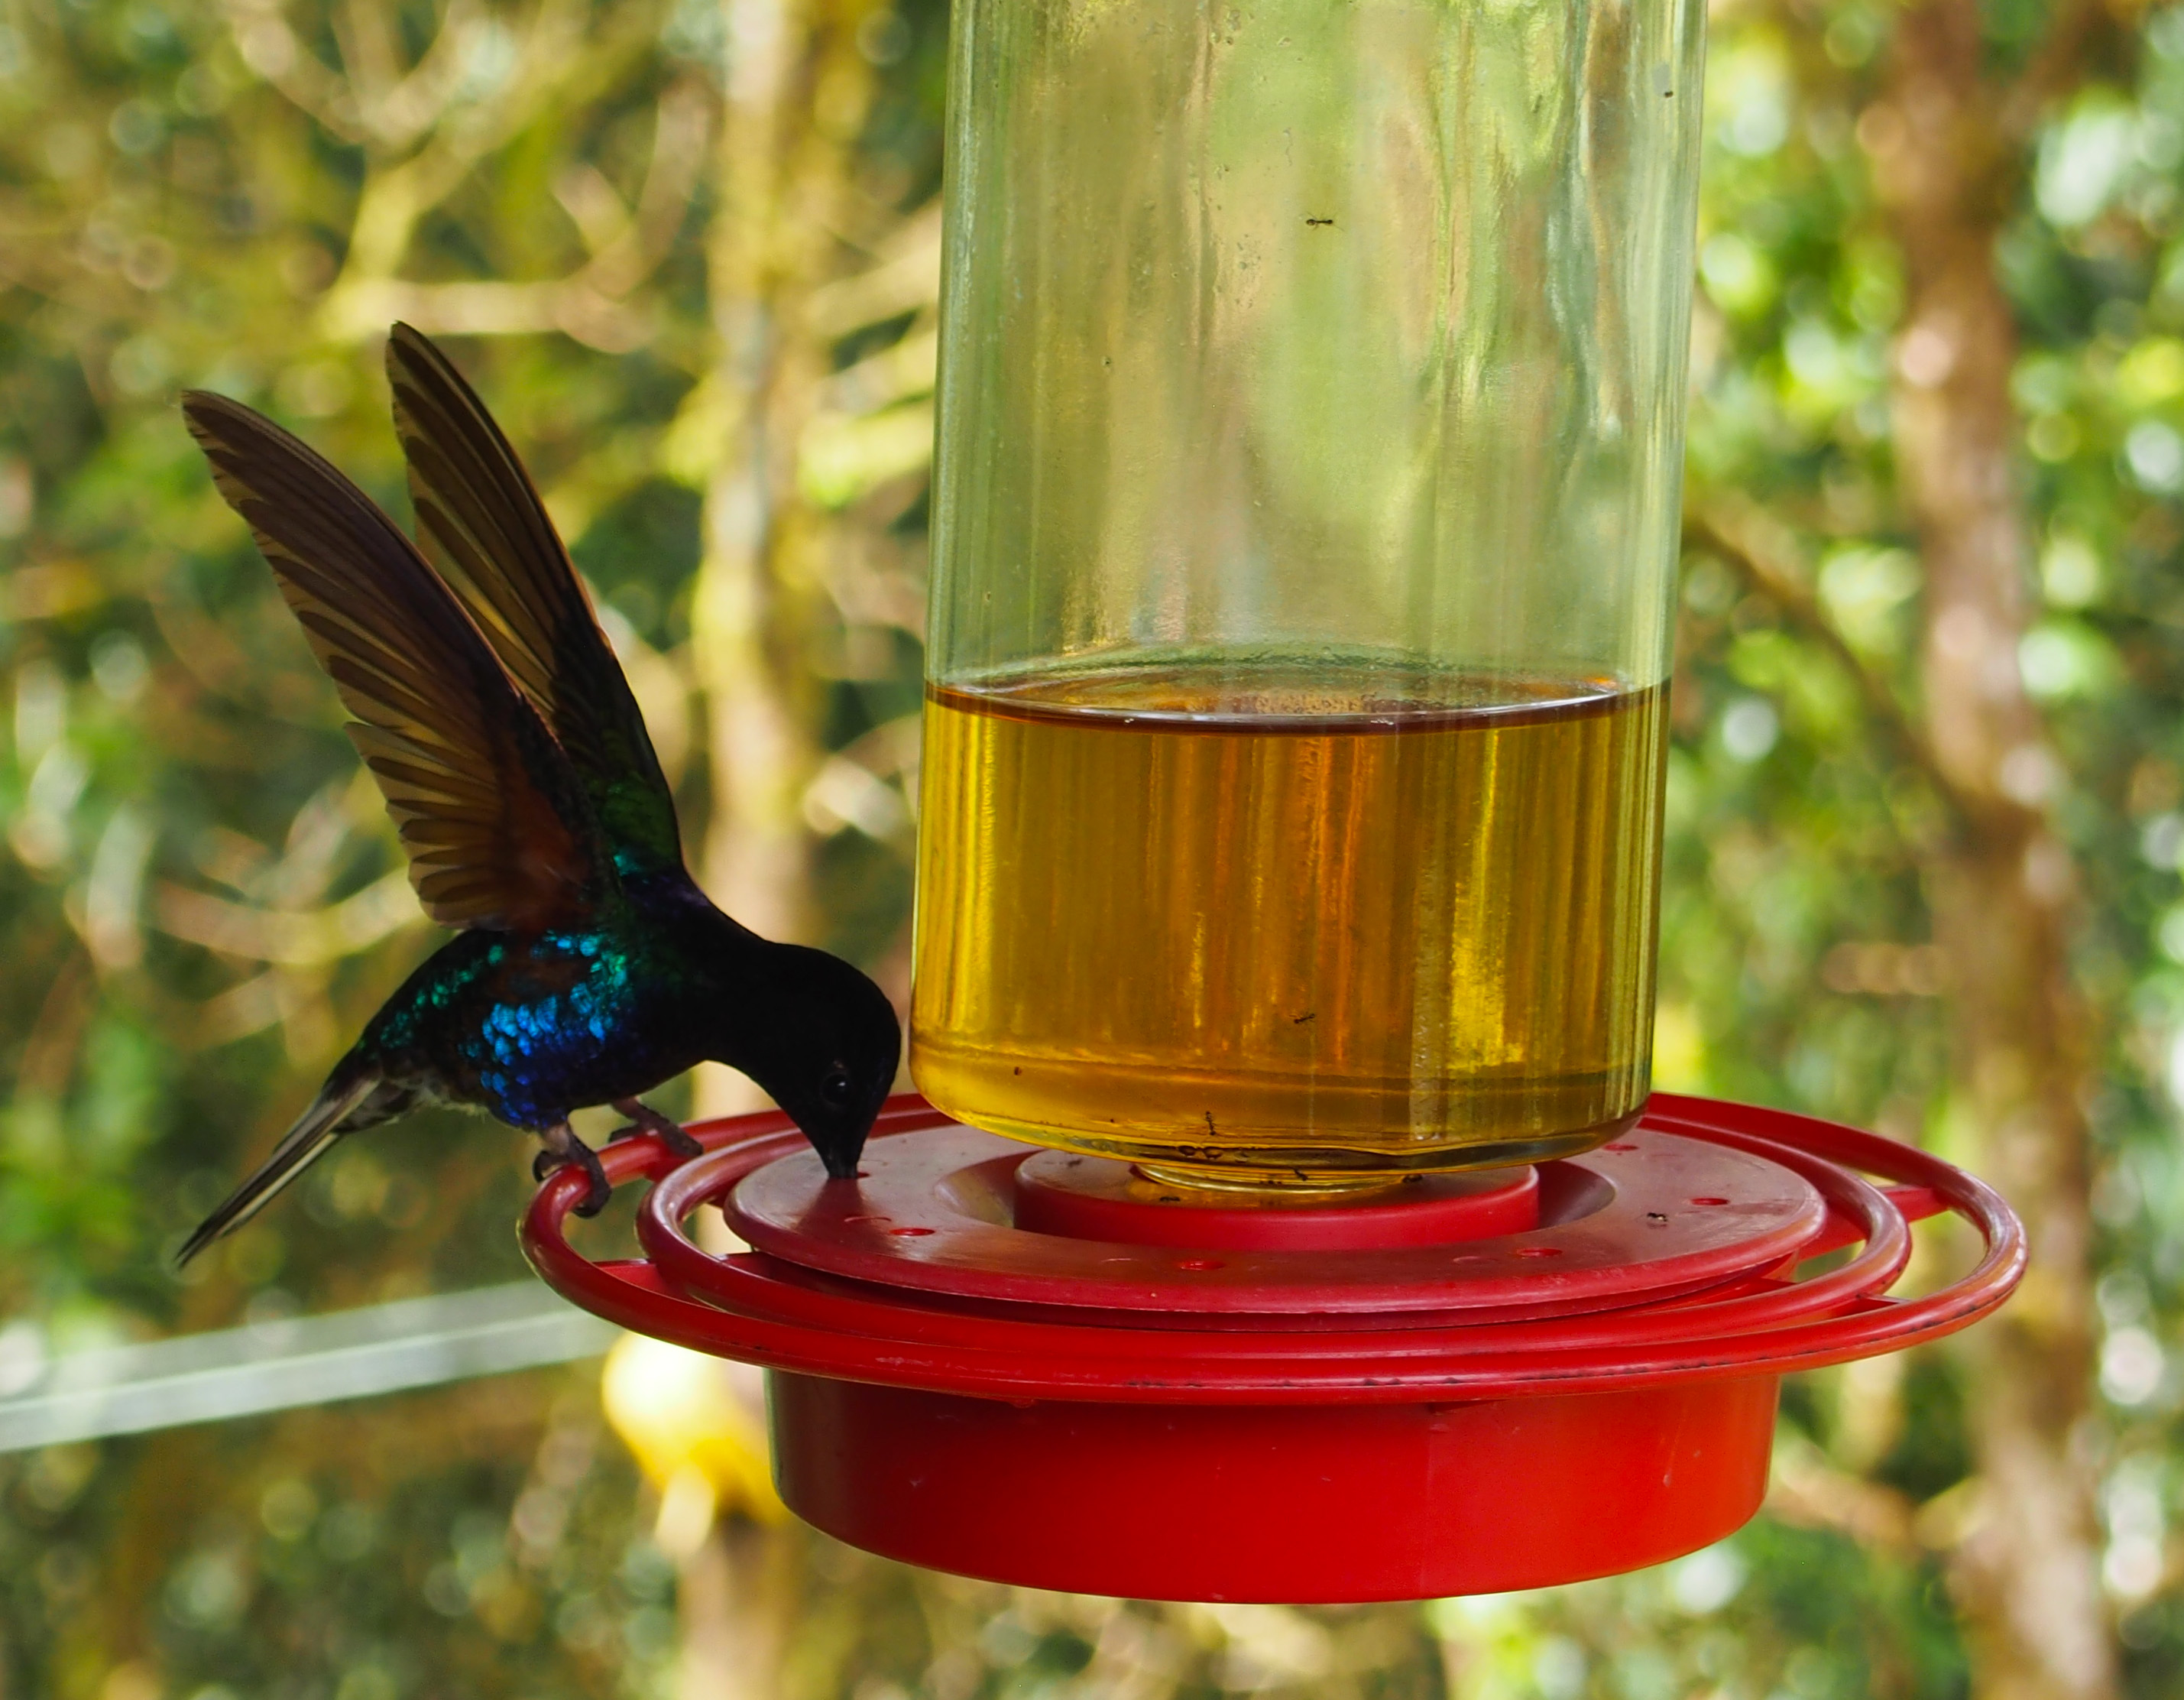
The Mindo Cloud Forest is at an altitude of around 1800 metres and has lush rainforest (or rather cloud forest) vegetation, which is a haven for birds of many varieties including the Hummingbird.
The variation of environment in Ecuador is home to approximately 1700 species of birds. In the world there are 320 species of Hummingbird, 138 of which can be found in Ecuador. The Hummingbird is one of the worlds smallest birds, the smallest of which is 5cm, weighing just 2.5grams. The Hummingbird has fewer than 100 feathers, and their wings flap approximately 80 times per second. As they fly, their wings flap so quickly you can see the body of the bird but not the wings.
We spent several hours at the Mindo Loma Bird Lodge to quietly watch the hummingbirds feeding. We saw various species of Hummingbirds, as well as some Tanagers.
While people can tell you the hummingbird moves quickly, it’s still surprising to see it (or most of the time miss it) with your own eyes.
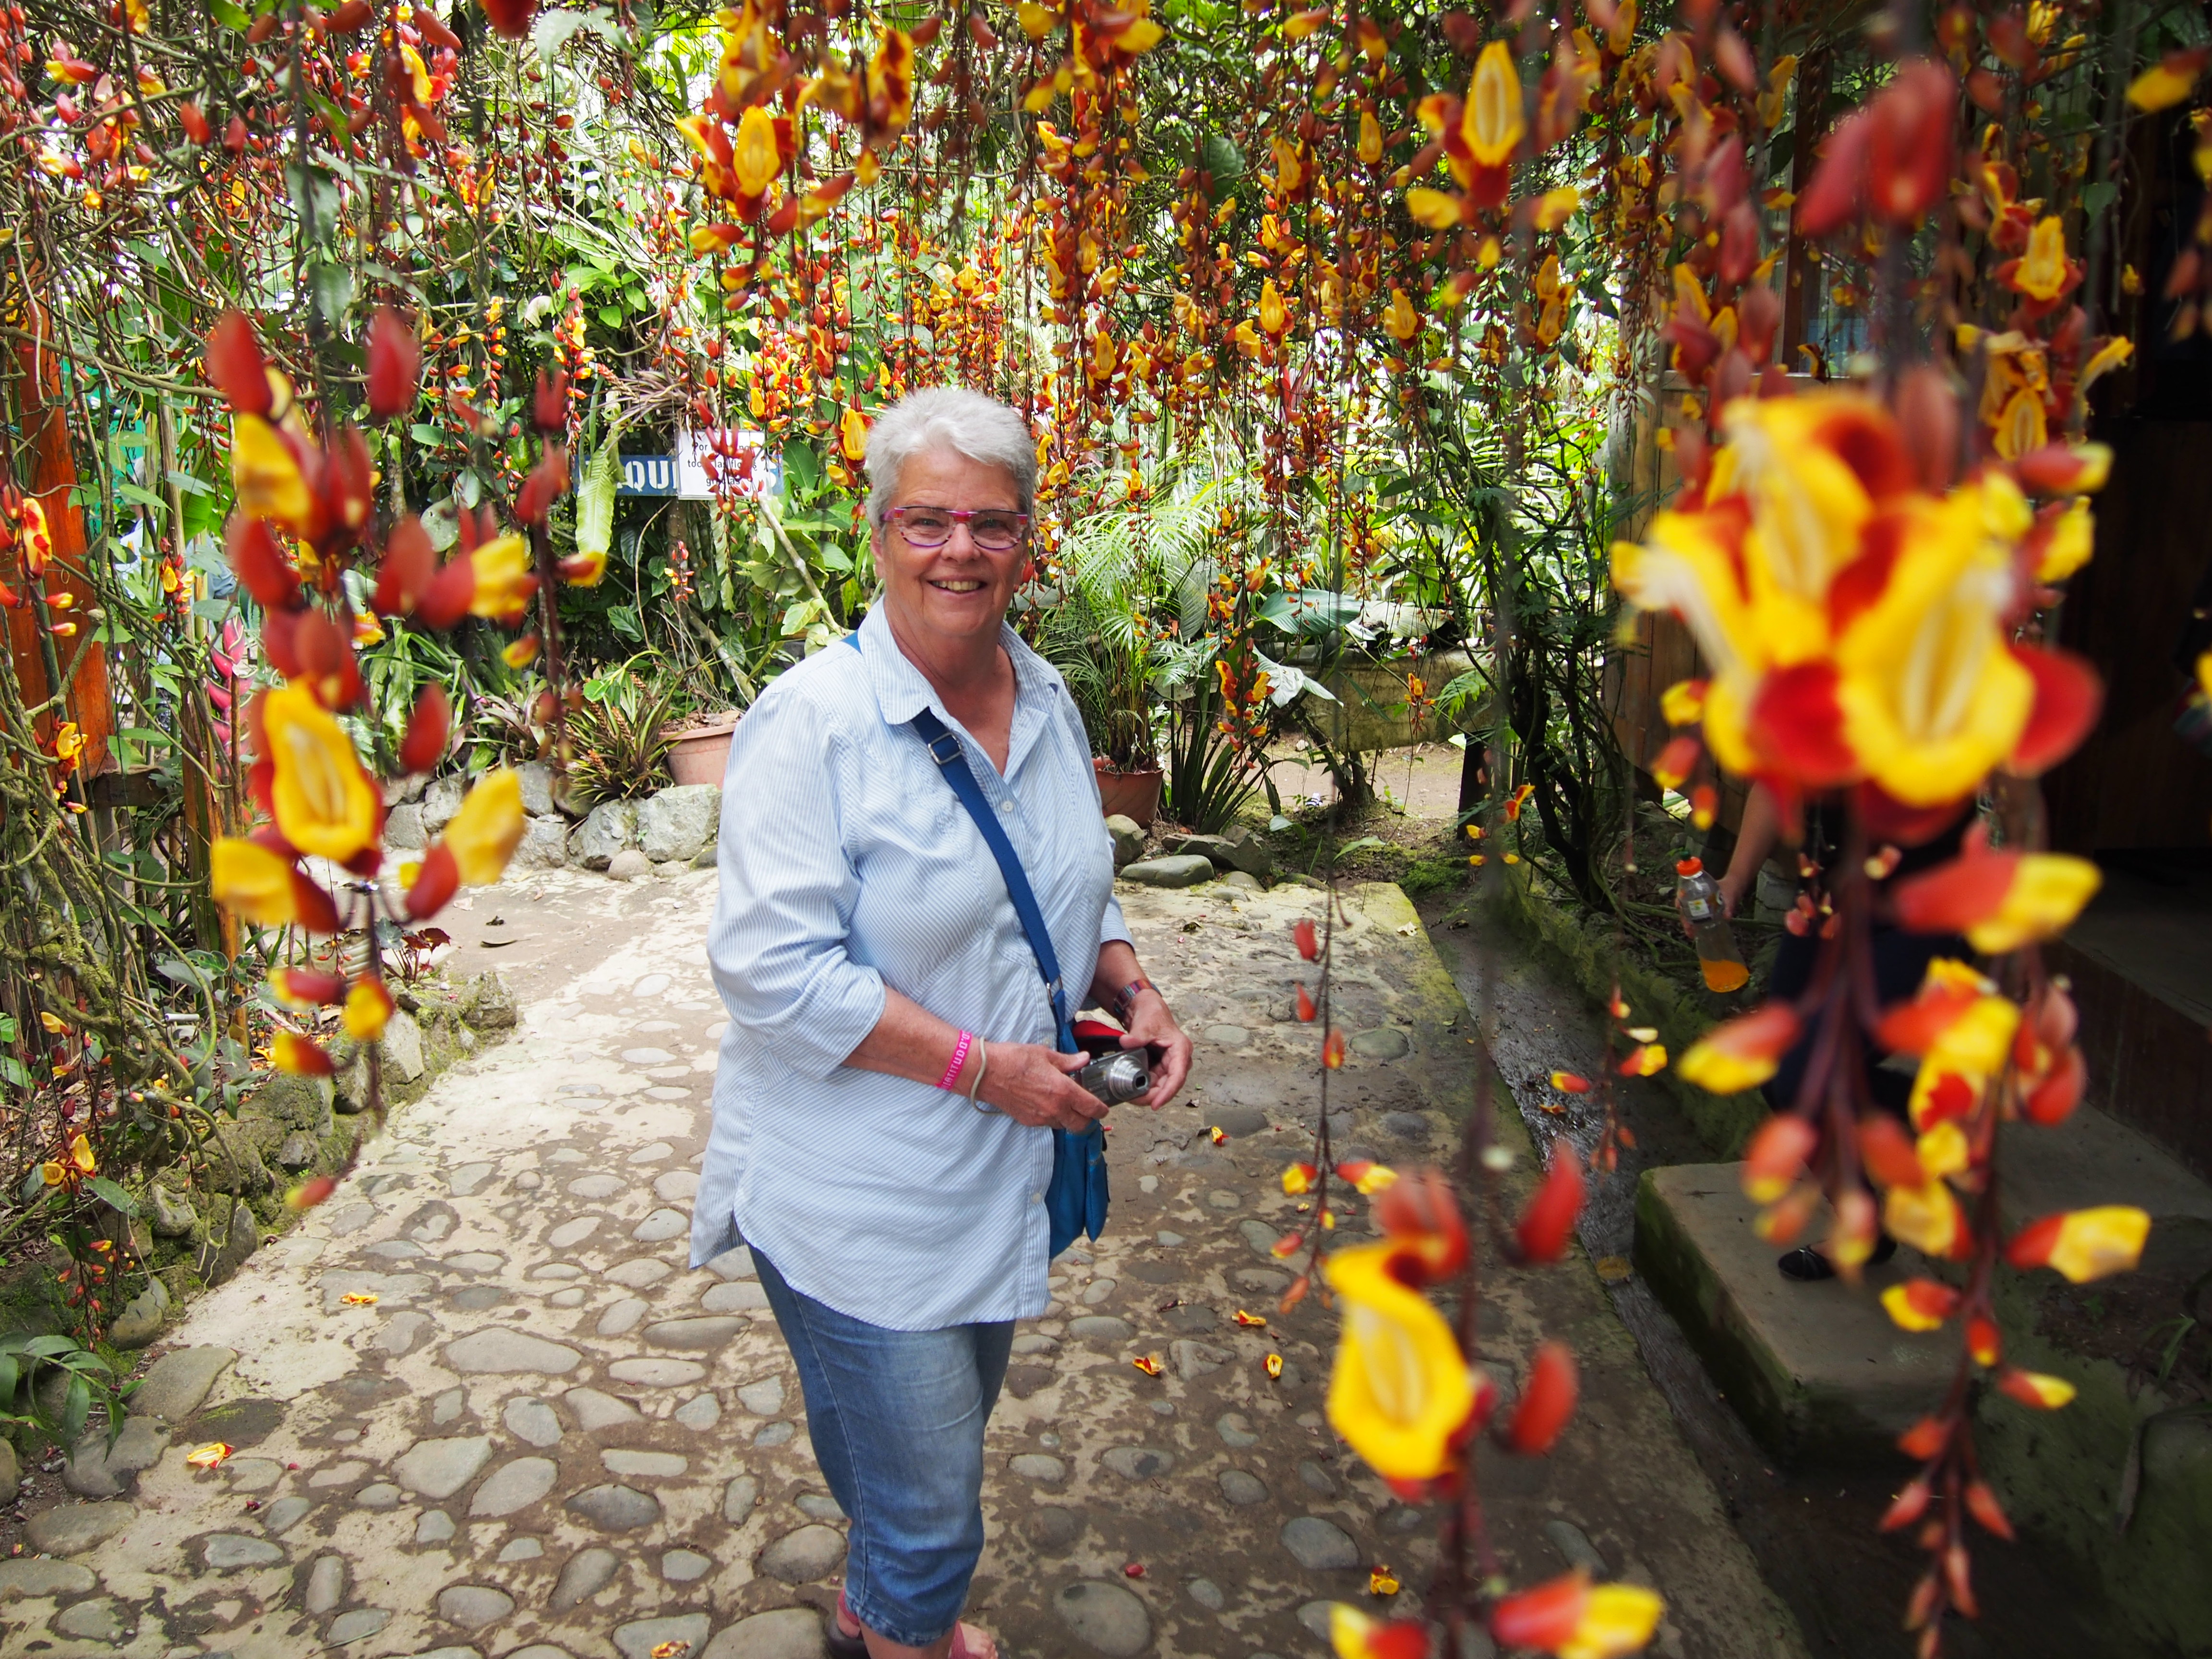
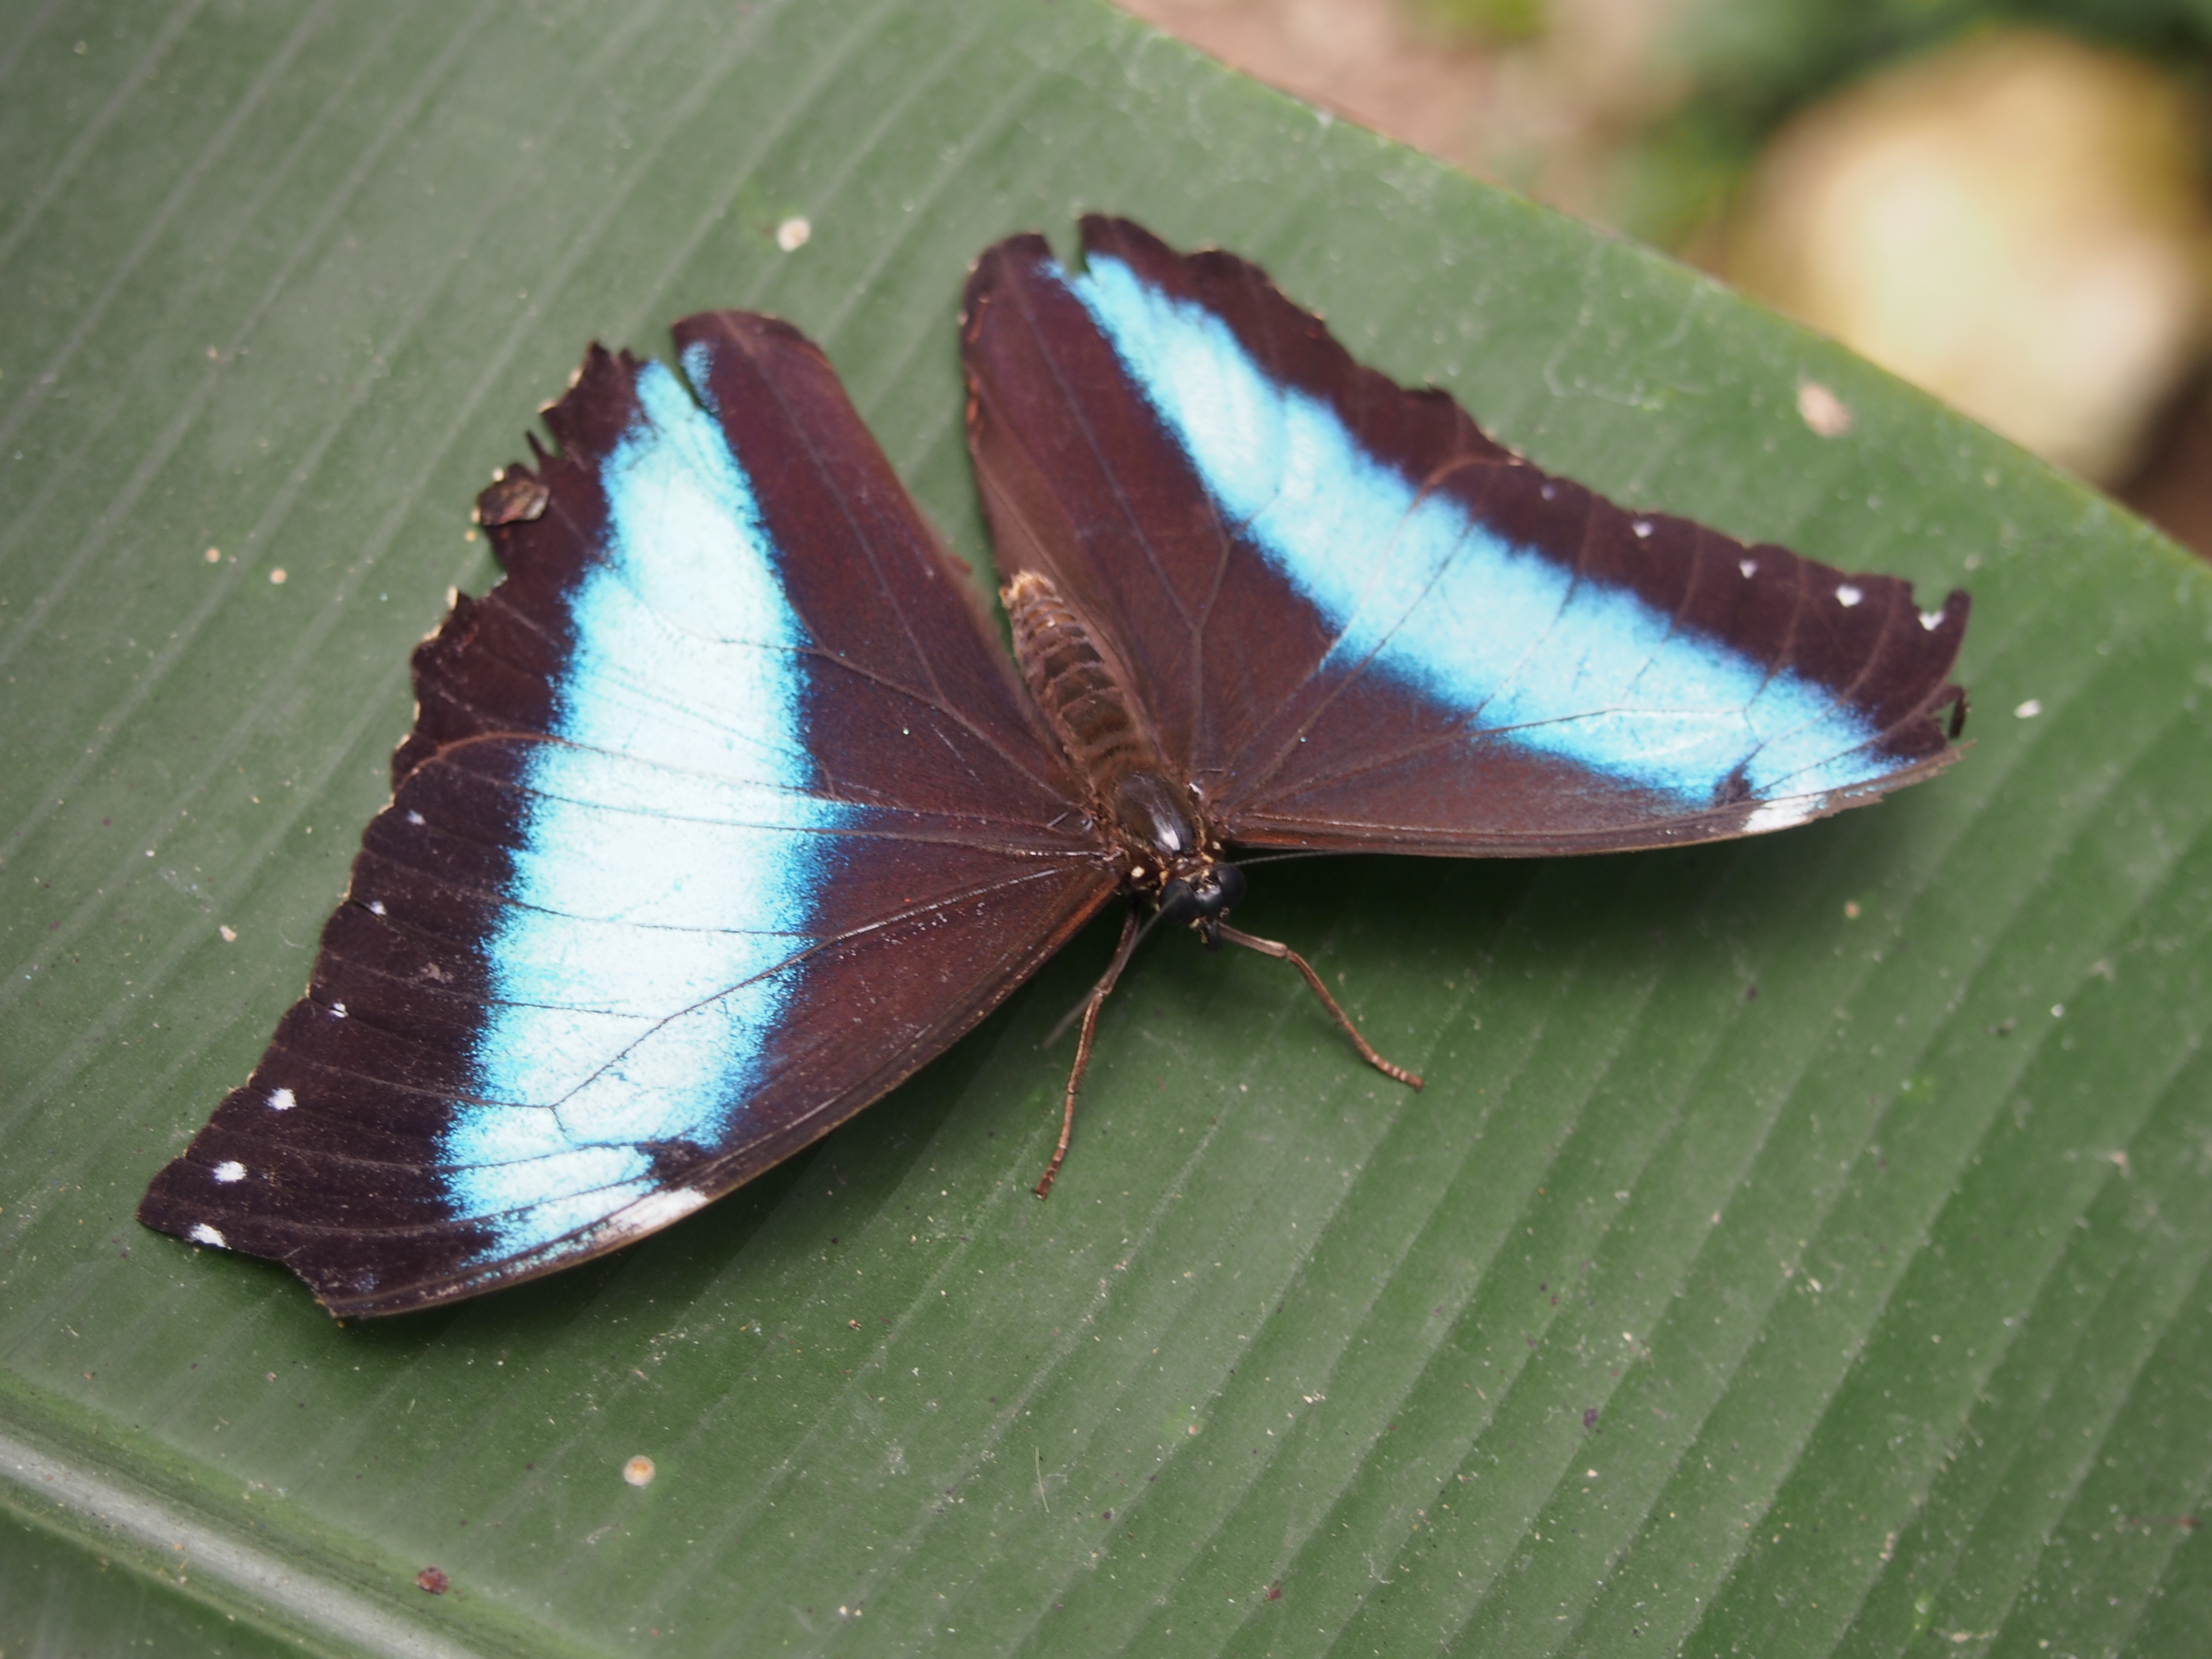
Nathaly Butterfly & Orchid House
Our second stop of the tour was to visit a butterfly and orchid house in the town of Mindo, called Nathaly.
Nathaly houses several varieties of Orchids. Like with birds, Ecuadors climate is conducive to the growth of many varieties of orchids. There are approximately 15,000 identified varieties of orchids in the world, of which Ecuador grows 5,000.
Amongst the orchids Nathaly offers the opportunity to learn about and see the various stages in the life cycle of a butterfly, including the eggs, larva, chrysalis and adult. In the butterfly house were several species of butterfly, though I can’t recall any of the names.
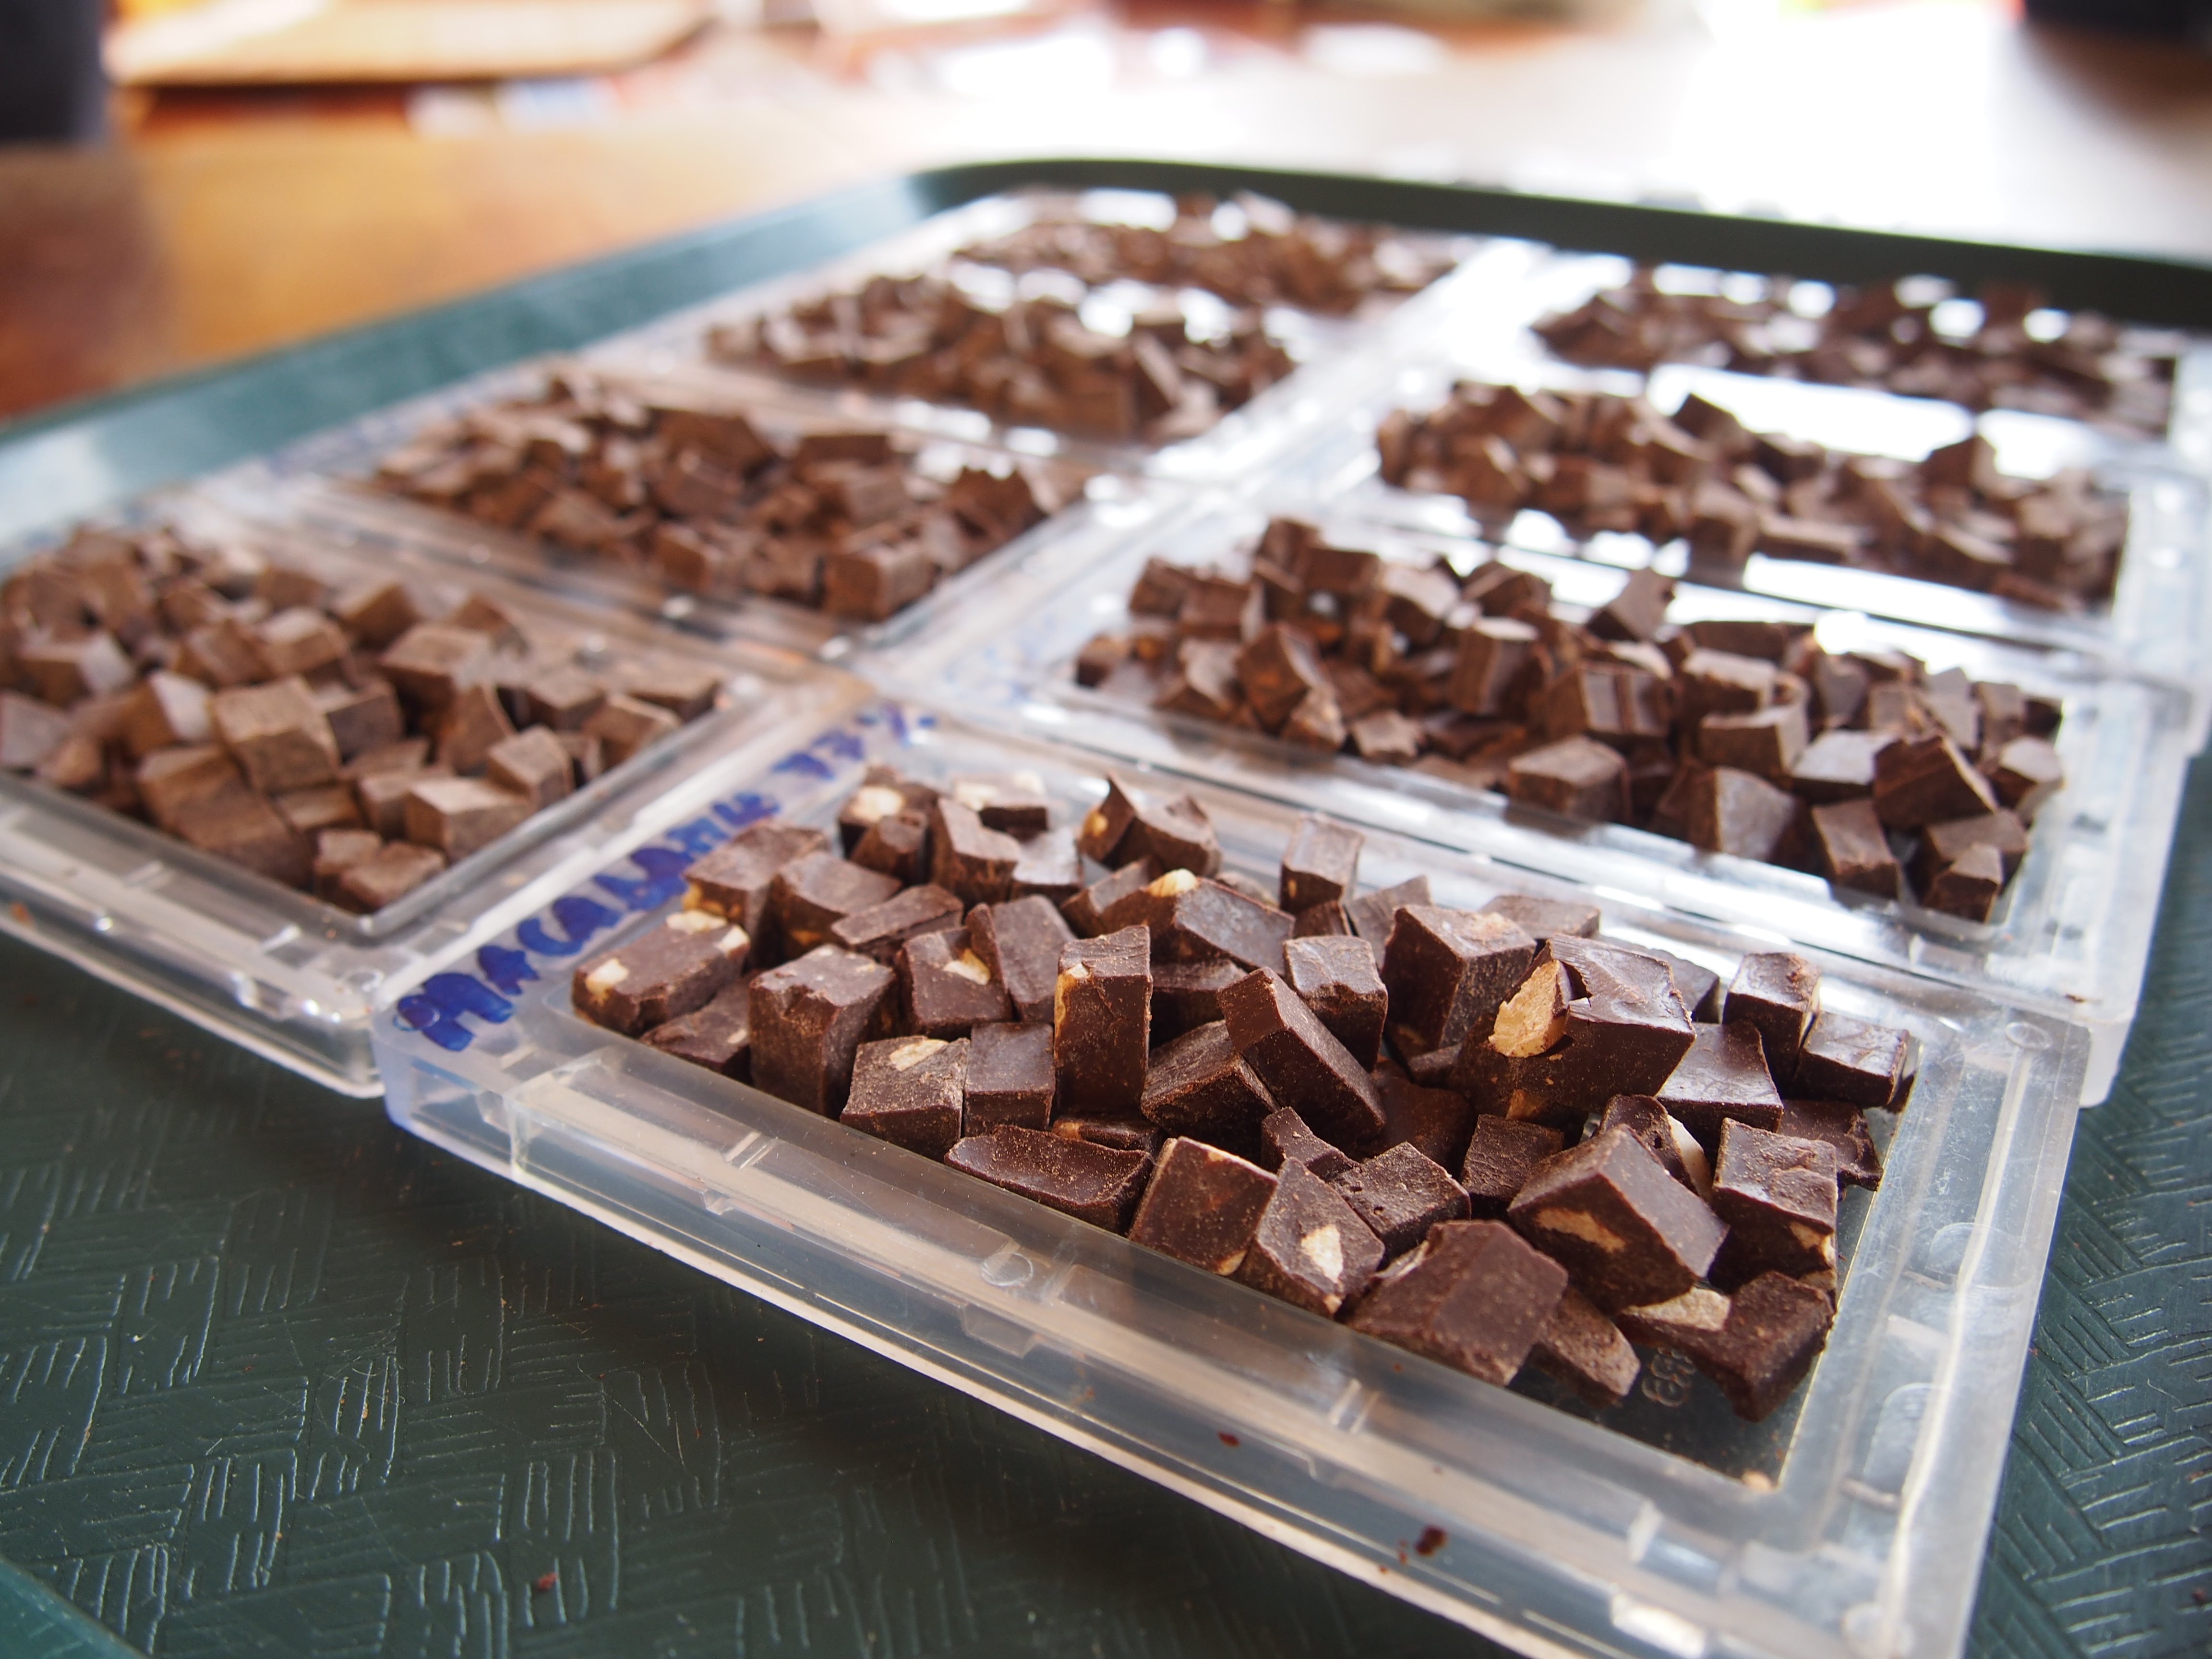
El Quetzal Chocolate Factory
The last stop of the day was the El Quetzal Chocolate Factory. The cacao beans are not grown in Mindo as the climate is too cold, however the remainder of the chocolate making process is done on site. All the ingredients are organic and grown on a family farm.
At the chocolate factory the chocolate making process is all hand done and using purpose built machines. It is interesting to see the processes undergone by the cacao bean through to chocolate bars and the home made machines to assist in this process.
All chocolates made contain only cacao, varying amounts of sugar and occasionally organic flavourings such as chilli or ginger. The chocolate tasting reinforced my love of the sweeter chocolates as opposed to the chocolate with a high percentage of cacao. The 100% chocolate resulted in a screwed up nose, while the 67% had me coming back for more!
At an elevation of 2850 metres Quito, Ecuador is the one of the world’s highest cities. The city is in a valley between the mountains, it’s only 6 kilometres wide and 40 kilometres long, so exploring the city can involve large amount of walking up and down. Arriving in Quito may have you feeling light headed and short of breath, but just remember to take it slow, drink lots of water and allow yourself to acclimatise to the altitude.
The city of Quito gained its name as an adaptation of the local Quitu people. It was a major Inca city, until the Spanish arrived and conquered it in 1534. The city was built up by the Spaniards from the 17th century, and it is many of these buildings which remain in the Old Town of Quito. The old town is UNESCO World Heritage listed and is the most well preserved old town in the Americas.
Quito today is a bustling city with a population of 2.6 million. Its primary export is oil, which unfortunately can be linked to the crash of the Ecuadorian currency and other problems. Other main exports include flowers, bananas, cacao beans and tuna.
Quito is a safe and pleasant city to explore on foot, albeit at a much slower pace than normal due to the altitude. There were a number of things I did around town including a free walking tour; Middle of the World tour; I visited the Basilica; Plaza Grande, the Cathedral; the Jesuit church, Iglesia de Compañia de Jesus; Monastery of San Francisco; Iglesia de Santo Domingo, La Ronda and also; the Teleferiqo.
Some places that were recommended as good to see, that I didn’t get around to seeing include: El Pancillo and El Capilla del Hombre/Guayasamin Museum.
When: 10:30am daily (except Sunday) Cost: Free, but tips are welcome
Our tour guide Andrea from Community Hostel, provided us with a fantastic tour of her town. She is a Quiteñan and is very proud of her city. We started the tour at Community Hostel and made our first stop at the Central Market, where we learned about the local foods.
Firstly, Ecuadorians love sugar! They will take any opportunity to put sugar on or in something, such as the delicious Jugo de Mora (Blackberry juice, sweetened with of course, sugar).
Andrea also advised us that Ecuadorians have discovered the cure for a hangover; Encebollada is some form of fish and onion broth that you see advertised all over the place.
After sampling some of the local fresh juice, we continued our tour into the old town where we heard some of the history of Quito and Ecuador and Andrea pointed out the significant buildings around town, as well as showing us some of the best views within the city.
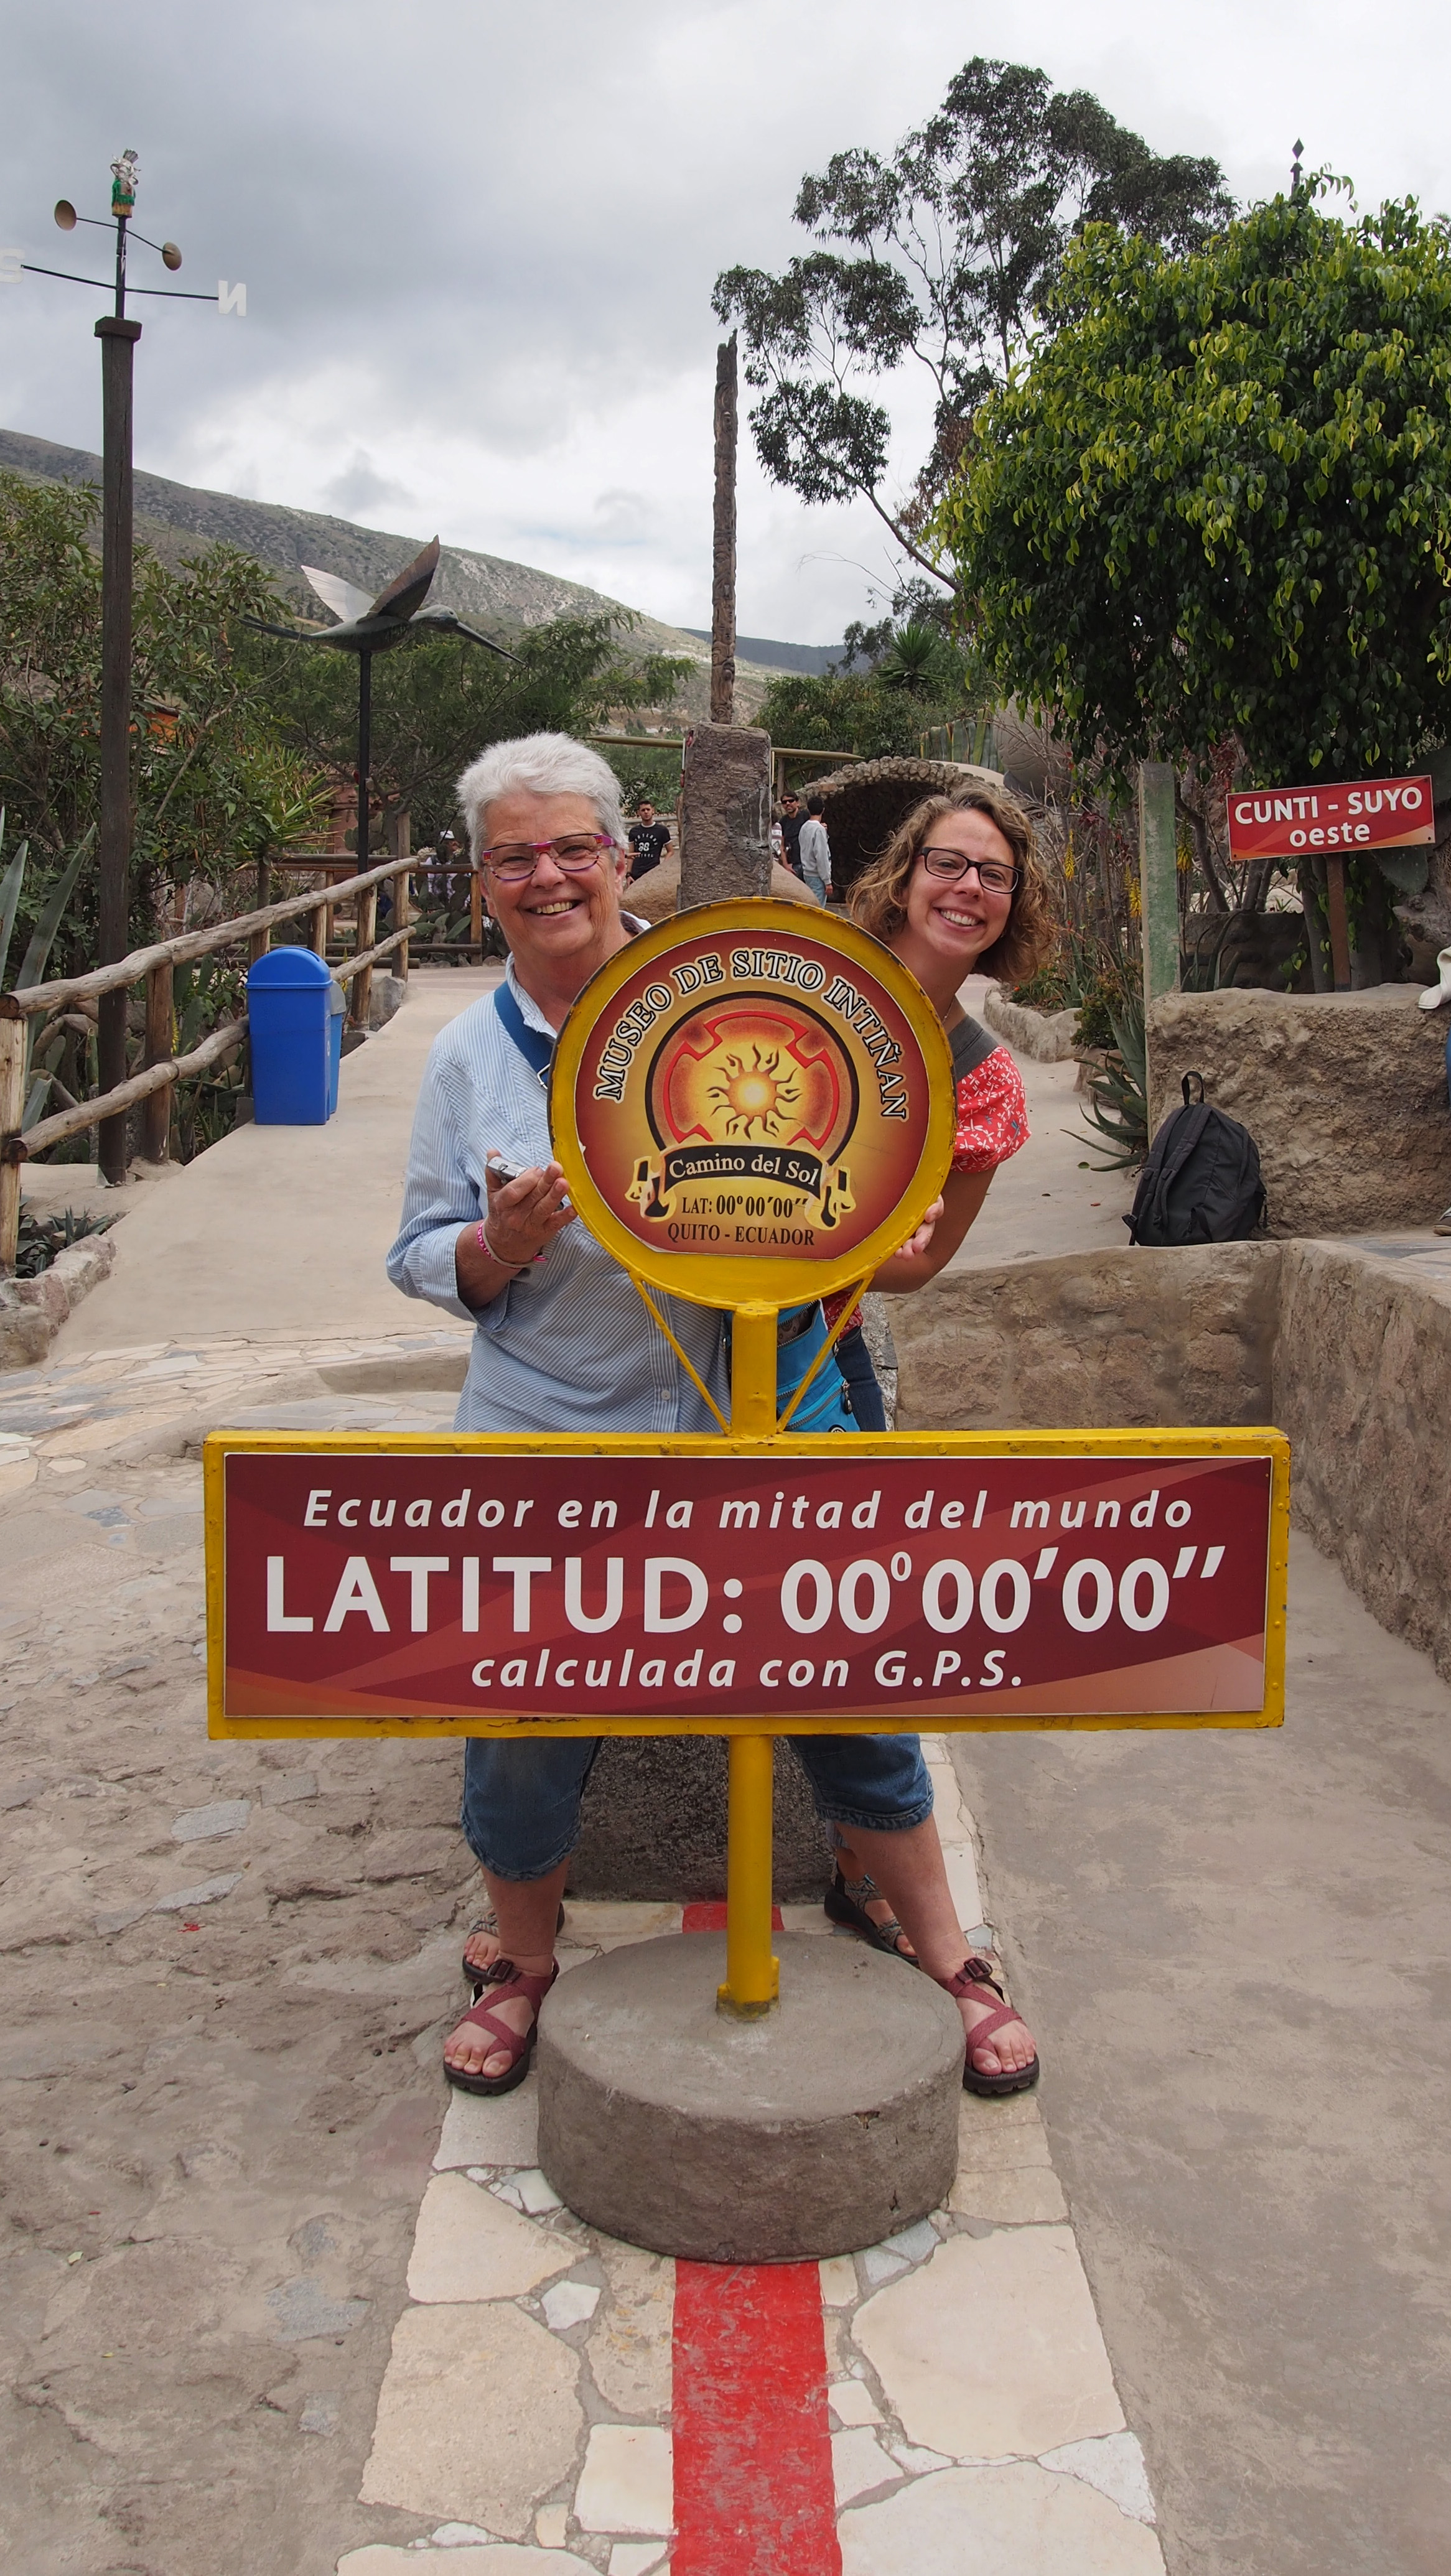
When: 2:30pm daily (except Sunday) from the Community Hostel Cost: $10 plus museum entrance fees. Intiñan Museum $4 and I did not pay to enter the ‘fake’ equator line.
In the days of the Spaniards, the equator line was identified running through the north of Quito, a monument and small city were built for tourists to come and visit. Some years later, using the new technology of GPS, the real equator line was discovered 200-300 metres away from the Mitad del Mundo museum, here the Intiñan Museum was built.
In a guided tour of the Intiñan Museum you are taught a small amount about some of the local people of Ecuador such as the Shuar Tribe who were the tribe of people known for shrinking heads to keep as trophies or allow their revered elders to live on. We also were able to perform small experiments on the equator line such as seeing water swirl different directions in the two different hemispheres, and balancing a raw egg on the head of a nail. I really enjoyed my visit to this small museum and the little experiments were fascinating and fun!
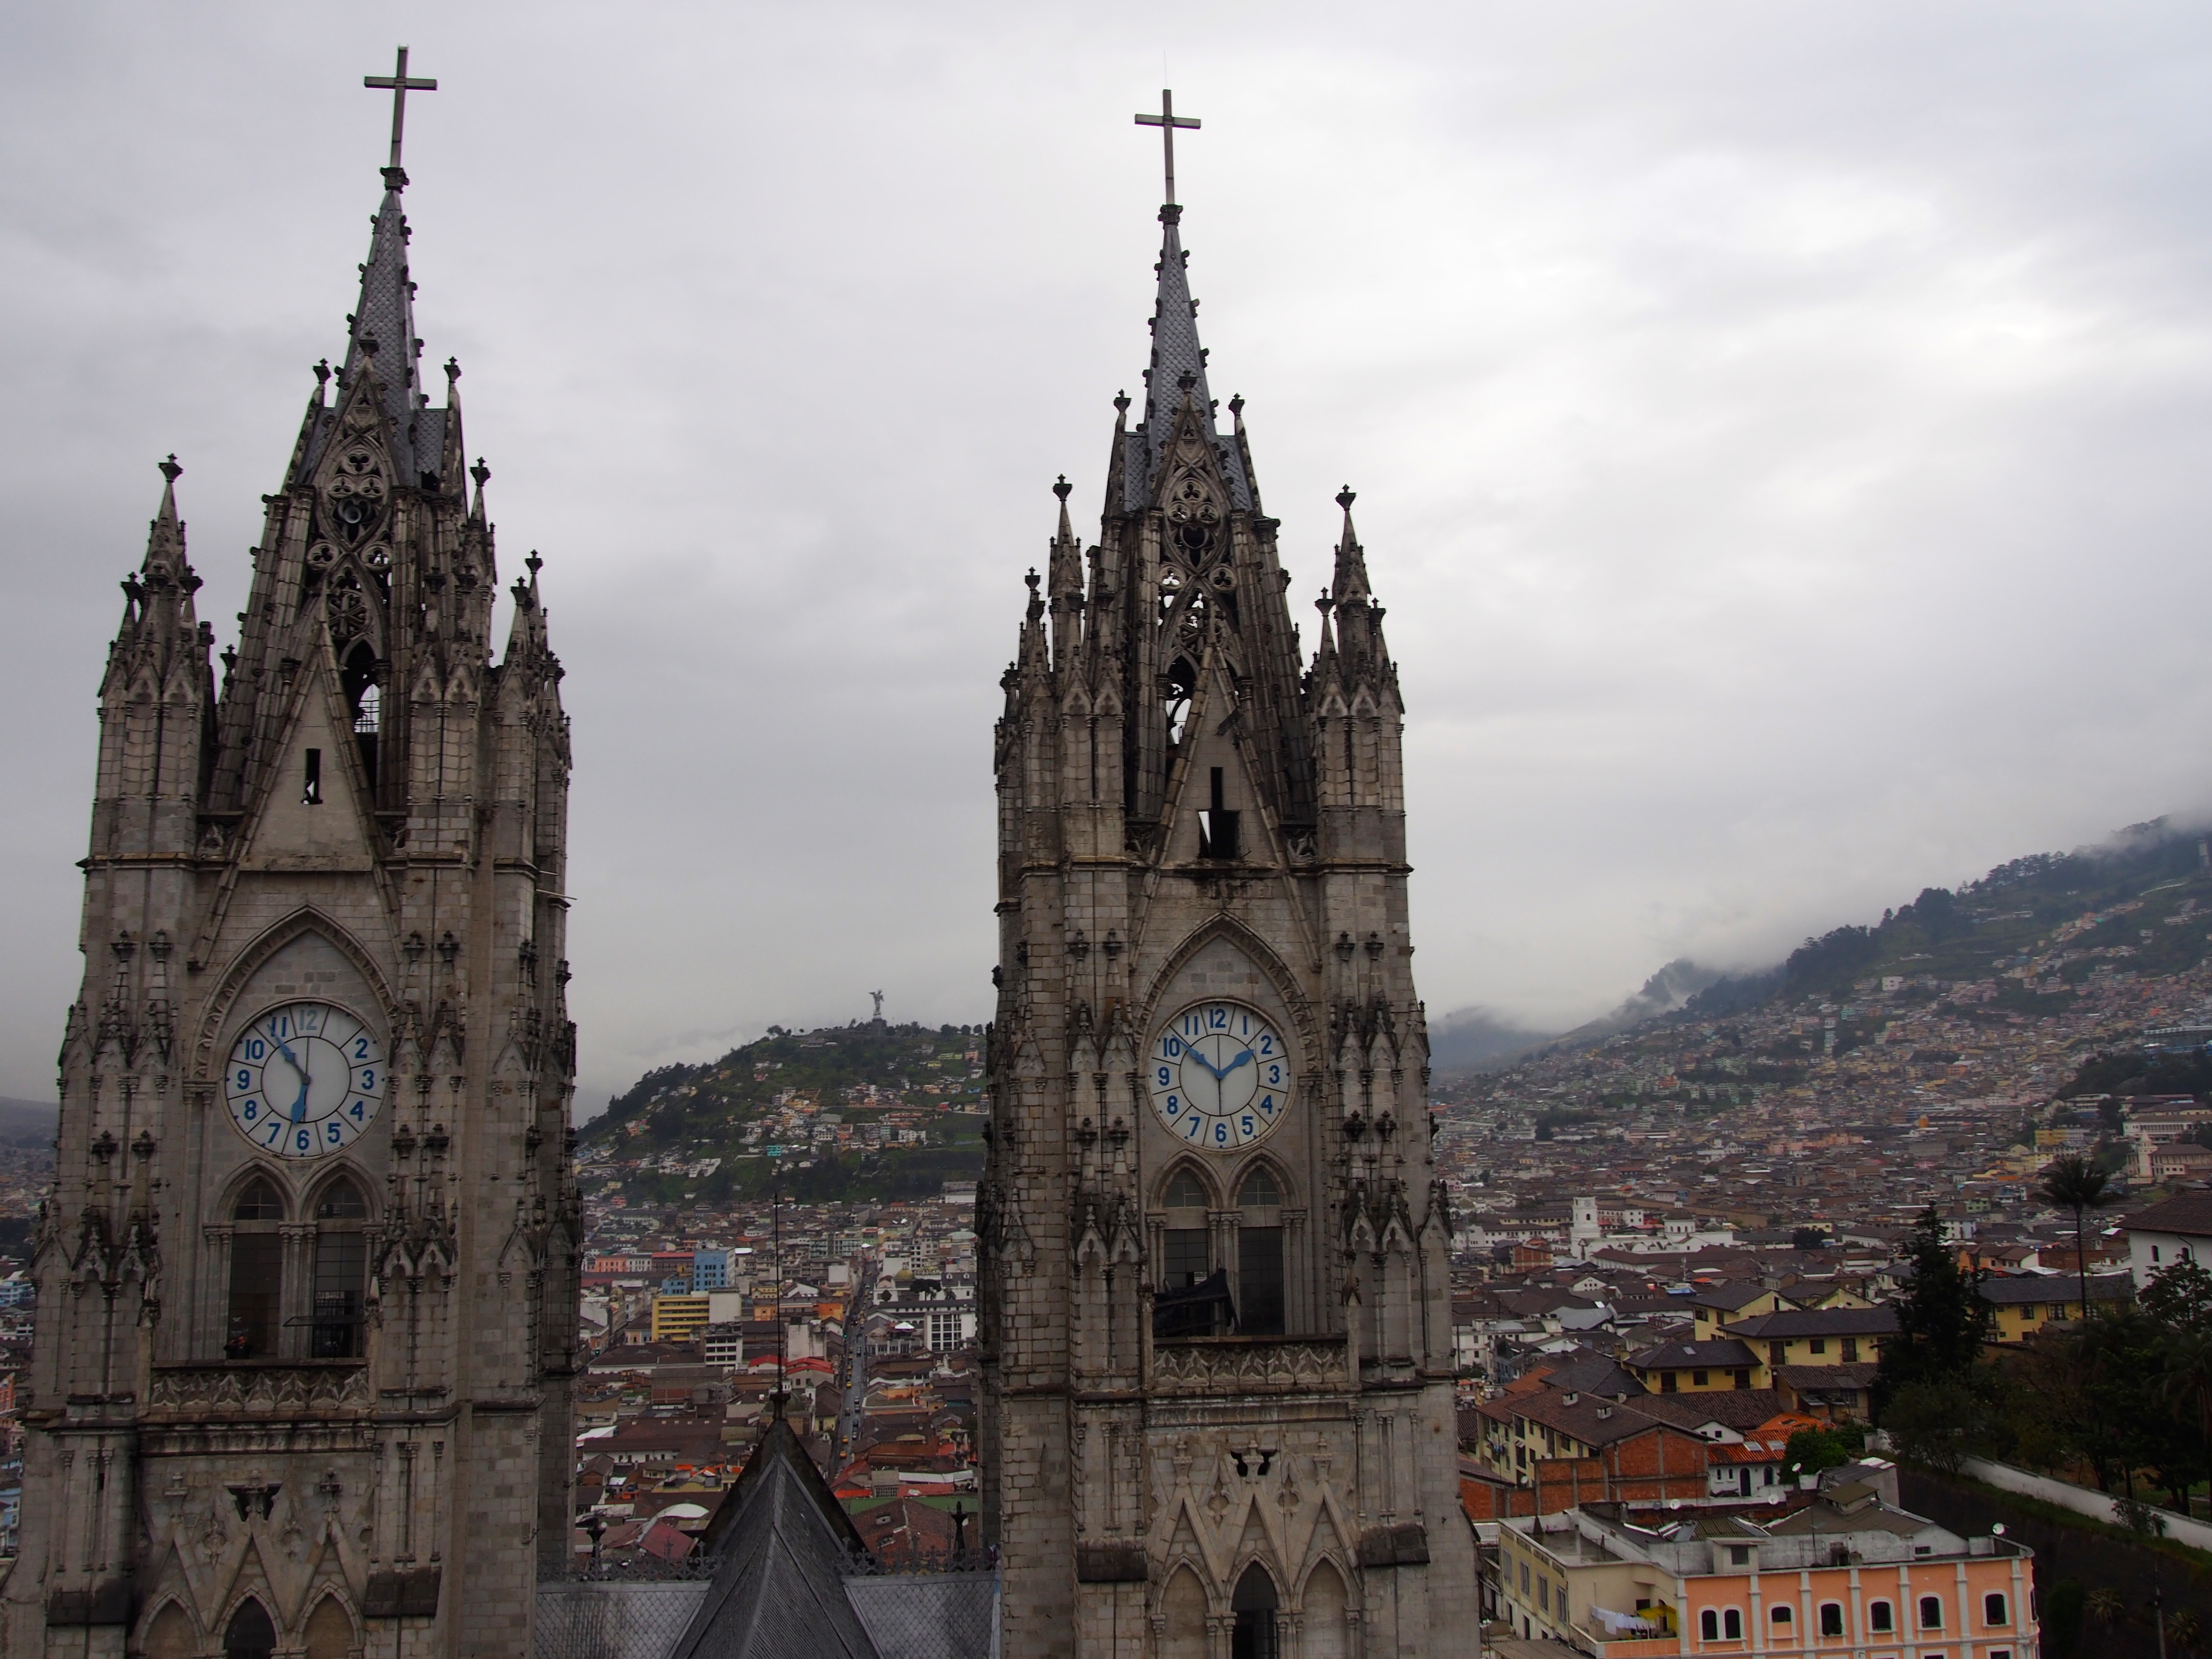
Basílica Voto de Nacional
Cost: $2 to climb the towers and $2 to visit the church.
The Basilica Voto de Nacional is the largest neo-gothic church in the Americas. It is visually comparable to the Notre Dame in Paris, except the gargoyles on the sides of the church’s exterior are native animals of Ecuador. The church interior is beautiful and the main nave is lined with stained glass windows. My favourite part of the basilica was not the church interior, rather the towers. Climbing the main tower and bell tower of the Basilica was one of my most enjoyable experiences in Quito. I had the chance to walk rickety timber boardwalks and exposed steel ladders to pop out at the top of these towers to gain a magnificent view of the city.
Plaza Grande
Cost: Free
Plaza Grande is essentially the central point of the old town. It is a large green plaza, with a sculpture of independence in the centre. It is clearly the place where locals come and hang out to enjoy the sunshine, relax and read the paper or try to sell their goods. The plaza is flanked by beautiful old buildings on three sides: the Archbishops palace which has been converted into shops and restaurants, the Presidential Palace and the Cathedral. The fourth side of the plaza houses the tourism office in a modern building that doesn’t suit the old town at all.
Having a coffee at one of the traditional old cafes under the Cathedral or sitting on one of the park benches enjoying a freshly made juice is a great way to spend the time and people watch as the locals go about their business.
La Catedral
Cost: $2
The Cathedral is the main church on Plaza Grande at the center of the Old Town. It was quite a lovely church, but in my opinion, many other churches in the area are more spectacular.
Iglesia de Compañia de Jesus
Cost: $5, or free on the first Sunday of every month. There is an additional cost to climb to the cupola (the cupola closes before the church and I didn’t have the chance to do this)
The Iglesia de Compañia de Jesus is the most elaborately detailed church I have seen. The rich Jesuits built the church over a period of 160 years. The elaborate and intricate designs are both external and internal. The value of the internal design is however much higher, with a huge number of surfaces being covered in gold leaf. Most of the interior glitters with gold.
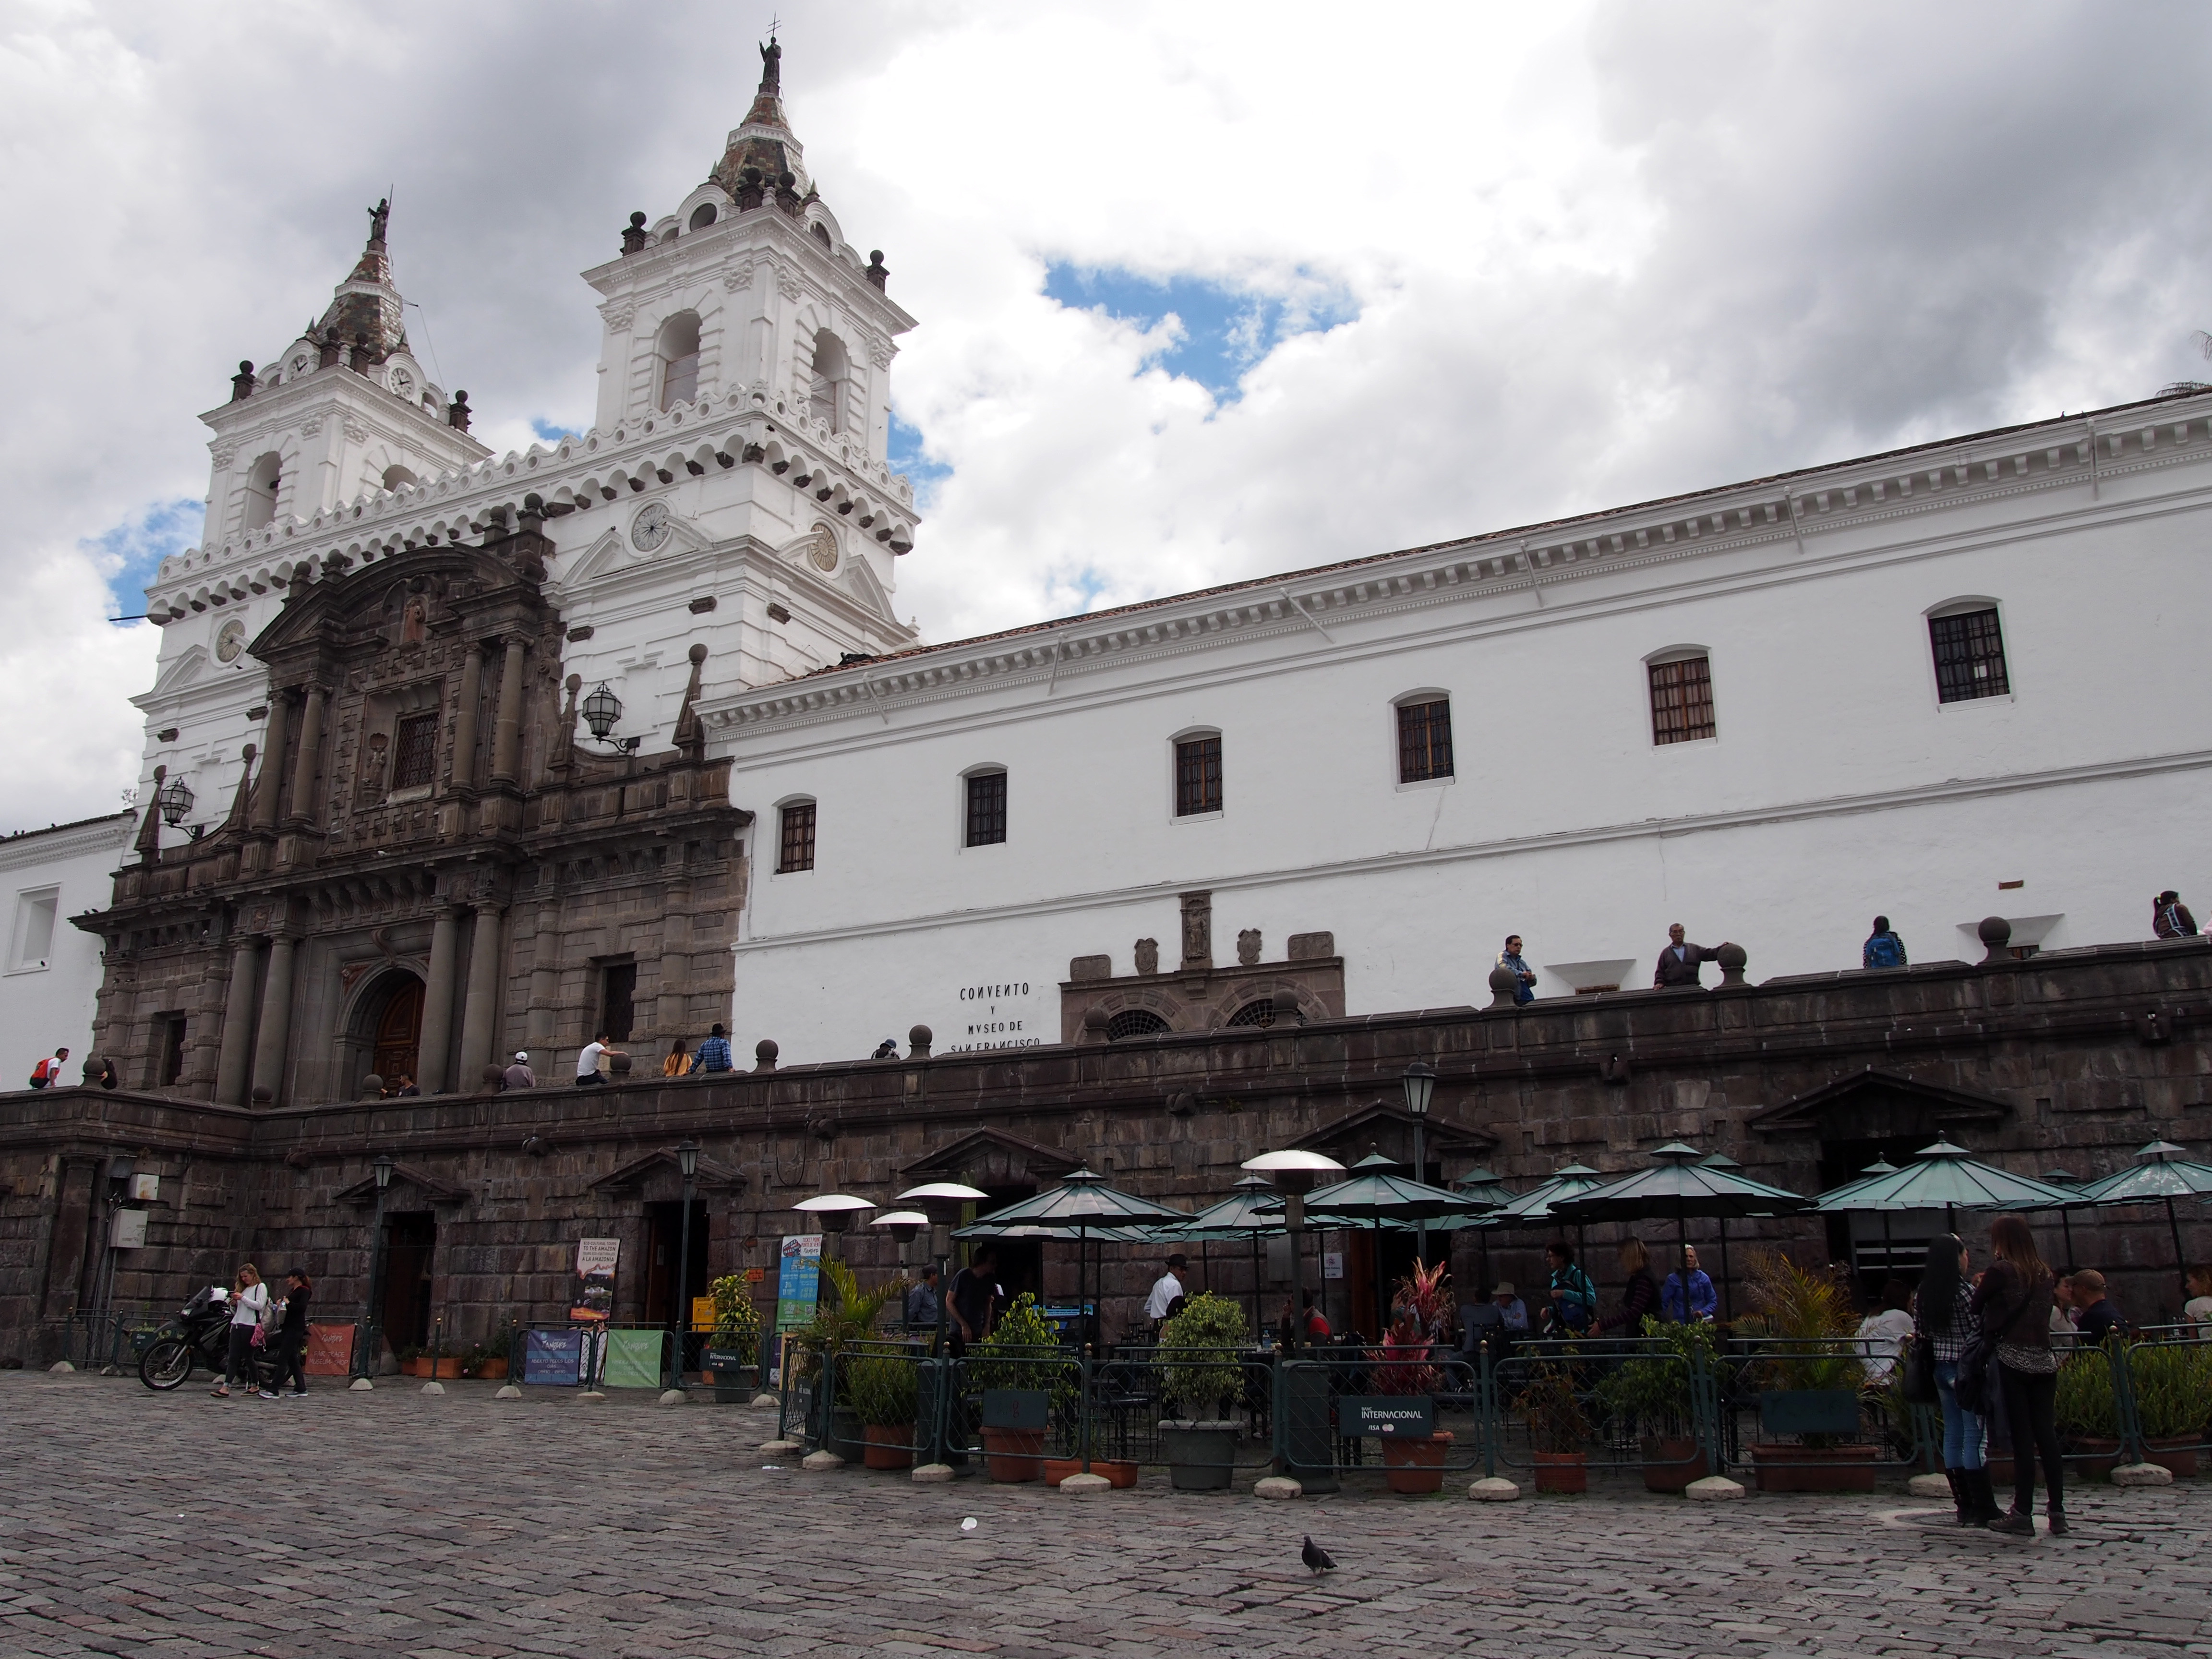
Monastery of San Francisco
Cost: $2
The long white building of the Monastery of San Francisco is a place to visit if you enjoy religious art and churches. It is the largest colonial structure in the city and took 70 years to build. Your entry free provides access to a small museum or gallery, a lovely internal garden courtyard and the church. The church is rather spectacular to see, with bright colours, elaborate paintings and highly detailed timber work. Unless you are particularly religious, it is probably not a place that would be high on my list of recommended places to visit. The plaza in front of the Monastery is busy with the construction of a new metro system, but still is a great place to buy from local artisans wandering through or stop and enjoy a coffee.
Iglesia de Santo Domingo
Cost: Free On the Plaza Santo Domingo is the Church of Santo Domingo. It is a beautiful church with fascinating bright blue patterned paintwork. The plaza is a pleasant place to wander through, where local food sellers occasionally set up stalls. It’s a little out of the main hub of the old town, but to me the lack of tourists buzzing around made my visit that little bit more pleasant and culturally rich.
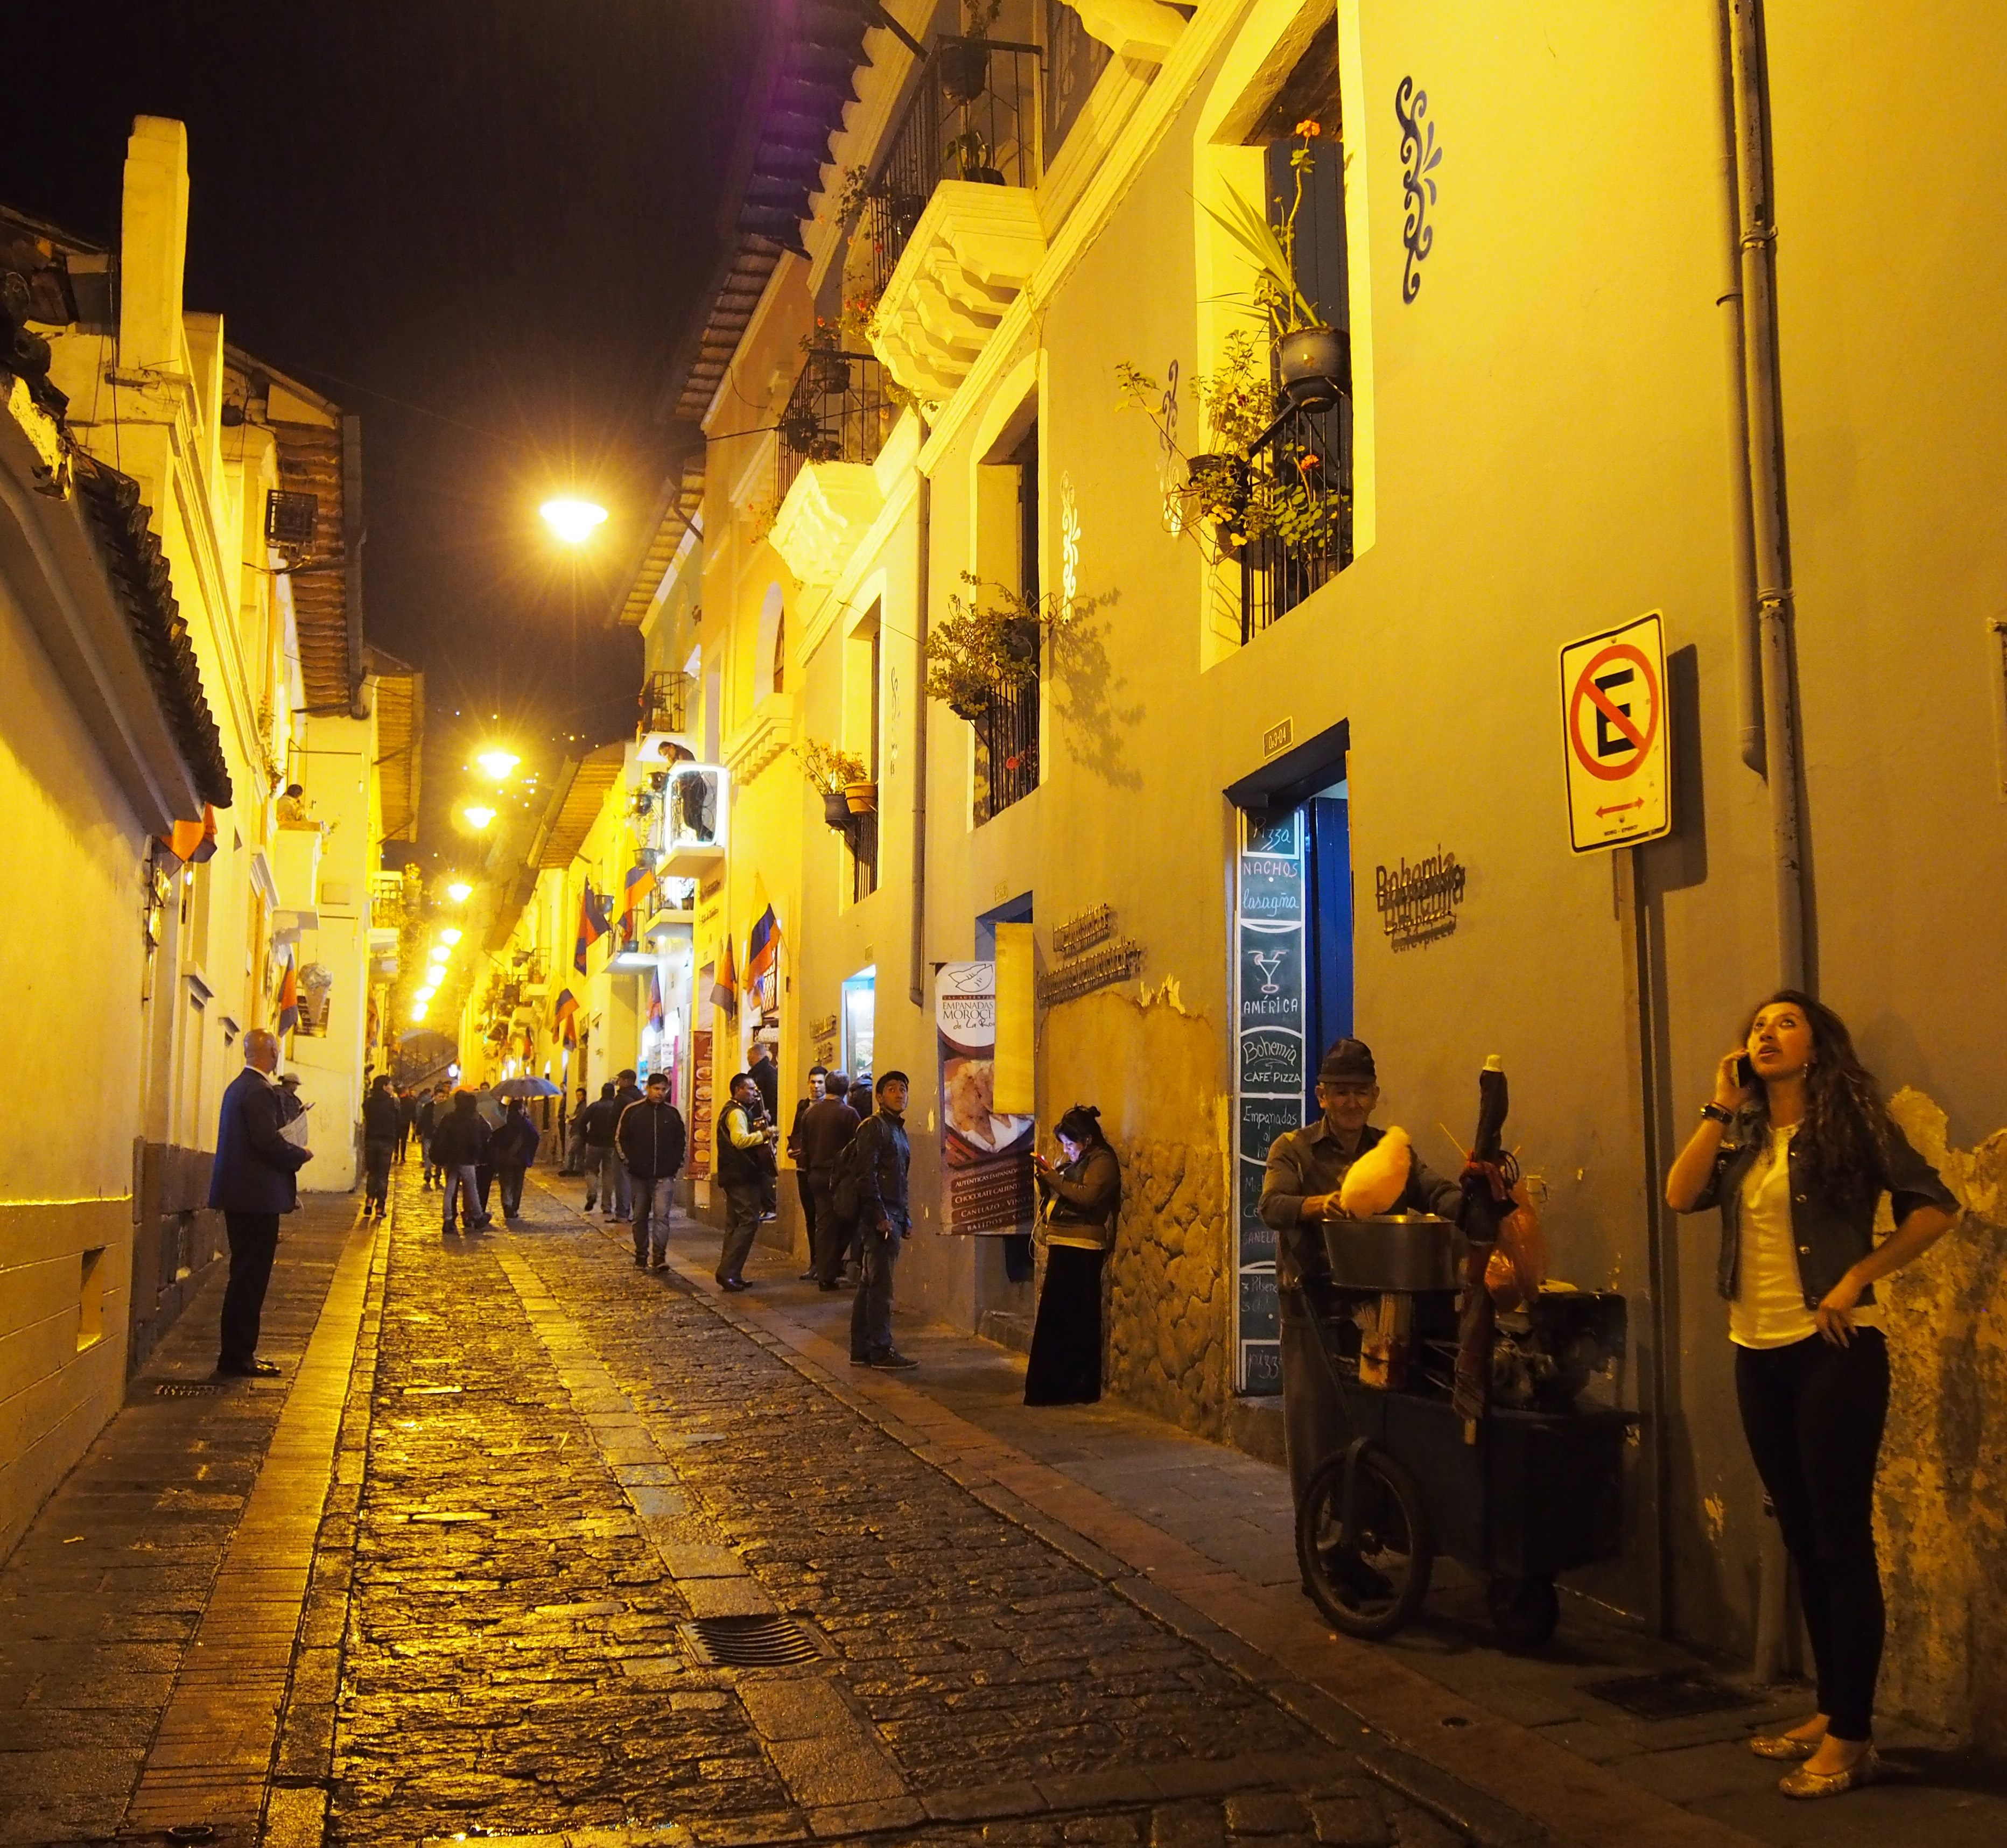
La Ronda
Cost: Free
Calle La Ronda is the oldest street in Quito. The street houses several artisan shops for chocolate, coffee, honey, metal work, timber work etc. After the sun sets is when the street really comes to life with busy restaurants and bars. The thing to do is stop in for a giant cheese empanada and the traditional drink, Canelazo while listening to live music.
TeleferiQo
Cost: $8
Getting a taxi or bus out to the TeleferiQo is a fabulous idea. You ride the cable car up to a height of 4100metres and are afforded stunning views over the whole city of Quito. It is from here that you are able to appreciate just how mountainous the town is, despite it being in a valley. From the arrival station you can continue up by hiking or riding a horse to the upper station at 4800metres. With friends and family, we decided the lower station was enough for us.
Artisan Market
Cost: Free
In the newer suburb of Mariscal is an artisan market with handicrafts made by local Quiteñans and Otavaleñans. If you don’t have the time to visit the markets in Otavalo, then this market is a fantastic alternative option.
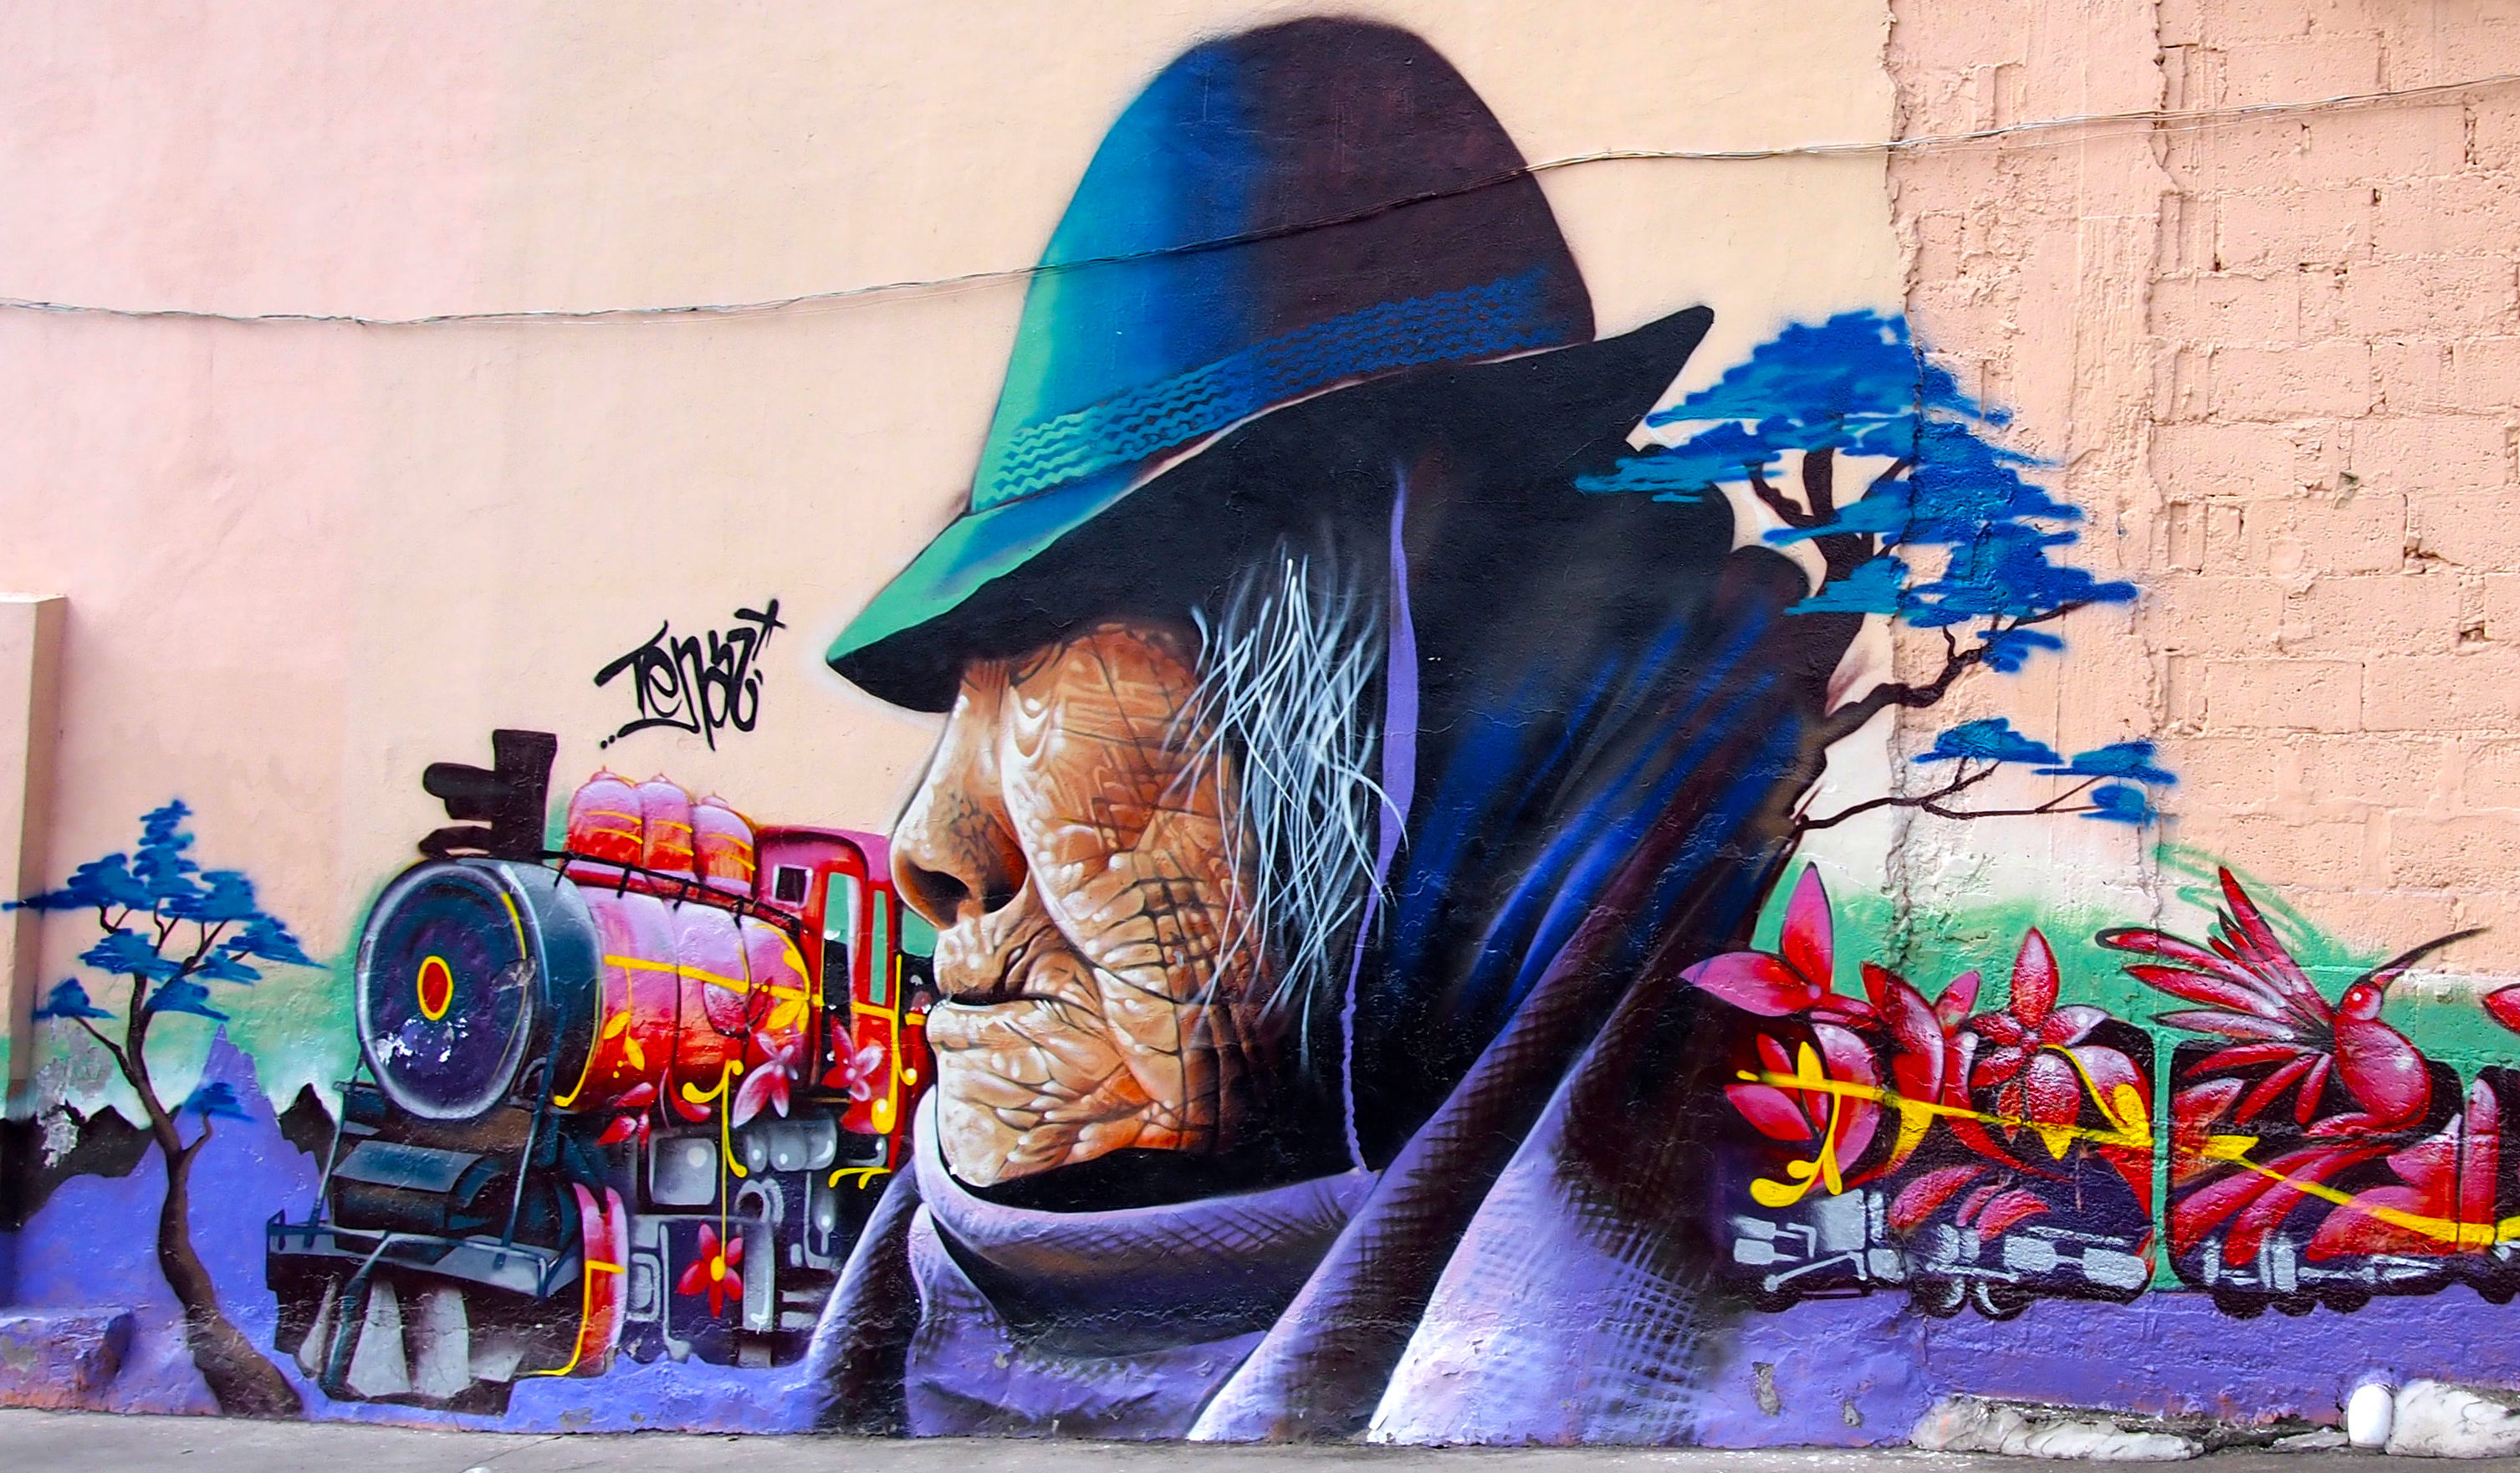
I’m not particularly into art or museums, but my dorm buddy in Quito was, so I figured I would tag along. I was glad I did.
The Contemporary Arts Museum is free to enter. It is located in a position on the hill which has a good view of the city and on the way there I walked past loads of street art, which I enjoyed photographing.
The arts museum was housed in a fascinating building which was a combination of old and new design styles. The few art installations insides the museum were also quite fascinating, though for me the building itself was the highlight.
The bucketpass is a pass where you pay a set price and get access to a certain number of attractions/visits and it works out to be slightly cheaper than all the separate ticket prices.
I only learned of the bucketpass after having explored Quito. There are numerous things covered by the pass that I did not see. However based on your interests, it may be worth looking into.
Food in Ecuador is reasonably cheap and I always try to eat the local cuisine in restaurants where the locals might eat.
Breakfast: I always book into accommodation where breakfast is provided.
Lunch: Typically a set menu with 3 courses for $3.
Dinner: One course with meat, rice and lentils or beans, usually around $5.
A good area to find food is around Foch Plaza in the suburb called Mariscal. In the middle of the plaza you will find more trendy, modern restaurants which are also more expensive. In the streets just off the plaza you will find more local food at a more affordable price.
Accommodation
For a private room in a budget hotel you can expect to pay around $20-$30 per night.
For a bed in a hostel dorm room you can expect to pay somewhere around $9 – $15
As per usual, whether it is a hostel or hotel, I book using booking.com
Transport
Buses around Quito and beyond cost on average $1 per hour of travel, which is quite cheap. The biggest problem is that there is a bus station at either end of the city, which take an hour to get to. THEN you can take your bus to your onward destination. A taxi to one of these stations may cost up to $10.
Taxis around town are hit and miss. When you catch a taxi, make sure it is Taxi Seguro (secure/safe taxi), check that it has cameras and that it uses a meter. If it doesn’t use a meter, negotiate your price before getting in. When the meter is on, the prices are typically really good.
Walk.. walking and getting lost in a new city is a very enjoyable experience and you come across all sorts of interesting things. I consider Quito safe to explore by foot, but I would not recommend walking up the hill up to El Pancillo. The area around El Pancillo is where all the thieves used to hang out, and the place you are most likely to be mugged.
Airport transfers, with a bus you can expect to pay $2 between Quito and the airport. For a taxi the standard rate is $30.
Otavalo is North of Quito, an area well known for its indigenous craft market and neighboring mountains and lakes. My reason for heading to Otavalo was to stay with a host family for a week while I attended daily Spanish lessons. My intention was to study Spanish for the first half of each day and explore the area in the afternoons, only my plan went a little bit pear-shaped on Day 2…
Spanish School
Parque Simon Bolivar
Knowing that I would be travelling South America for the coming months (and having travelled to so many Spanish speaking countries) I decided it was time to work on my Spanish skills. So I spent hours researching and emailing various Spanish schools around Ecuador, comparing costs and locations.I finally settled on Mundo Andino in Otavalo. The cost was $145 for 20 hours of private Spanish lessons over the course of one week (4hours per day for 5 days), plus $17 per night to be placed with a local host family.
The director of the school Aida was fabulous in arranging everything for me and was great at helping me get settled. My teacher Mayra was absolutely lovely and did her best at helping me increase my Spanish level. We combined grammar theory, with grammar practice, as well as learning expressions and phrases, in addition to getting side-tracked with very stilted conversation.
After a week of Spanish, I certainly still can’t hold a conversation but I can speak and understand a great deal more than before. So while I still have a long way to go, I consider my Spanish lessons a success.
My host family
Located in the centre of Otavalo, just three blocks from my Spanish school, was my home with the Montalvo family. Maria and Pablo and their children Pablo and Camila. Their oldest daughter Lizeth was there for the first day before heading back to Quito where she lives for study purposes. Also living in the home was Christina, Pablo Senior’s sister.
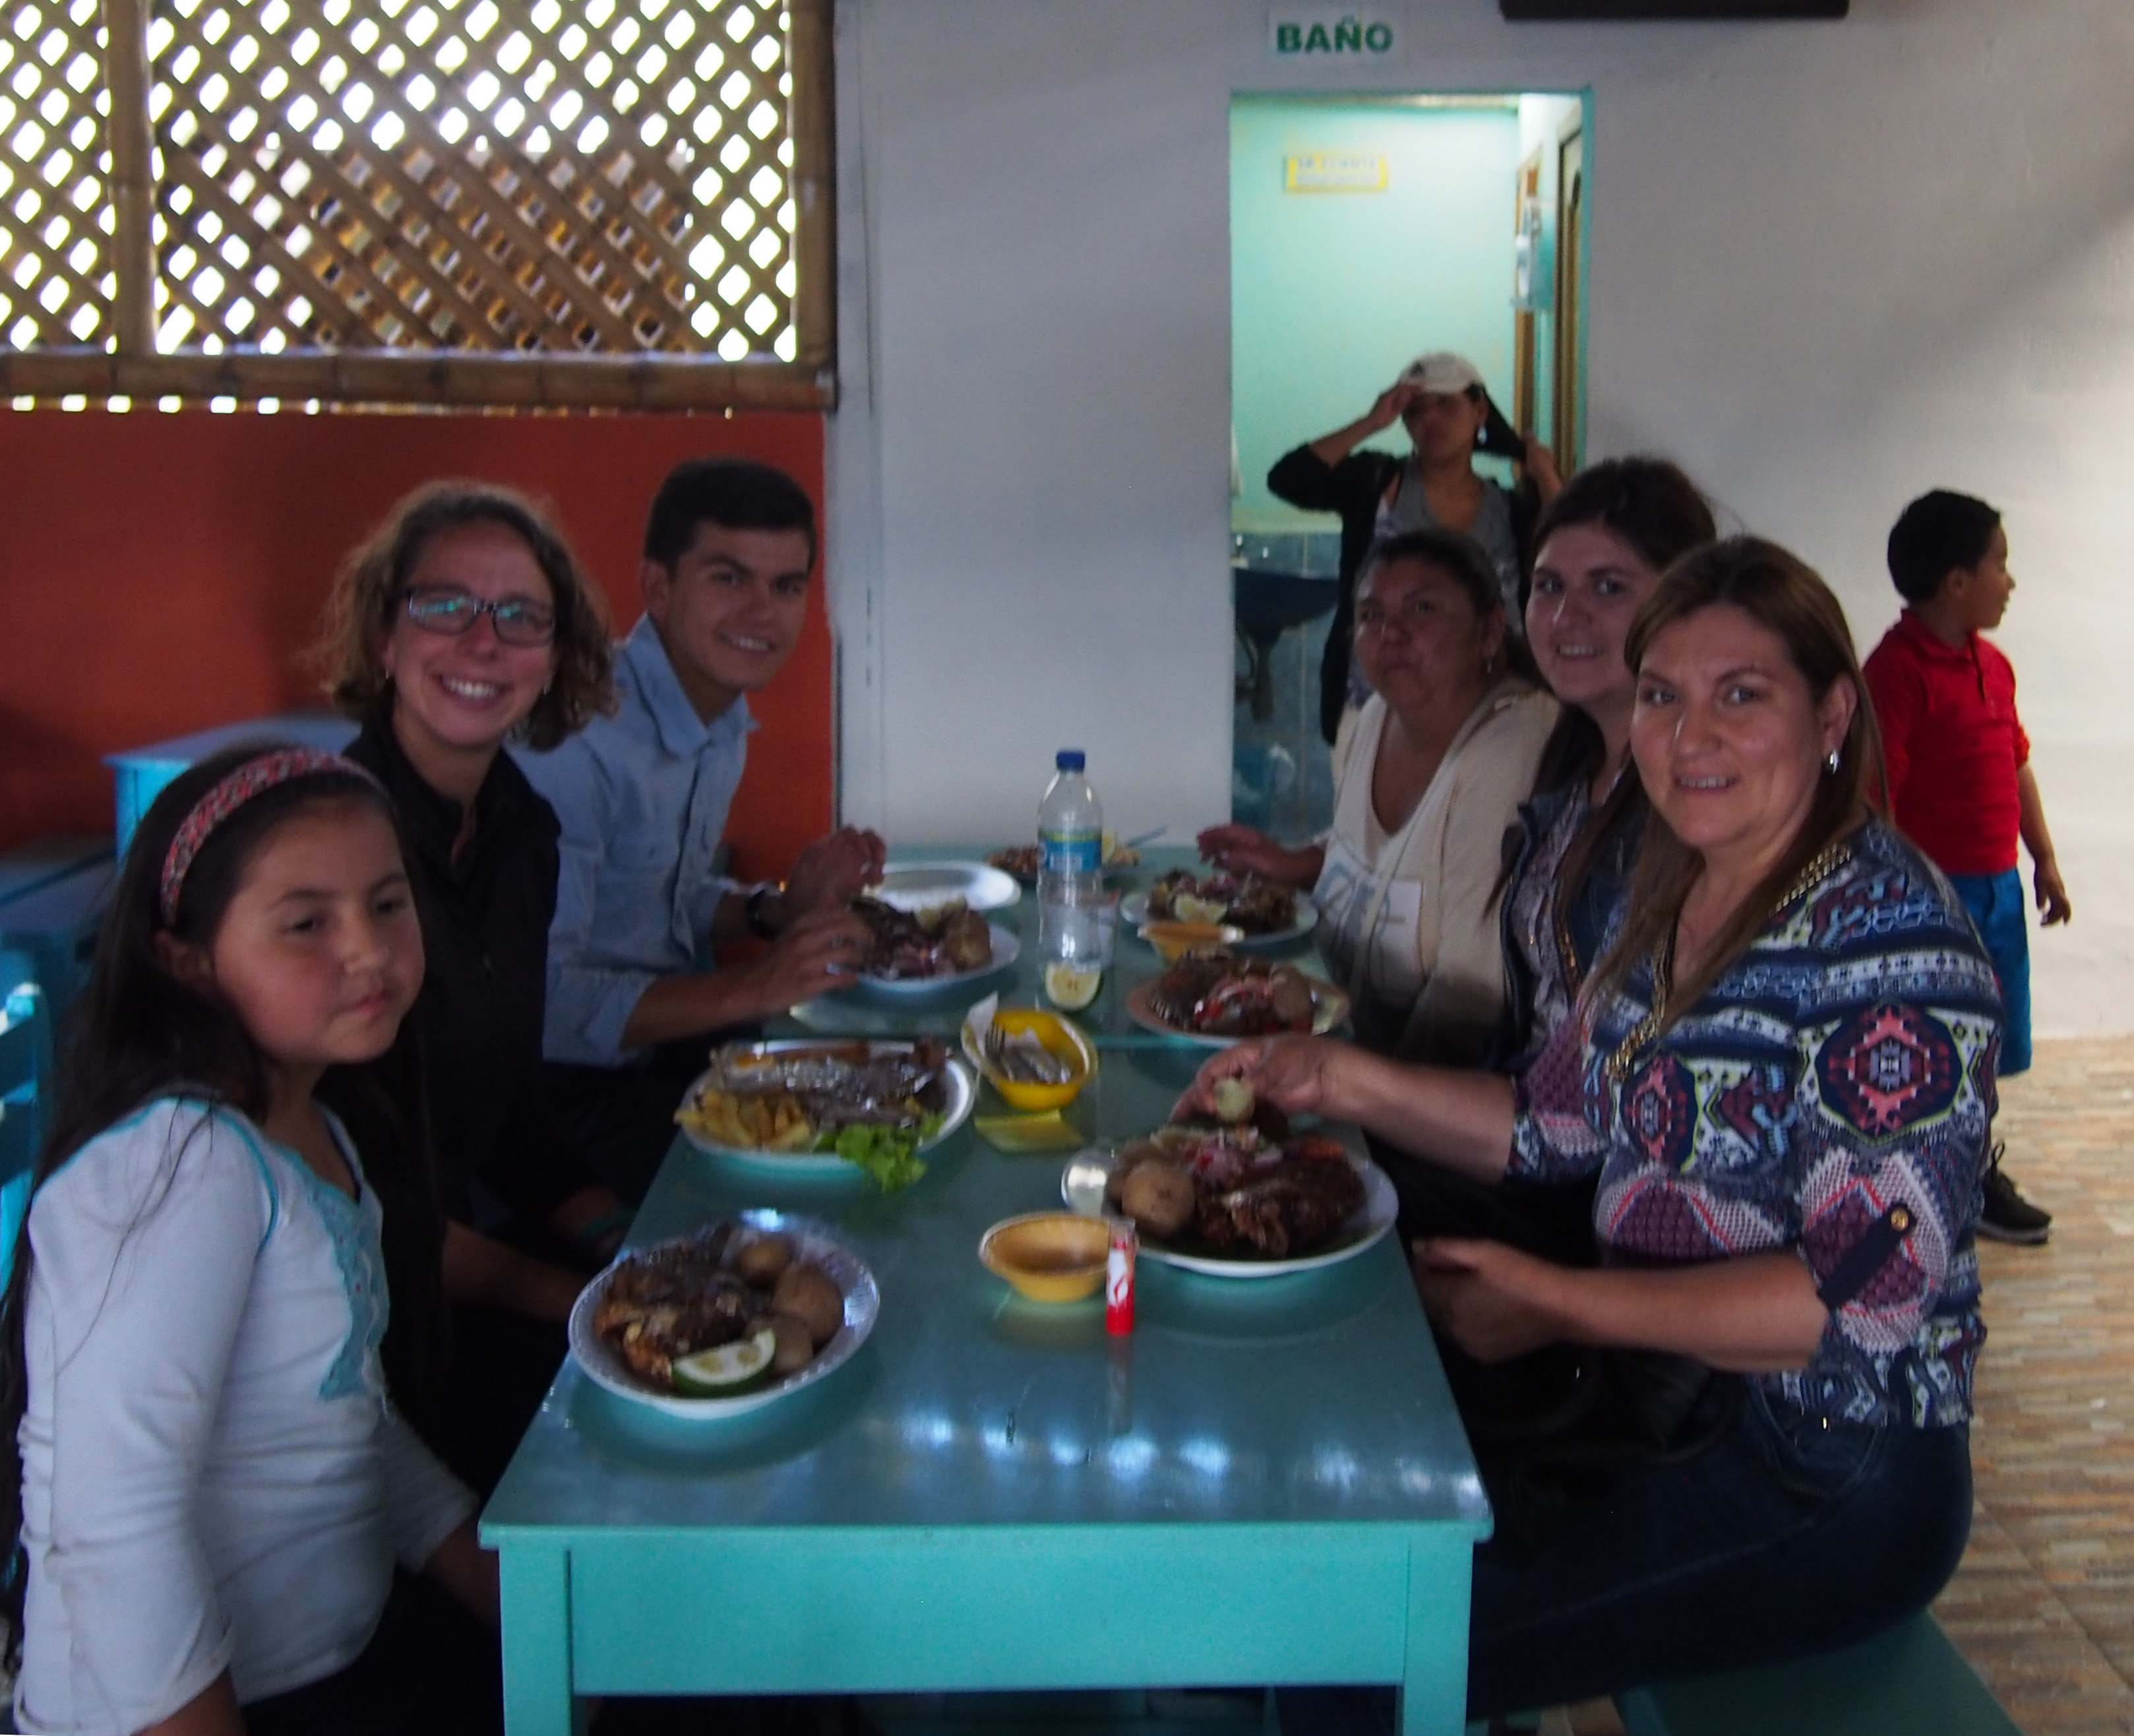
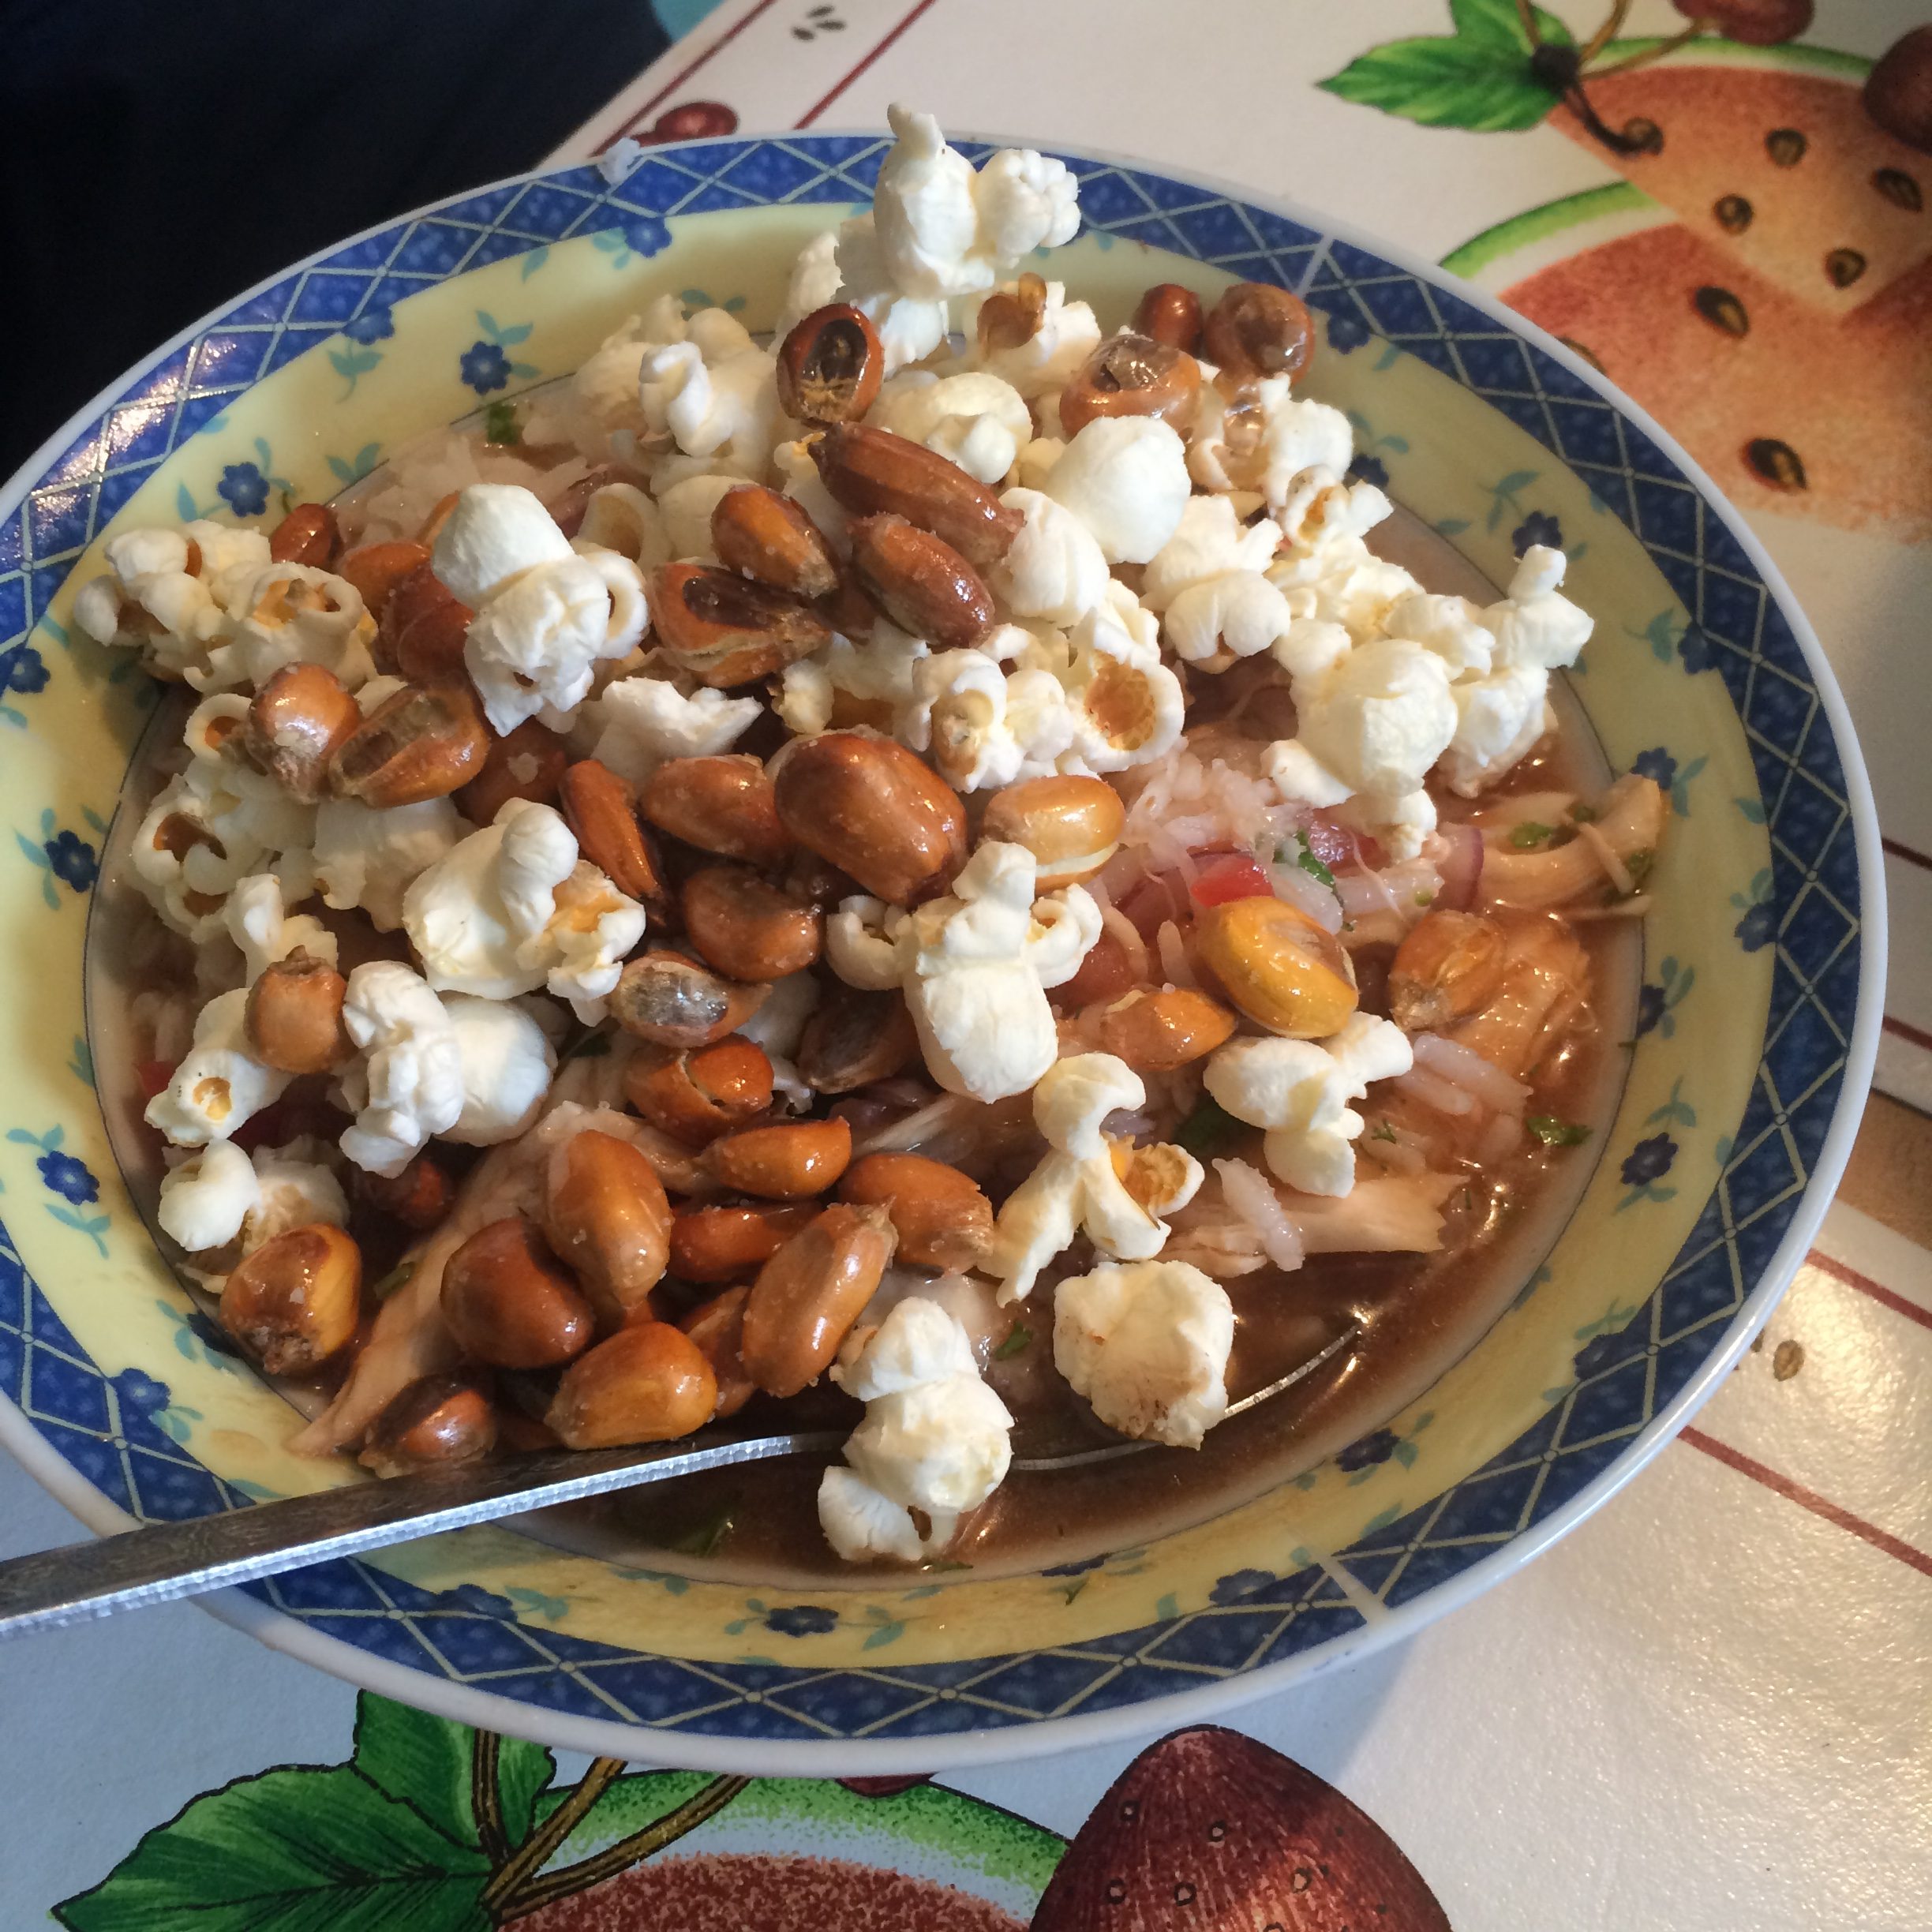
I arrived around midday on a Sunday. My family warmly welcomed me into their home, before taking me off on an adventure to nearby town Ibarra. We went to the local lake Yahuarcocha for a traditional Ecuadorian meal. Fish is the typical dish, but I was grateful to find a meat dish to eat while my family tucked into their fried fish meals.
We finished our first day together with a family trip to the cinemas, where Cristina, Lizeth, Camila and I watched Buscando a Dory (Finding Dory). It was a throughly entertaining movie, and I loved it even though I only understood about 10 words! Maria and Pablo Jnr were more into the terror genre and headed off to see the Conjuring 2.
The following day I started into the routine of breakfast at 8:30, school from 9-1. Lunch at home at 1:30. The afternoon for homework and/or exploration. Dinner at 7. Continue homework and then sleep.
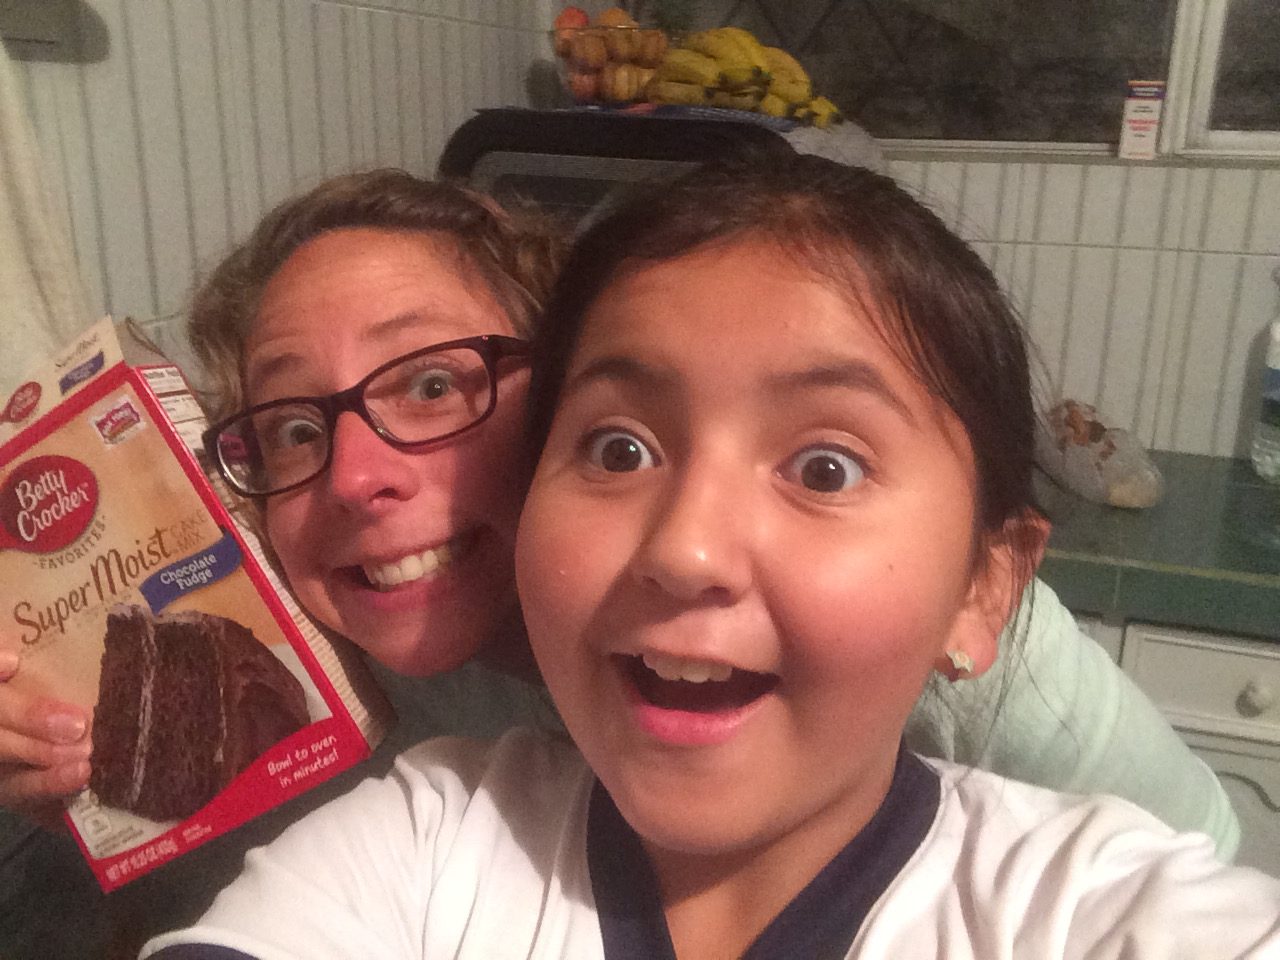
Aside from meal times, I didn’t spend much time with my host family, they all lead busy lives themselves with school and work. I did however spend some time with my little sister Camila. Together we baked a cake for her teacher in celebration of the last day of the school year. We sang (I attempted to sing) along with contemporary Spanish songs and danced like crazies. She also was interested in my website, and was super keen to write something…
Camila’s Short post about Otavalo
Ecuador es muy lindo a pesar de ser un paìs pequeño tiene mucha biodiversidad es el paìs que tine diversas culturas, Imbabura es donde yo vivo tiene mucha cultura donde esta el corazón del imbabura , el lago san pablo , el lechero, la cascada de peguche etc.
My interpretation of Camila’s post: Ecuador is a very nice place, despite being small it has a great deal of biodiversity and diverse cultures. The heart of Imbabura where I live, has much culture: San Pablo Lake, El Lechero (a sacred tree), Peguche Waterfall etc.
She would have liked to continue writing, but at that point in time we had to go eat dinner, and we didn’t get back to finishing her post.
Attempts to explore and resulting disaster…
After some time spent reading the lonely planet guide, talking to my new siblings and internet reading, I had quite a little list of activities I wanted to do while in Otavalo. This list included seeing the market, visiting the local sacred tree El Lechero, walking to Peguche Waterfall and walking around Lake Cuicocha.
After my first day of Spanish classes I figured I would start with something fairly small, a walk up the hill to El Lechero. I was told it was pretty well sign posted and was about a 20 minute walk.
I downloaded the google map, slung my camera over my shoulder and off I went. As I went up into the line of houses on the hill I got some good views of the city and some pictures of cool street art. I started to head off into the section of unsealed roads, and then dirt trails, regularly asking random passersby for directions. Eventually I got to a narrow little goat trail up the hill, whistling as I walked, enjoying the great outdoors. I popped up near the hilltop assuming I should be pretty close, but didn’t know whether to follow the trail left or right. I headed left where there was a ramshackle farmhouse, I thought I may be able to call out and ask for directions.
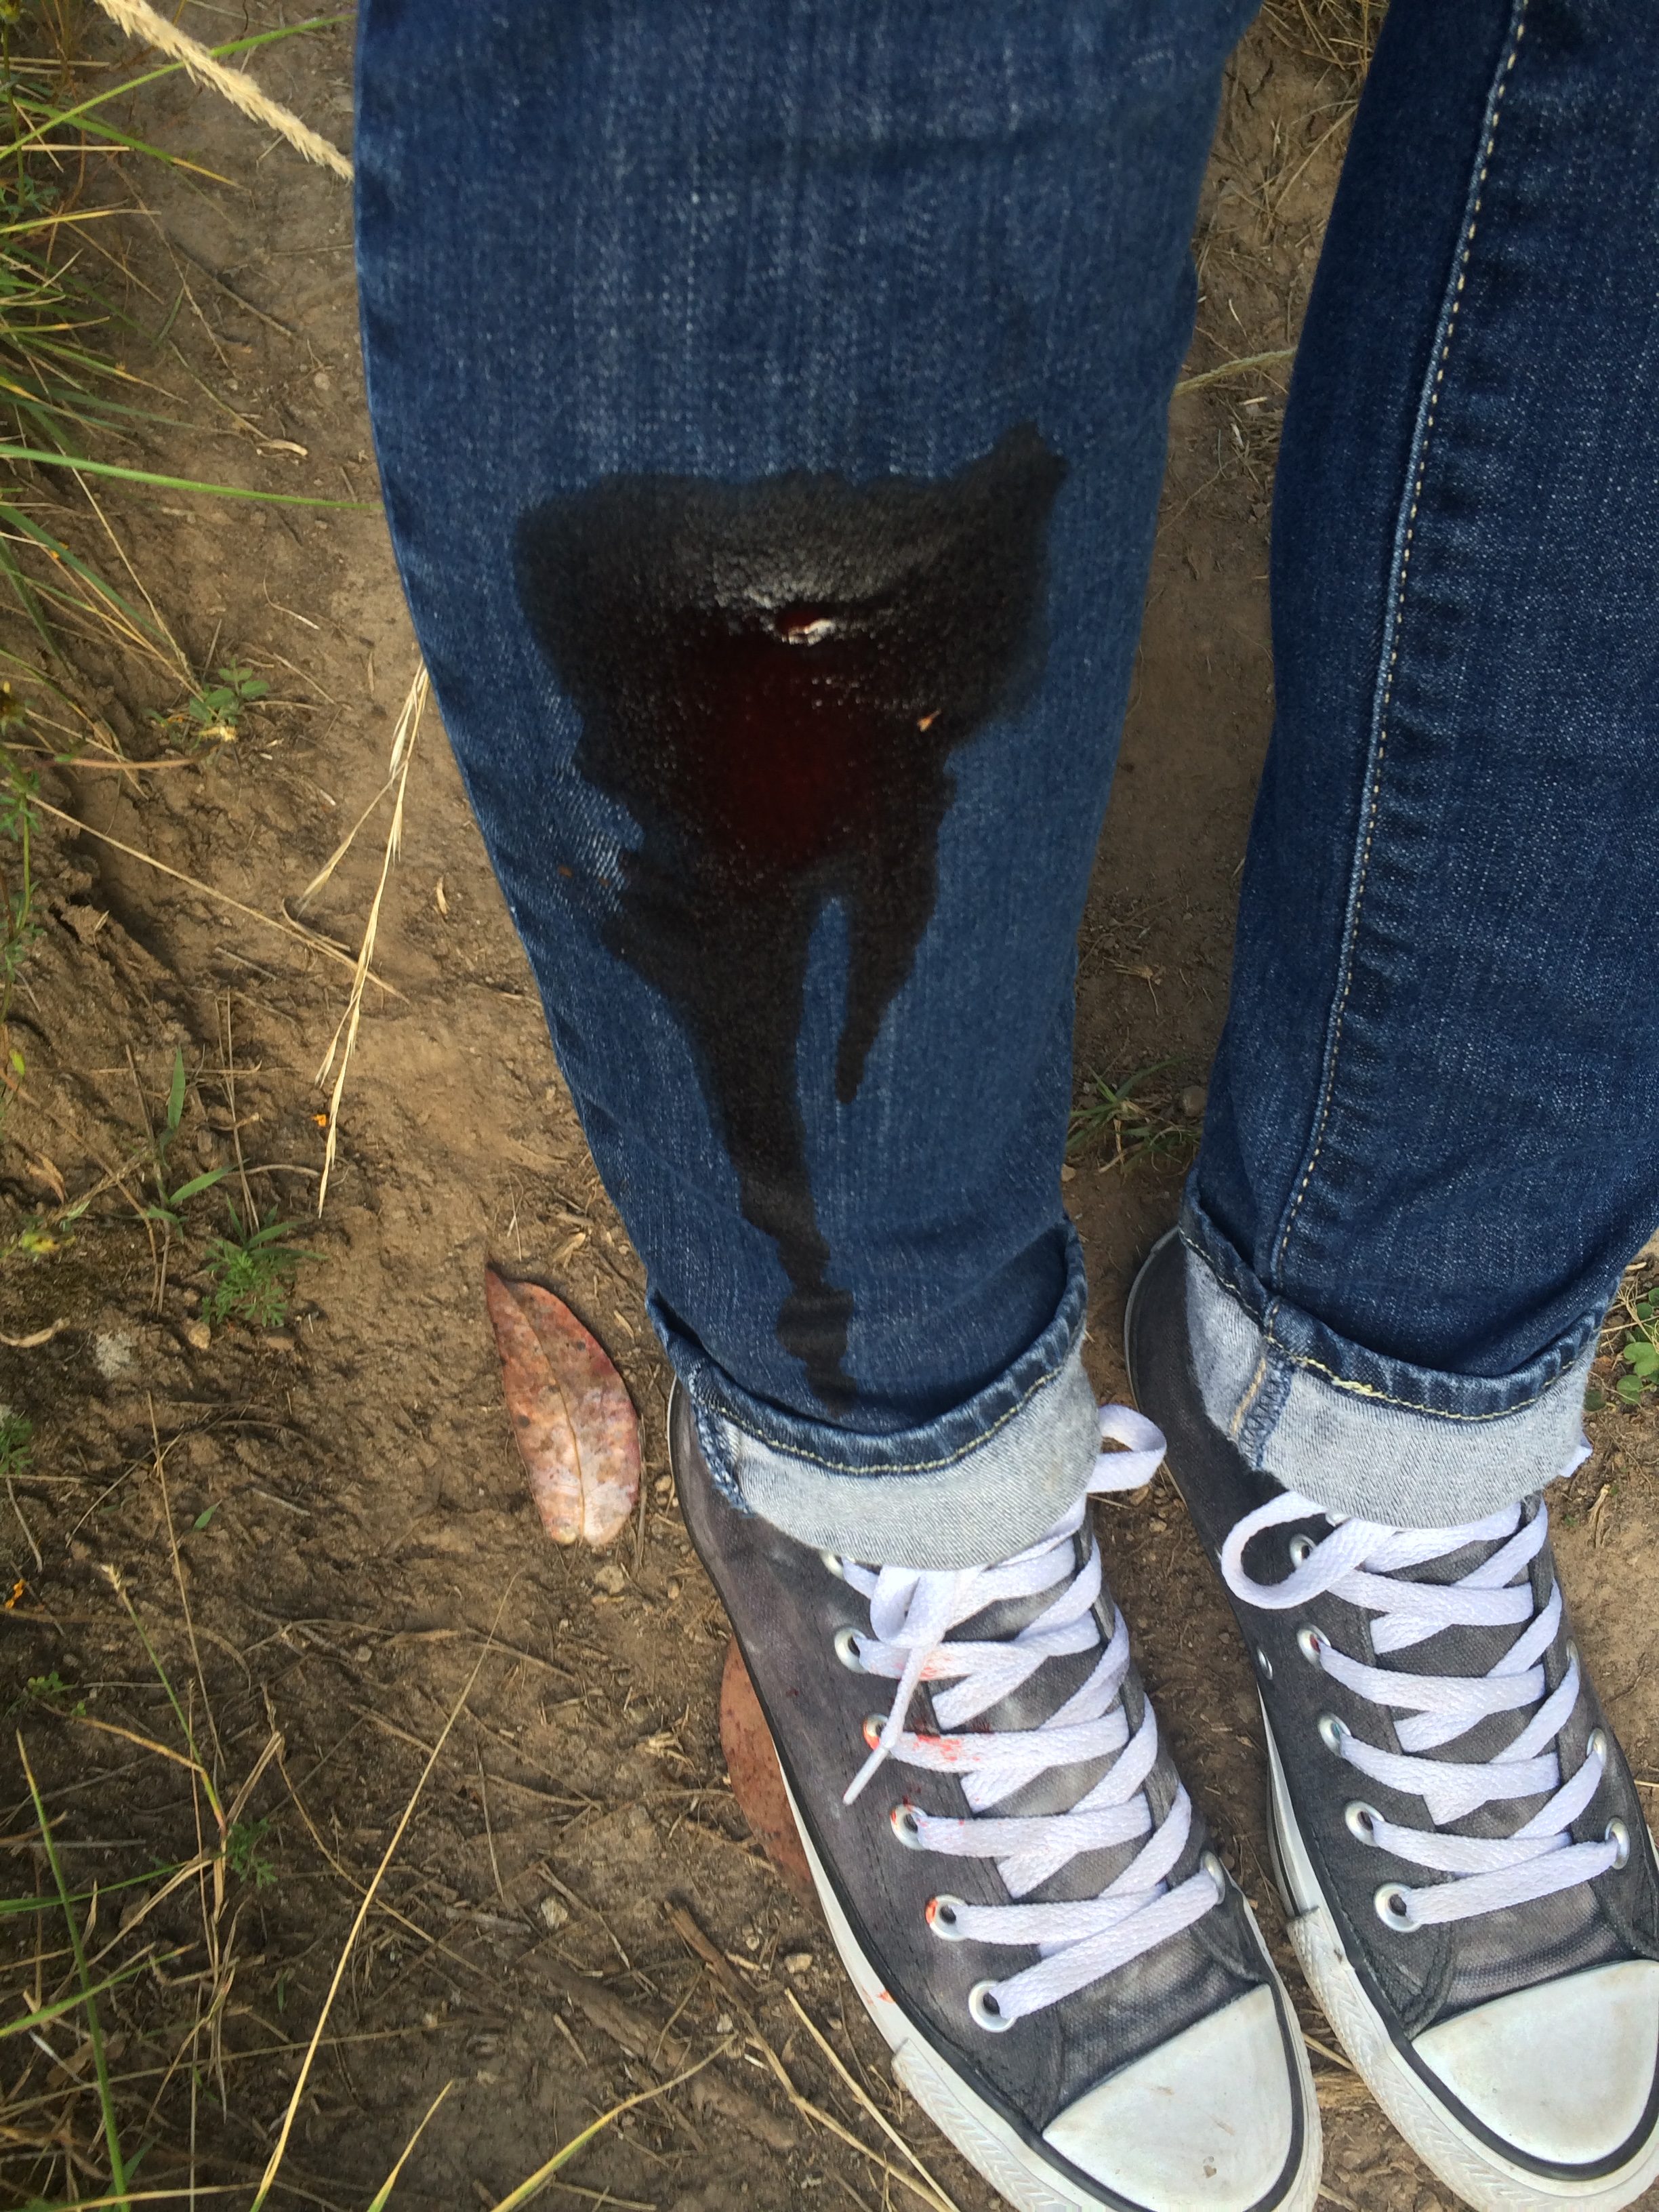
As I neared this farmhouse, I heard some dogs start to bark. Suddenly a pack of five angry dogs had surrounded me, barking and snarling. I was TERRIFIED!!! I started screaming! At first the dogs backed off, but then came back at me. One of them managed to grab hold of my right leg, before some young children came running out of the farmhouse and subdued their dogs with brooms.
At this point, with blood soaked jeans, I made a quick getaway down the hillside, all intentions of finding El Lechero cast aside. I walked 3 kilometres back to town before bursting into tears in front of my host mother and father, who promptly took me to the hospital for treatment.
Over the course of the following five days I received a tetanus shot, two rabies shots and made daily hospital visits for wound cleaning. I was also given a stack of pain killers and a two week course of antibiotics.
It was possibly the most terrifying experience of my life! It also reinforced I had made the decision to buy a local SIM card. I was able to remain in contact with friends the whole time, to let them know what was happening. As a solo female in the hills of some random town in Ecuador and no one knows where you are, it is a brilliant idea to have a local SIM card, so that if/when something happens, you are able to contact others for help.
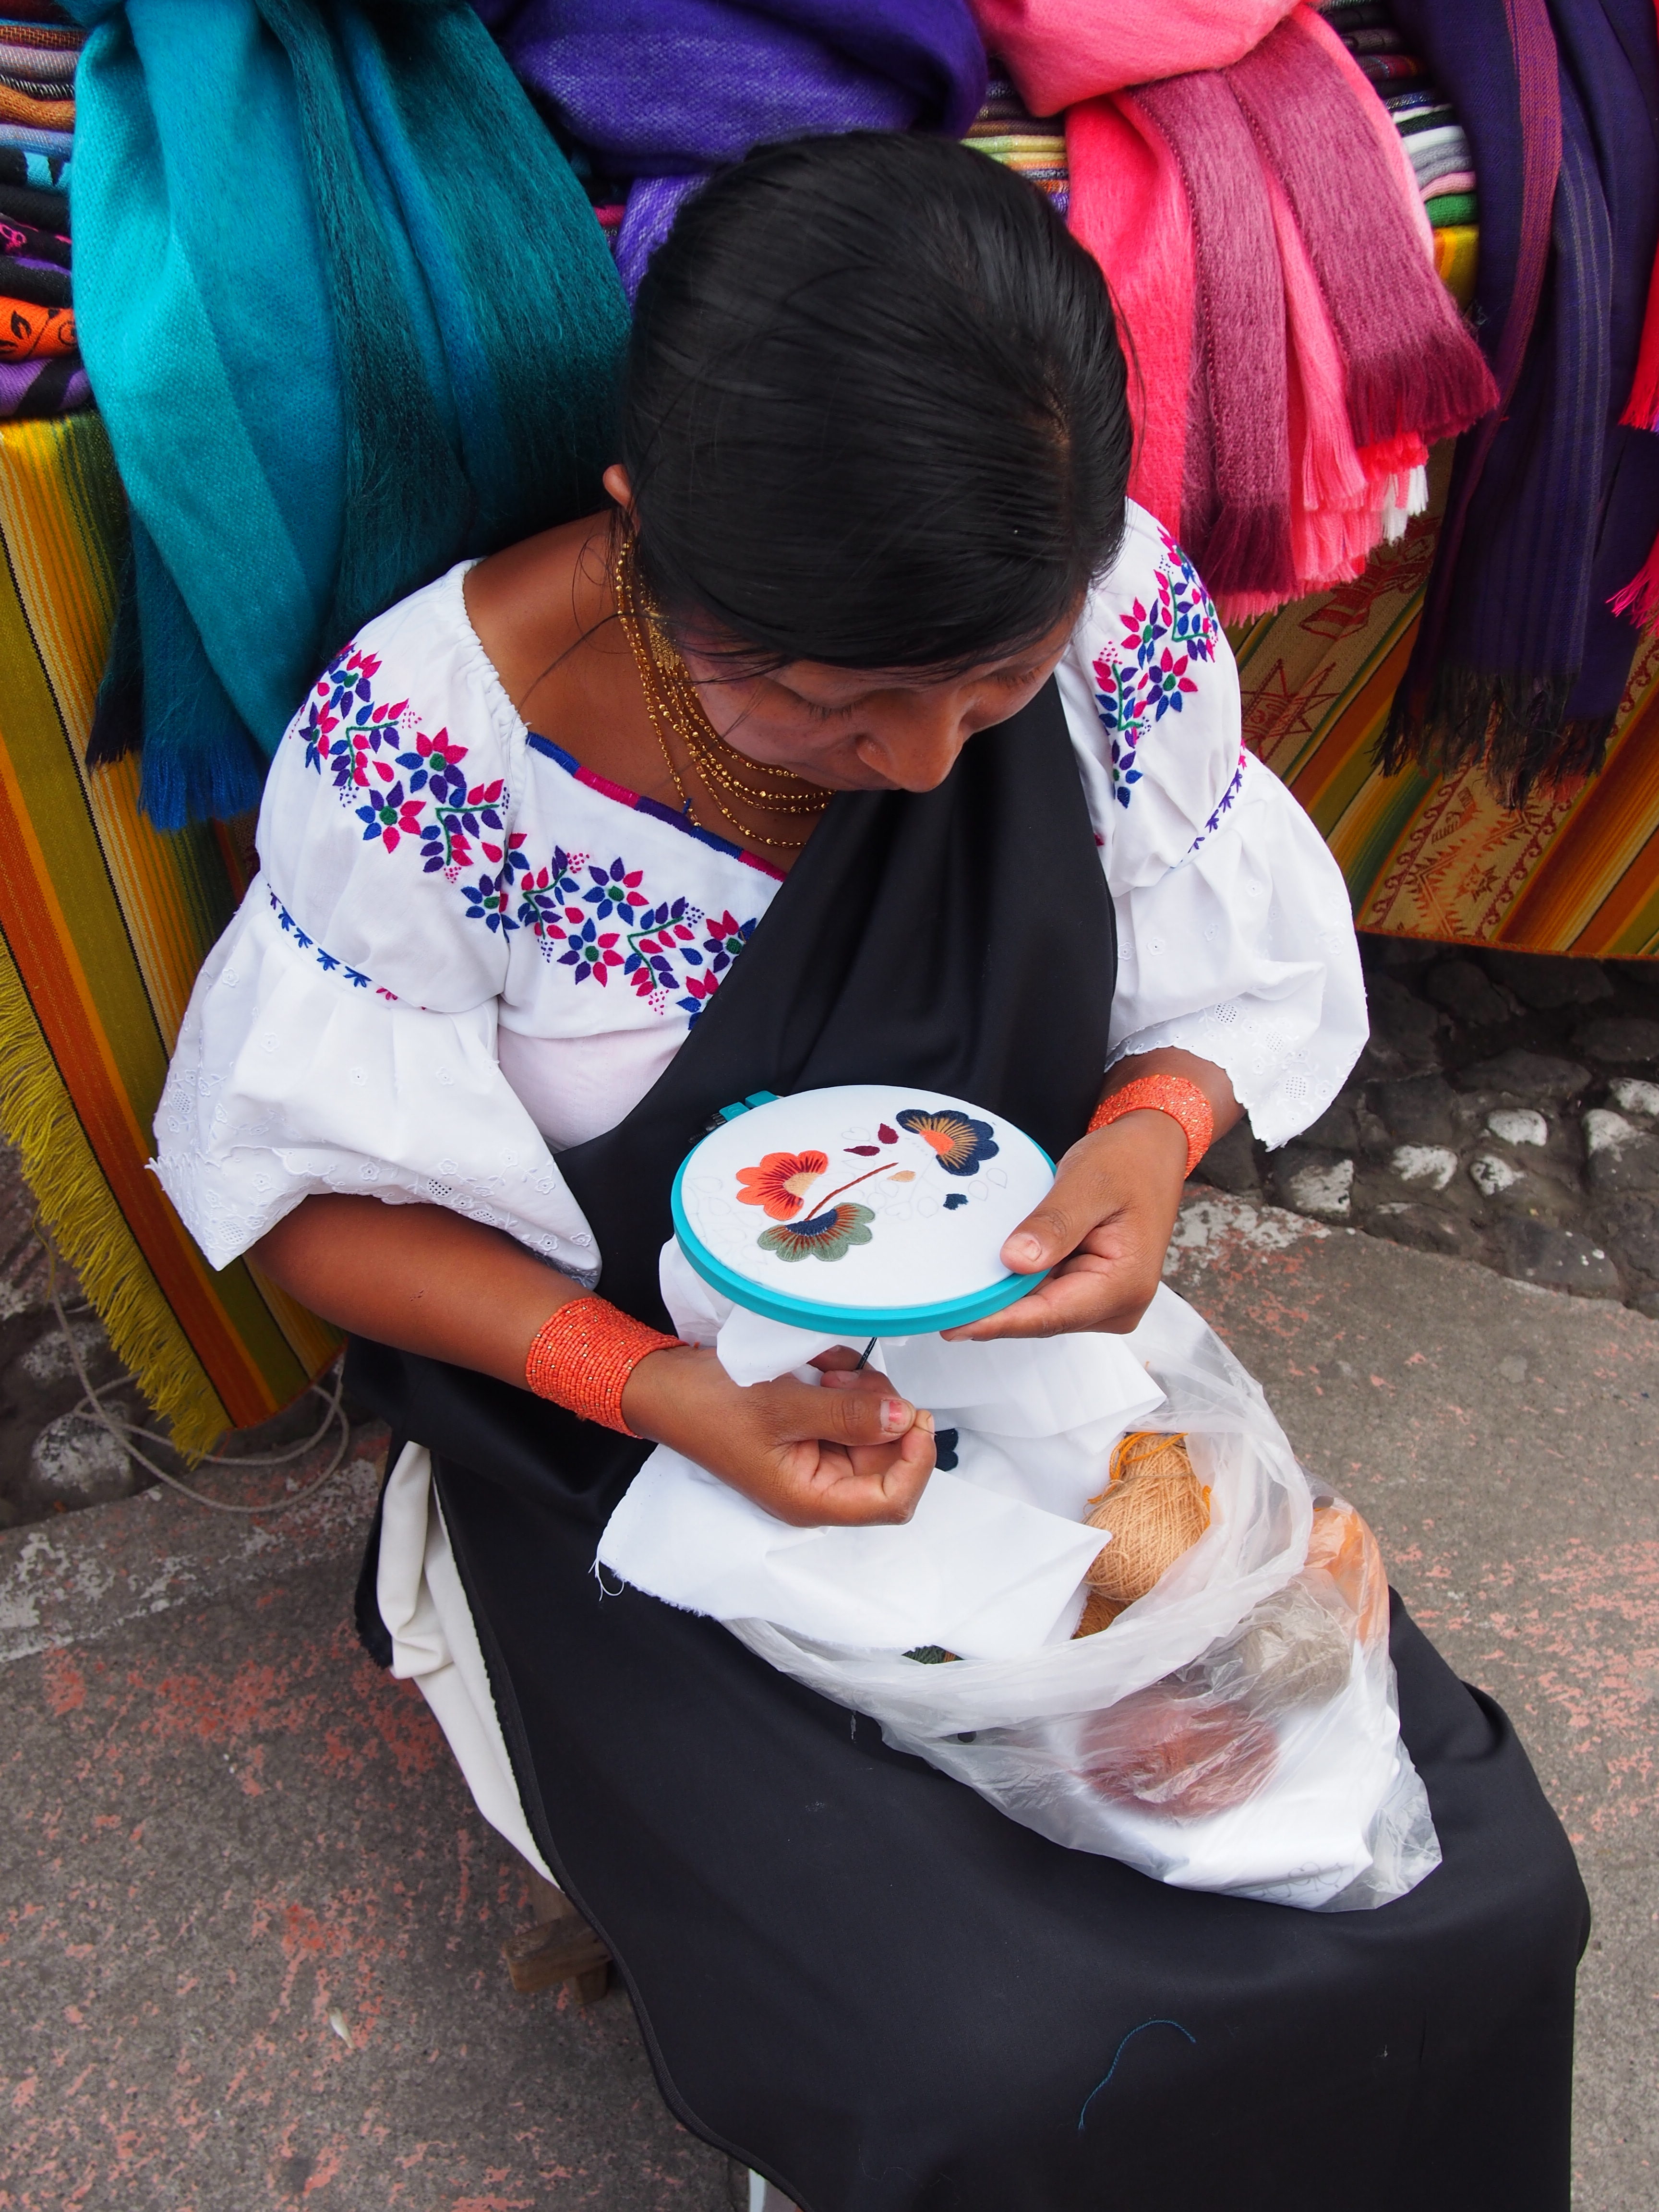
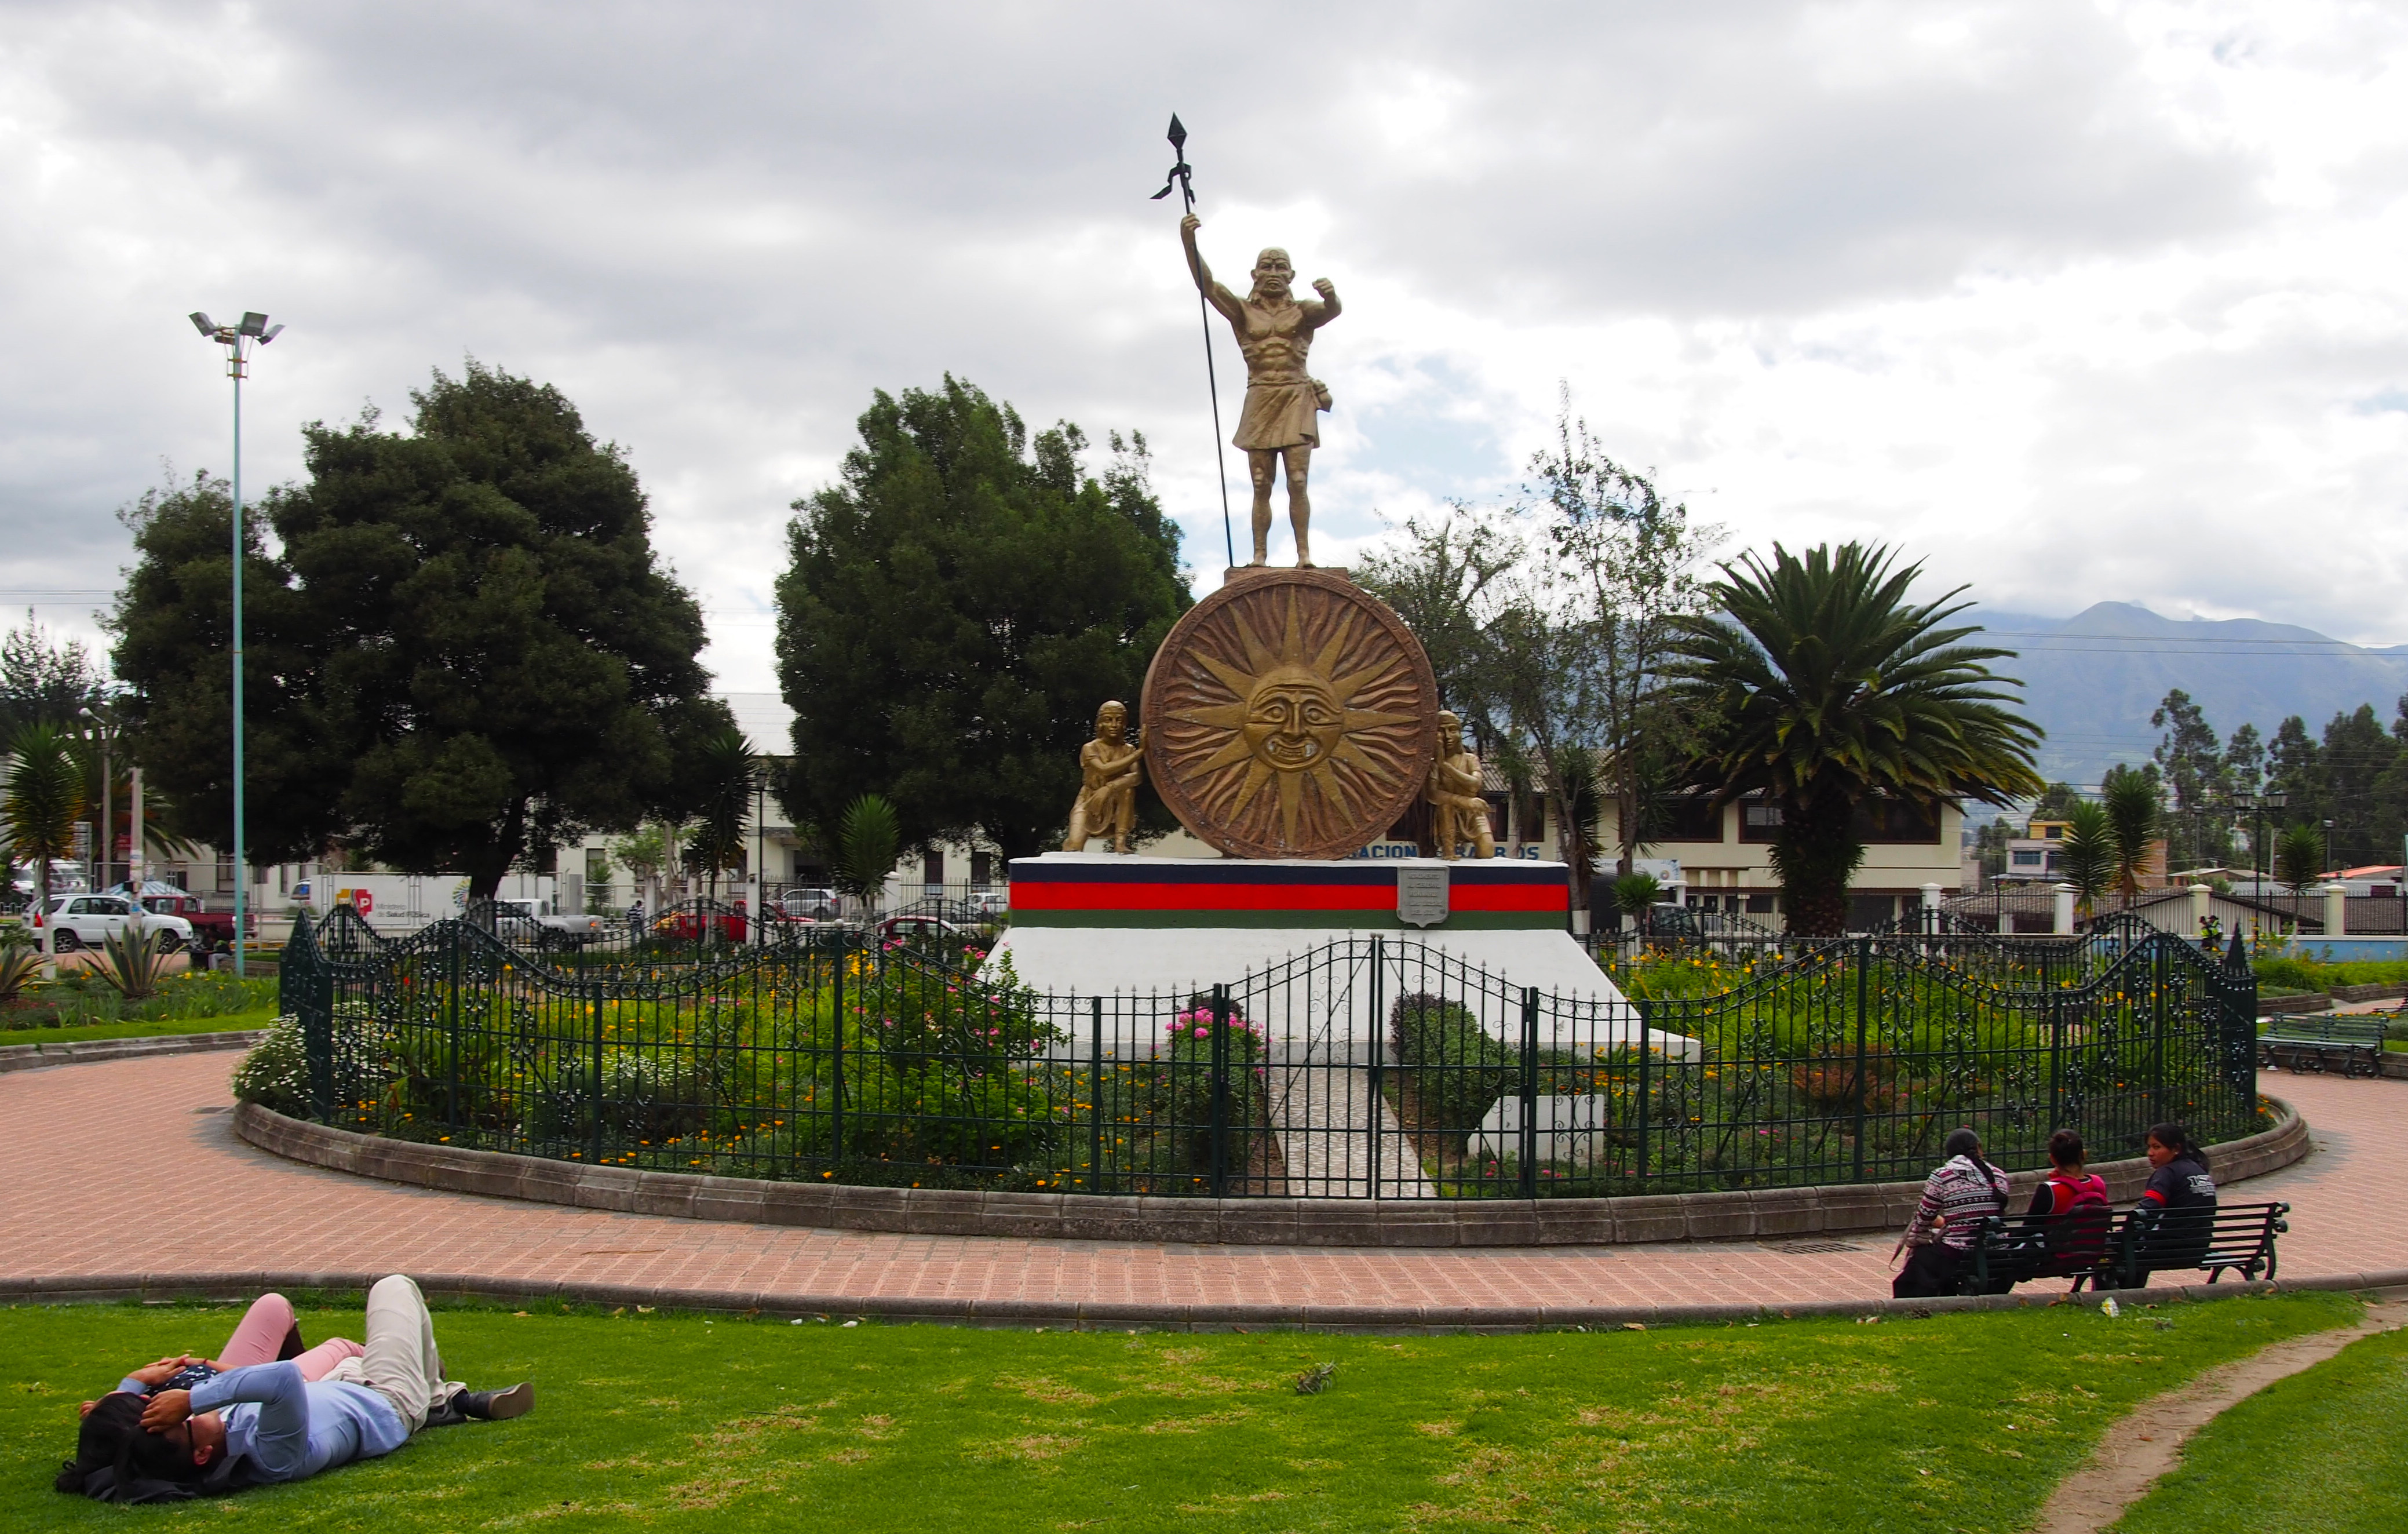
From that day on, I kept my explorations to the confines of the city. Checking out the famous indigenous craft market at Plaza de Ponchos. The market is on daily, but on Saturdays it explodes in size and extends all the way up and down the streets too. You can buy arts and crafts not just from indigenous Otavaleñas and Ecuadorians, but also indigenous goods from neighbouring countries such as Columbia, Peru and Bolivia.
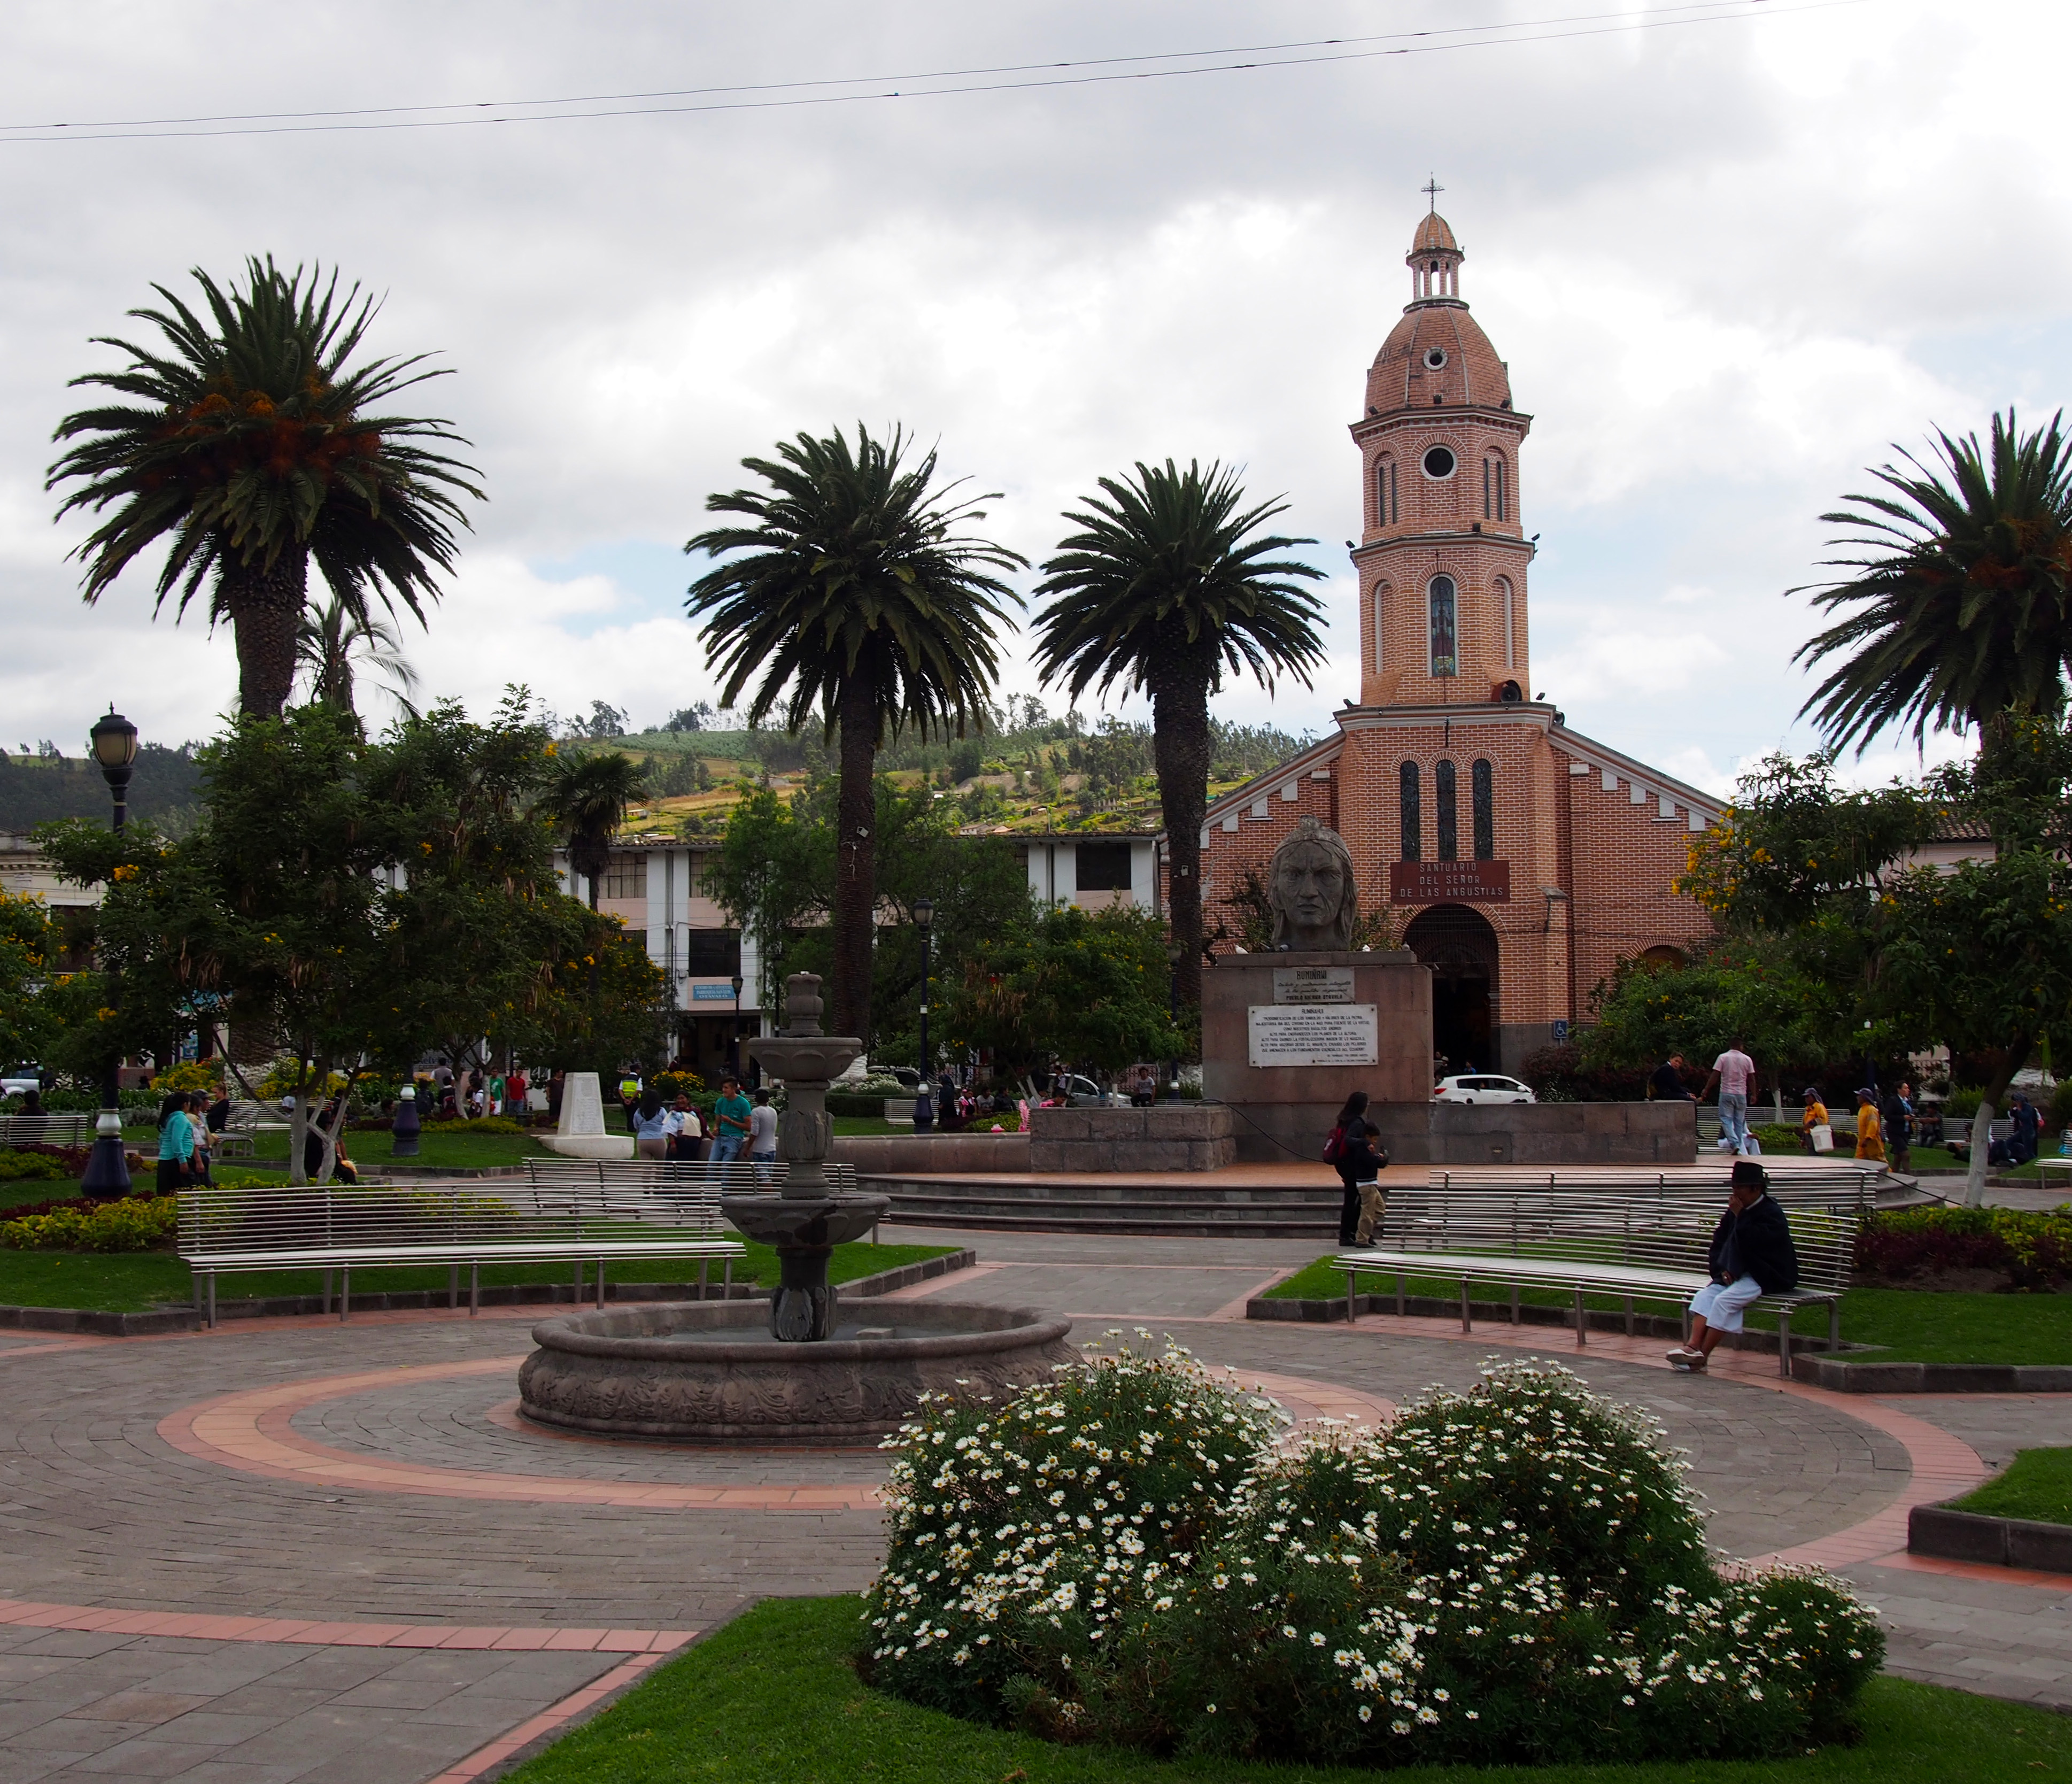
The main square of town is Parque Simon Bolivar. It is where you will find the towns White House and main Iglesia (church). While Simon Bolivar seems to be the Main Street running through town, if you want nice (probably over priced) cafes and restaurants, head to Plaza de Ponchos, around the market. I enjoyed an amazing latte at Plaza Cafe Sisa (not to be confused with the restaurant Sisa somewhere else in town)
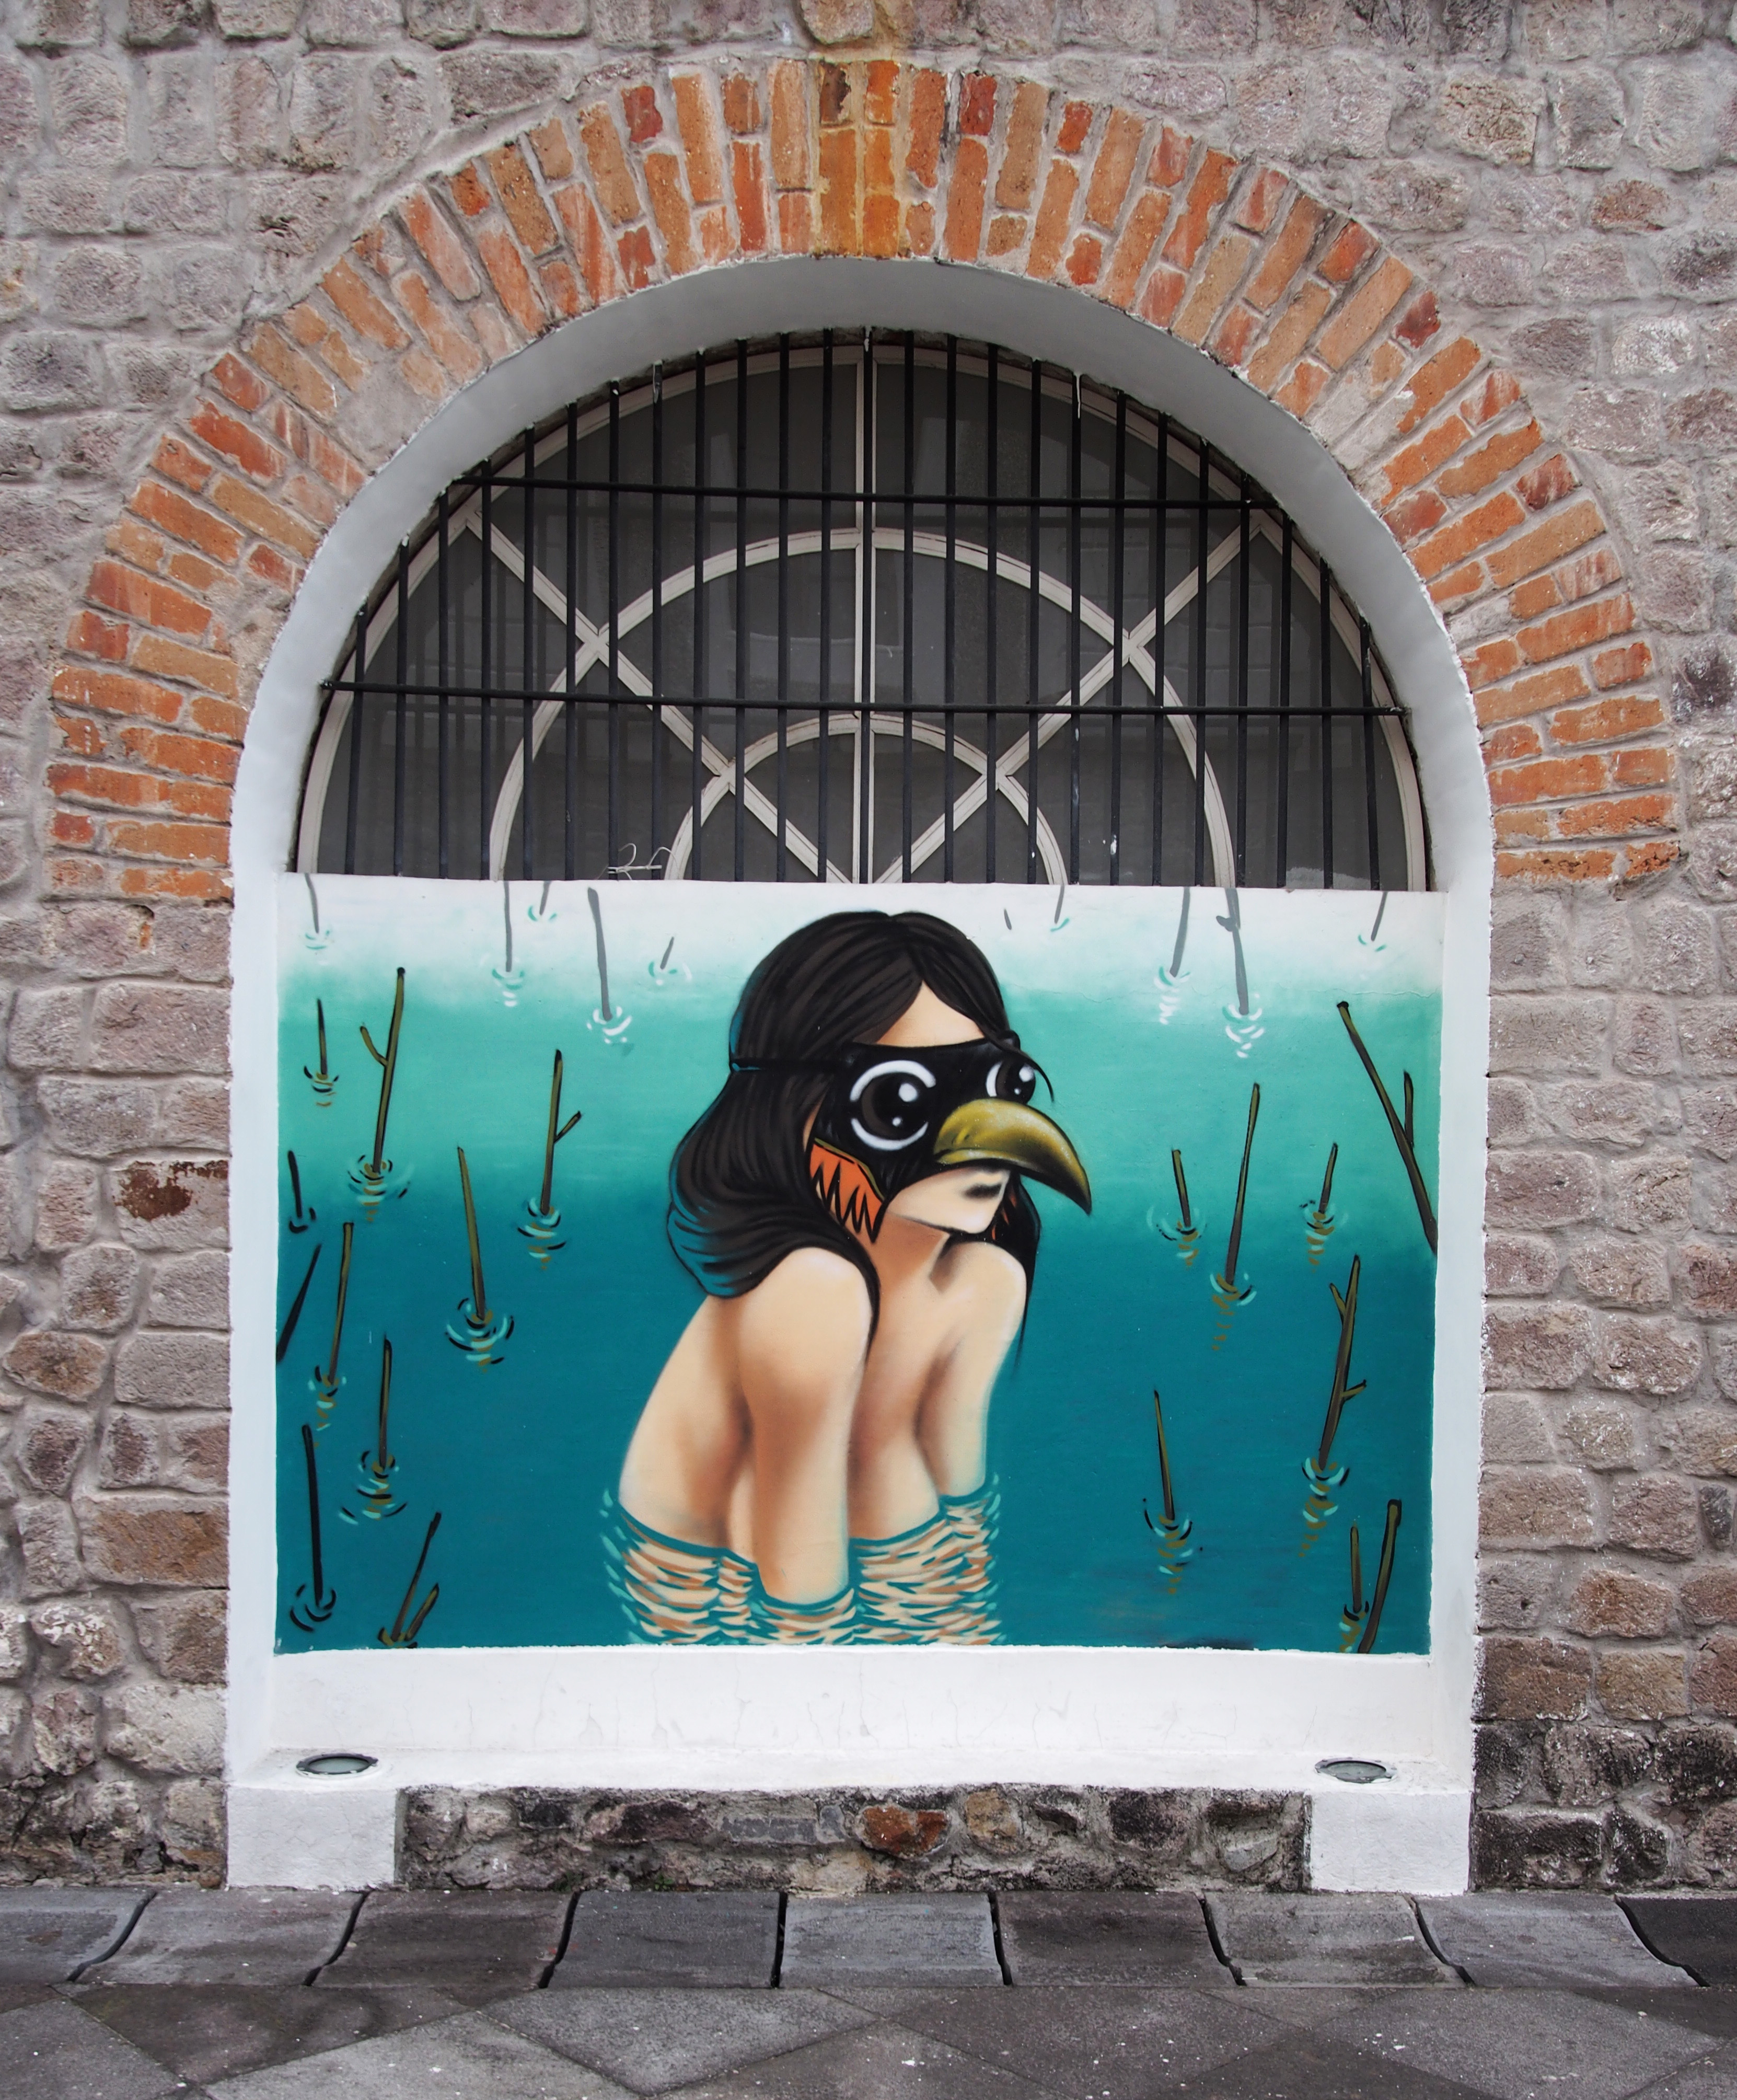
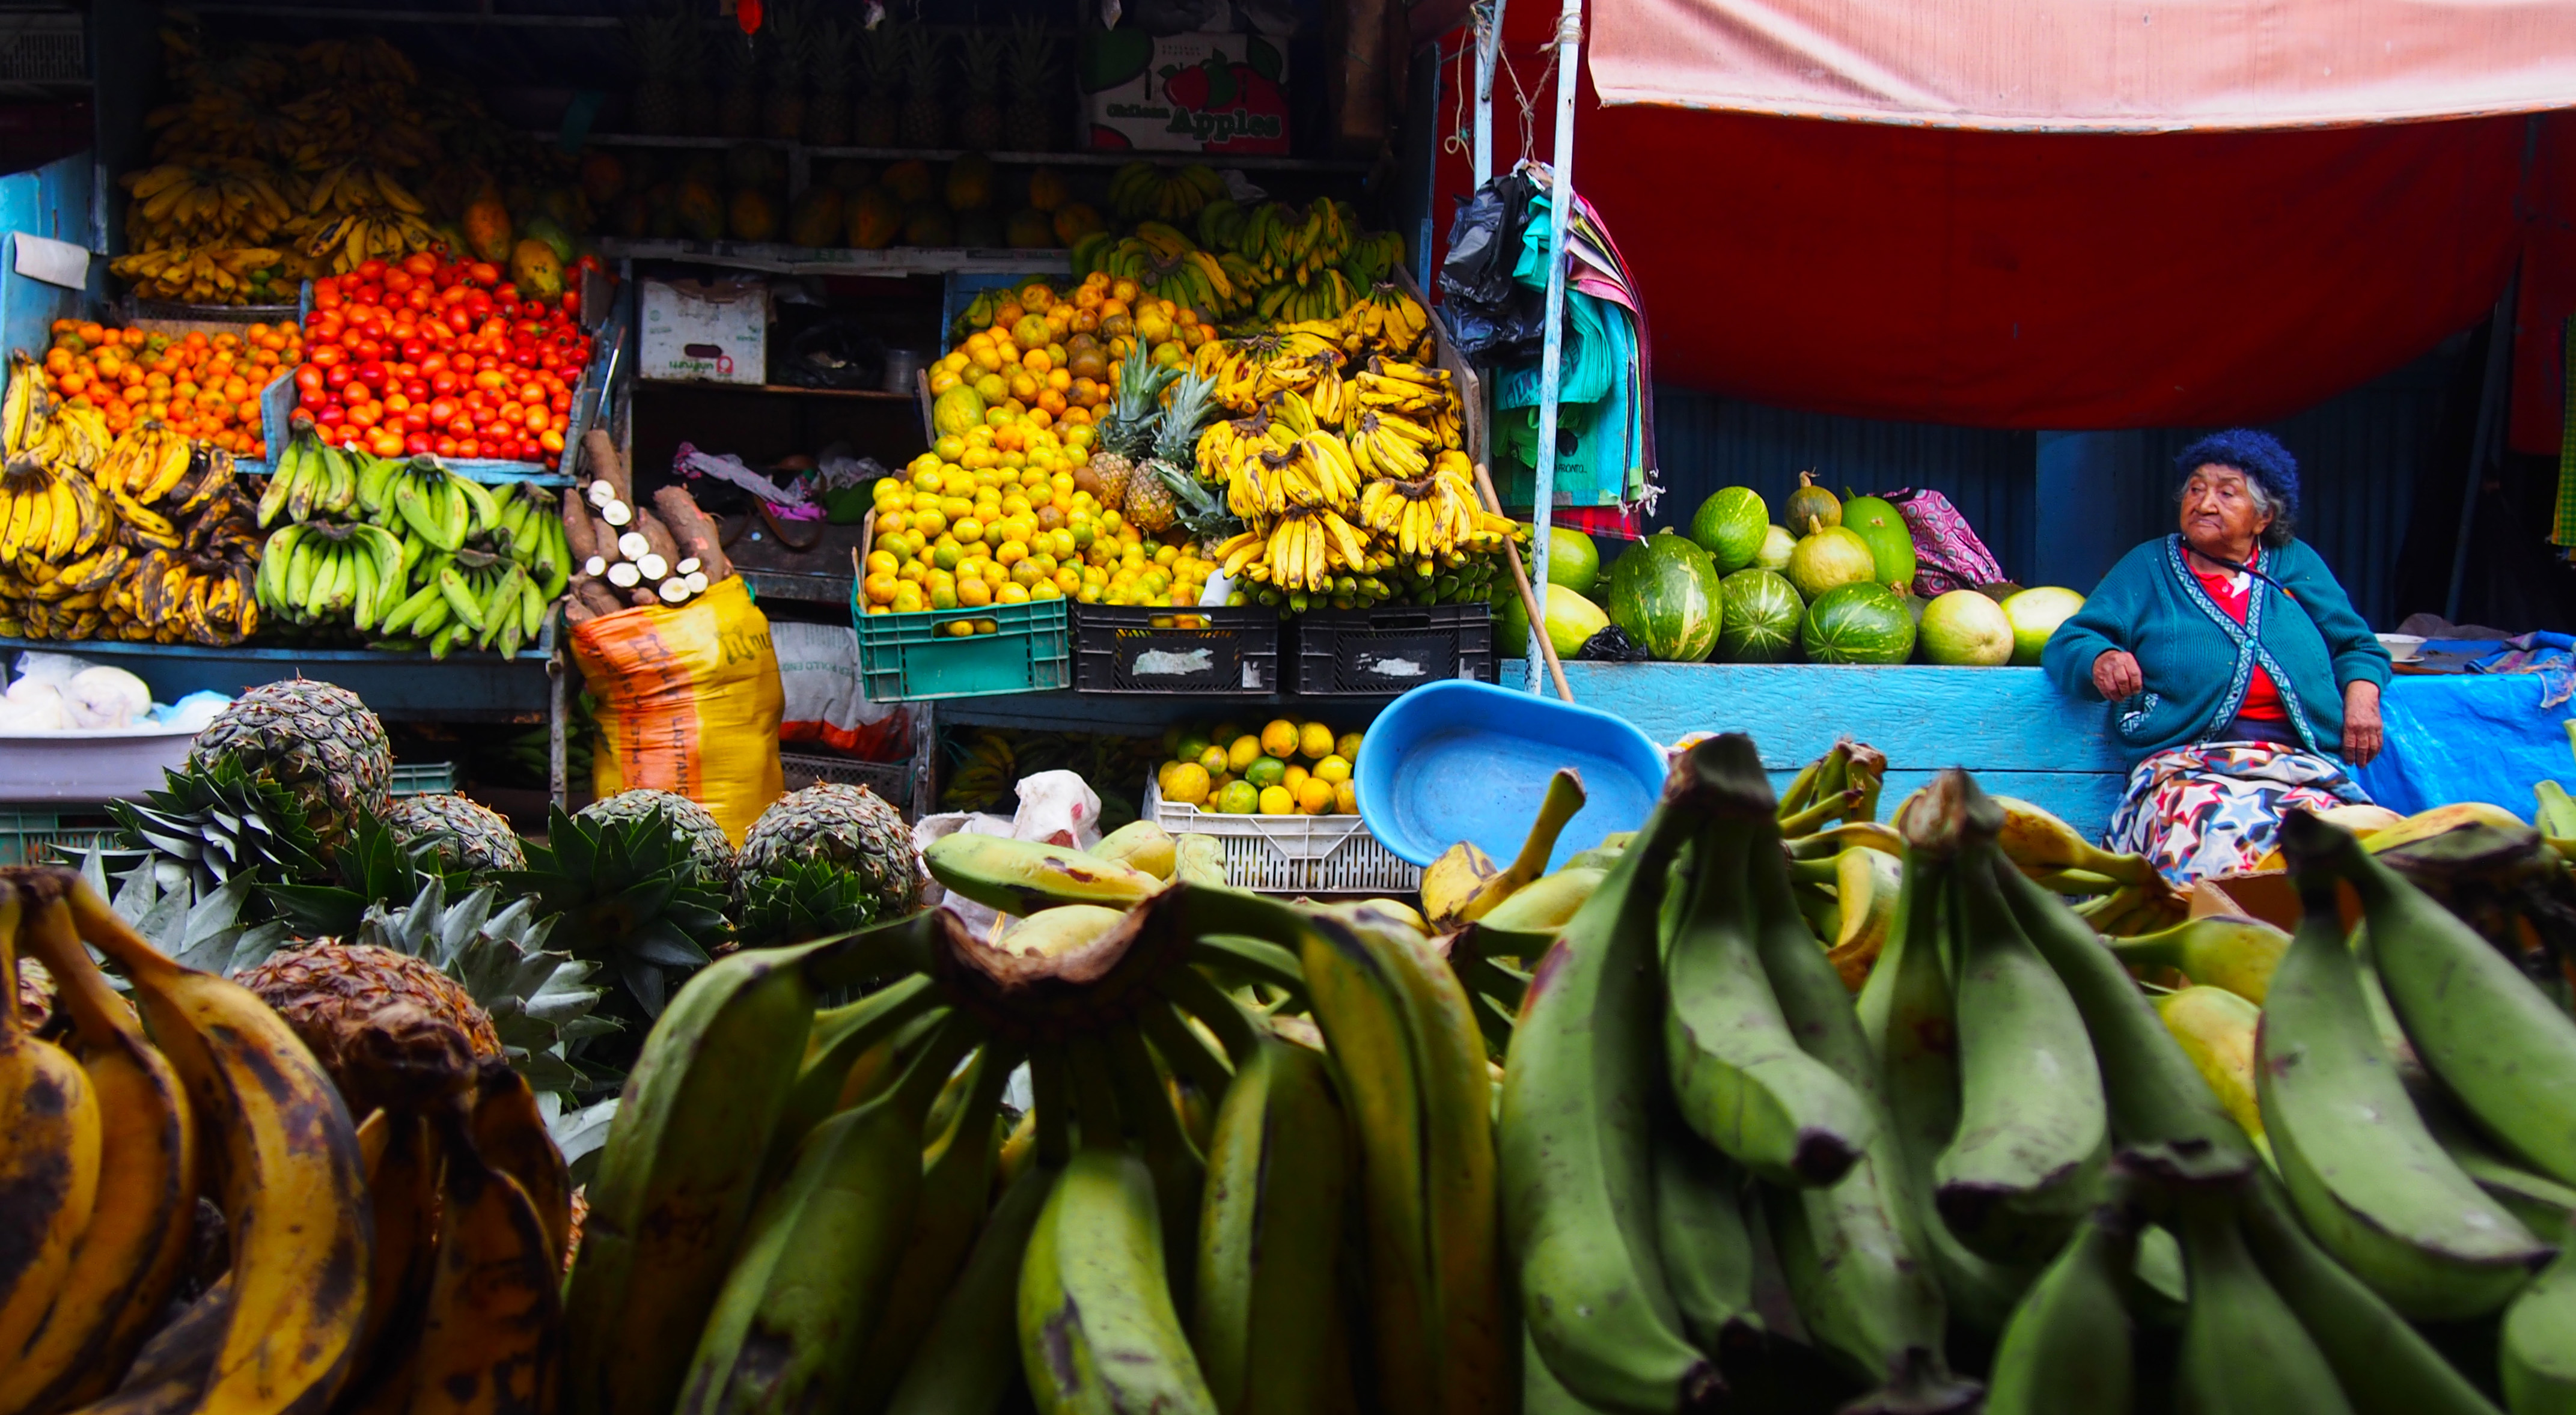
I also spent quite some time wandering the streets to find all the cool street art (I was surprised at how much cool street art I found in this small town), and checking out local fruit and vegetable markets.
It’s great town and the nearby natural sights sound like they are worth seeing, but I will wait until I have travel buddies before I go exploring again.
Getting There
I travelled to and from Quito to Otavalo. I went there via shared taxi and came back with the bus, both are affordable options.
First up, it’s worth me mentioning that I have an irrational aversion to buses, they scare me. I don’t feel comfortable riding the bus, especially when carrying both my hiking pack and daypack. I fear for my own safety and the safety of my belongings. The cheapest way to get to and from Otavalo is only with buses, this is completely do-able, but I chose not to do it.
Option A: Shared Taxi
TaxiLagos is a company that provides a shared taxi transport service. It is cheaper than a standard taxi, but more expensive than a bus, however the security is obviously much higher.
I paid $15 to travel from Quito to Otavalo, the ride took approximately 1.5hours. They pick you up from your hotel and drop you off at your exact destination (I didn’t understand enough Spanish to understand that they would pickup from the hotel, so I paid $4 to get a taxi from my hotel to the Taxi Lagos Office.)
The TaxiLagos office is on Calle Ascunsion 3-82, just near Calle Versalles. The sign on the outside of the building says ServiQuito.
Total Cost: Taxi + Shared Taxi = $19
Time Cost: 1hr 45mins.
Option B: Bus
So as I mentioned, the cheapest way to do this is just with the bus, but that is not what I did.
I caught a taxi from central Otavalo to the bus station Norte to get a bus “Directo Quito”, some of the buses make heaps of stops and the ride can take 3hrs+. All Taxis around Otavalo central cost a fixed rate of $1.25. Again you can do this by bus and it will only cost 30 – 40 cents.
On arrival at the bus station I asked “quito directo” and jumped on a bus that was “seguro” (secure/safe). The bus cost $2.50 and took approximately 2.5 hours to get to Quito Carcelen Bus Station. The bus was indeed secure and was fitted with security cameras, much to my relief.
The Carcelen bus station to central quito is still quite a distance, an hour by bus or about 30-40minutes by taxi. I took a taxi for $8. NB: only travel via Carcelen bus station when travelling north
Total Cost: Taxi + Bus + Tax = $11.75
Time Cost: 3hr 15mins.
I heard that many people had so many concerns about packing for the camino. Since I had been living out of a backpack for 13 months prior to starting the camino, and with friends who had done the walk, I had a pretty decent idea of what and how I wanted to pack.
When it came to actually packing my bag I refined my ideas based on suggestions from my friend Ari, and the packing guides written by travel bloggers Dave and Candice.
I aimed to stick with the advice of getting the bag down to 7kg, but was unsuccessful. That being said my bag was 9-10kg with food and water and I had no problems with the weight. I had anticipated having back, shoulder and neck problems and was pleasantly surprised not to experience any of those issues at all.
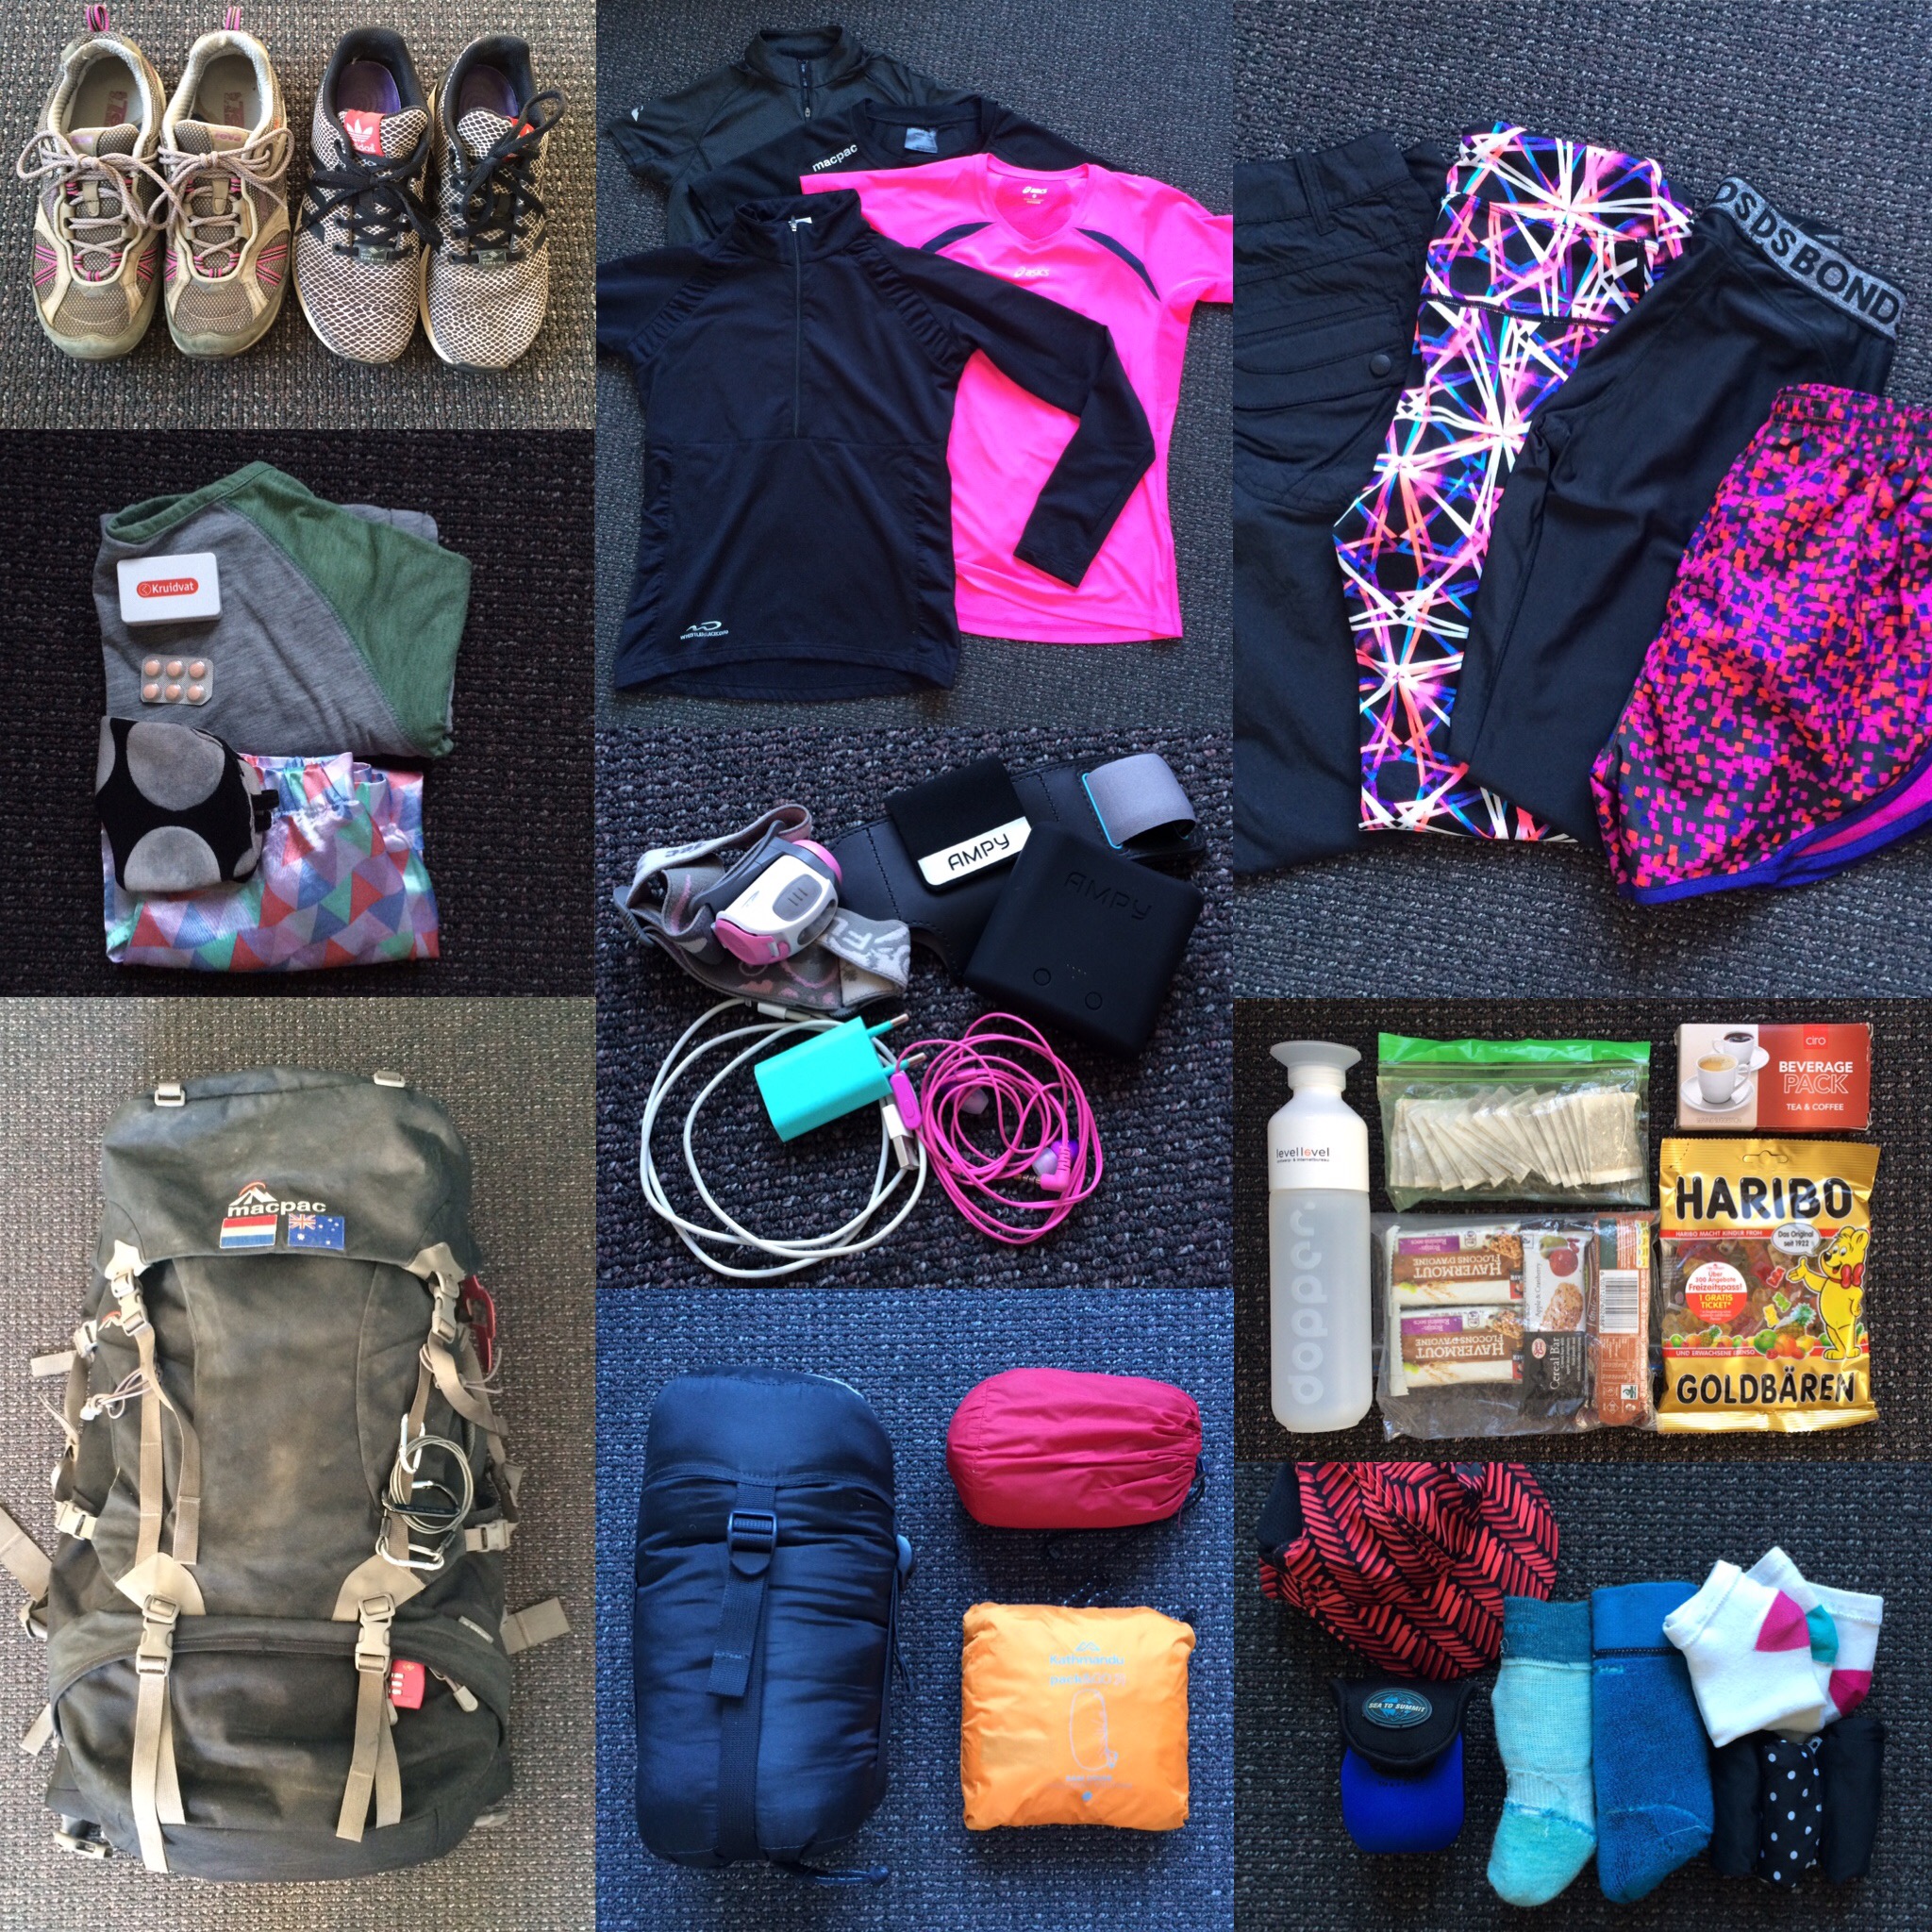
Final Packing List
MacPac Genesis Aztec 55L Travel Pack
Passport, Pilgrims Passport and Money
2x Full Length Sports Leggings
1x Hiking Pants
1x Shorts
3x Tech/Sports T-shirts
1x Sweater
1x Lightweight Raincoat
3x Microfibre Underpants
2x Bras
2x Merino Wool Socks
2x Cotton Ankle Sport Socks
1x Pyjamas (T-Shirt and Shorts)
1x Sleeping Eye Mask and Earplugs (and some sleeping pills for the bad nights)
1x Hat
1x Sunglasses
1x “Buff” Camino pattern neck warmer thing
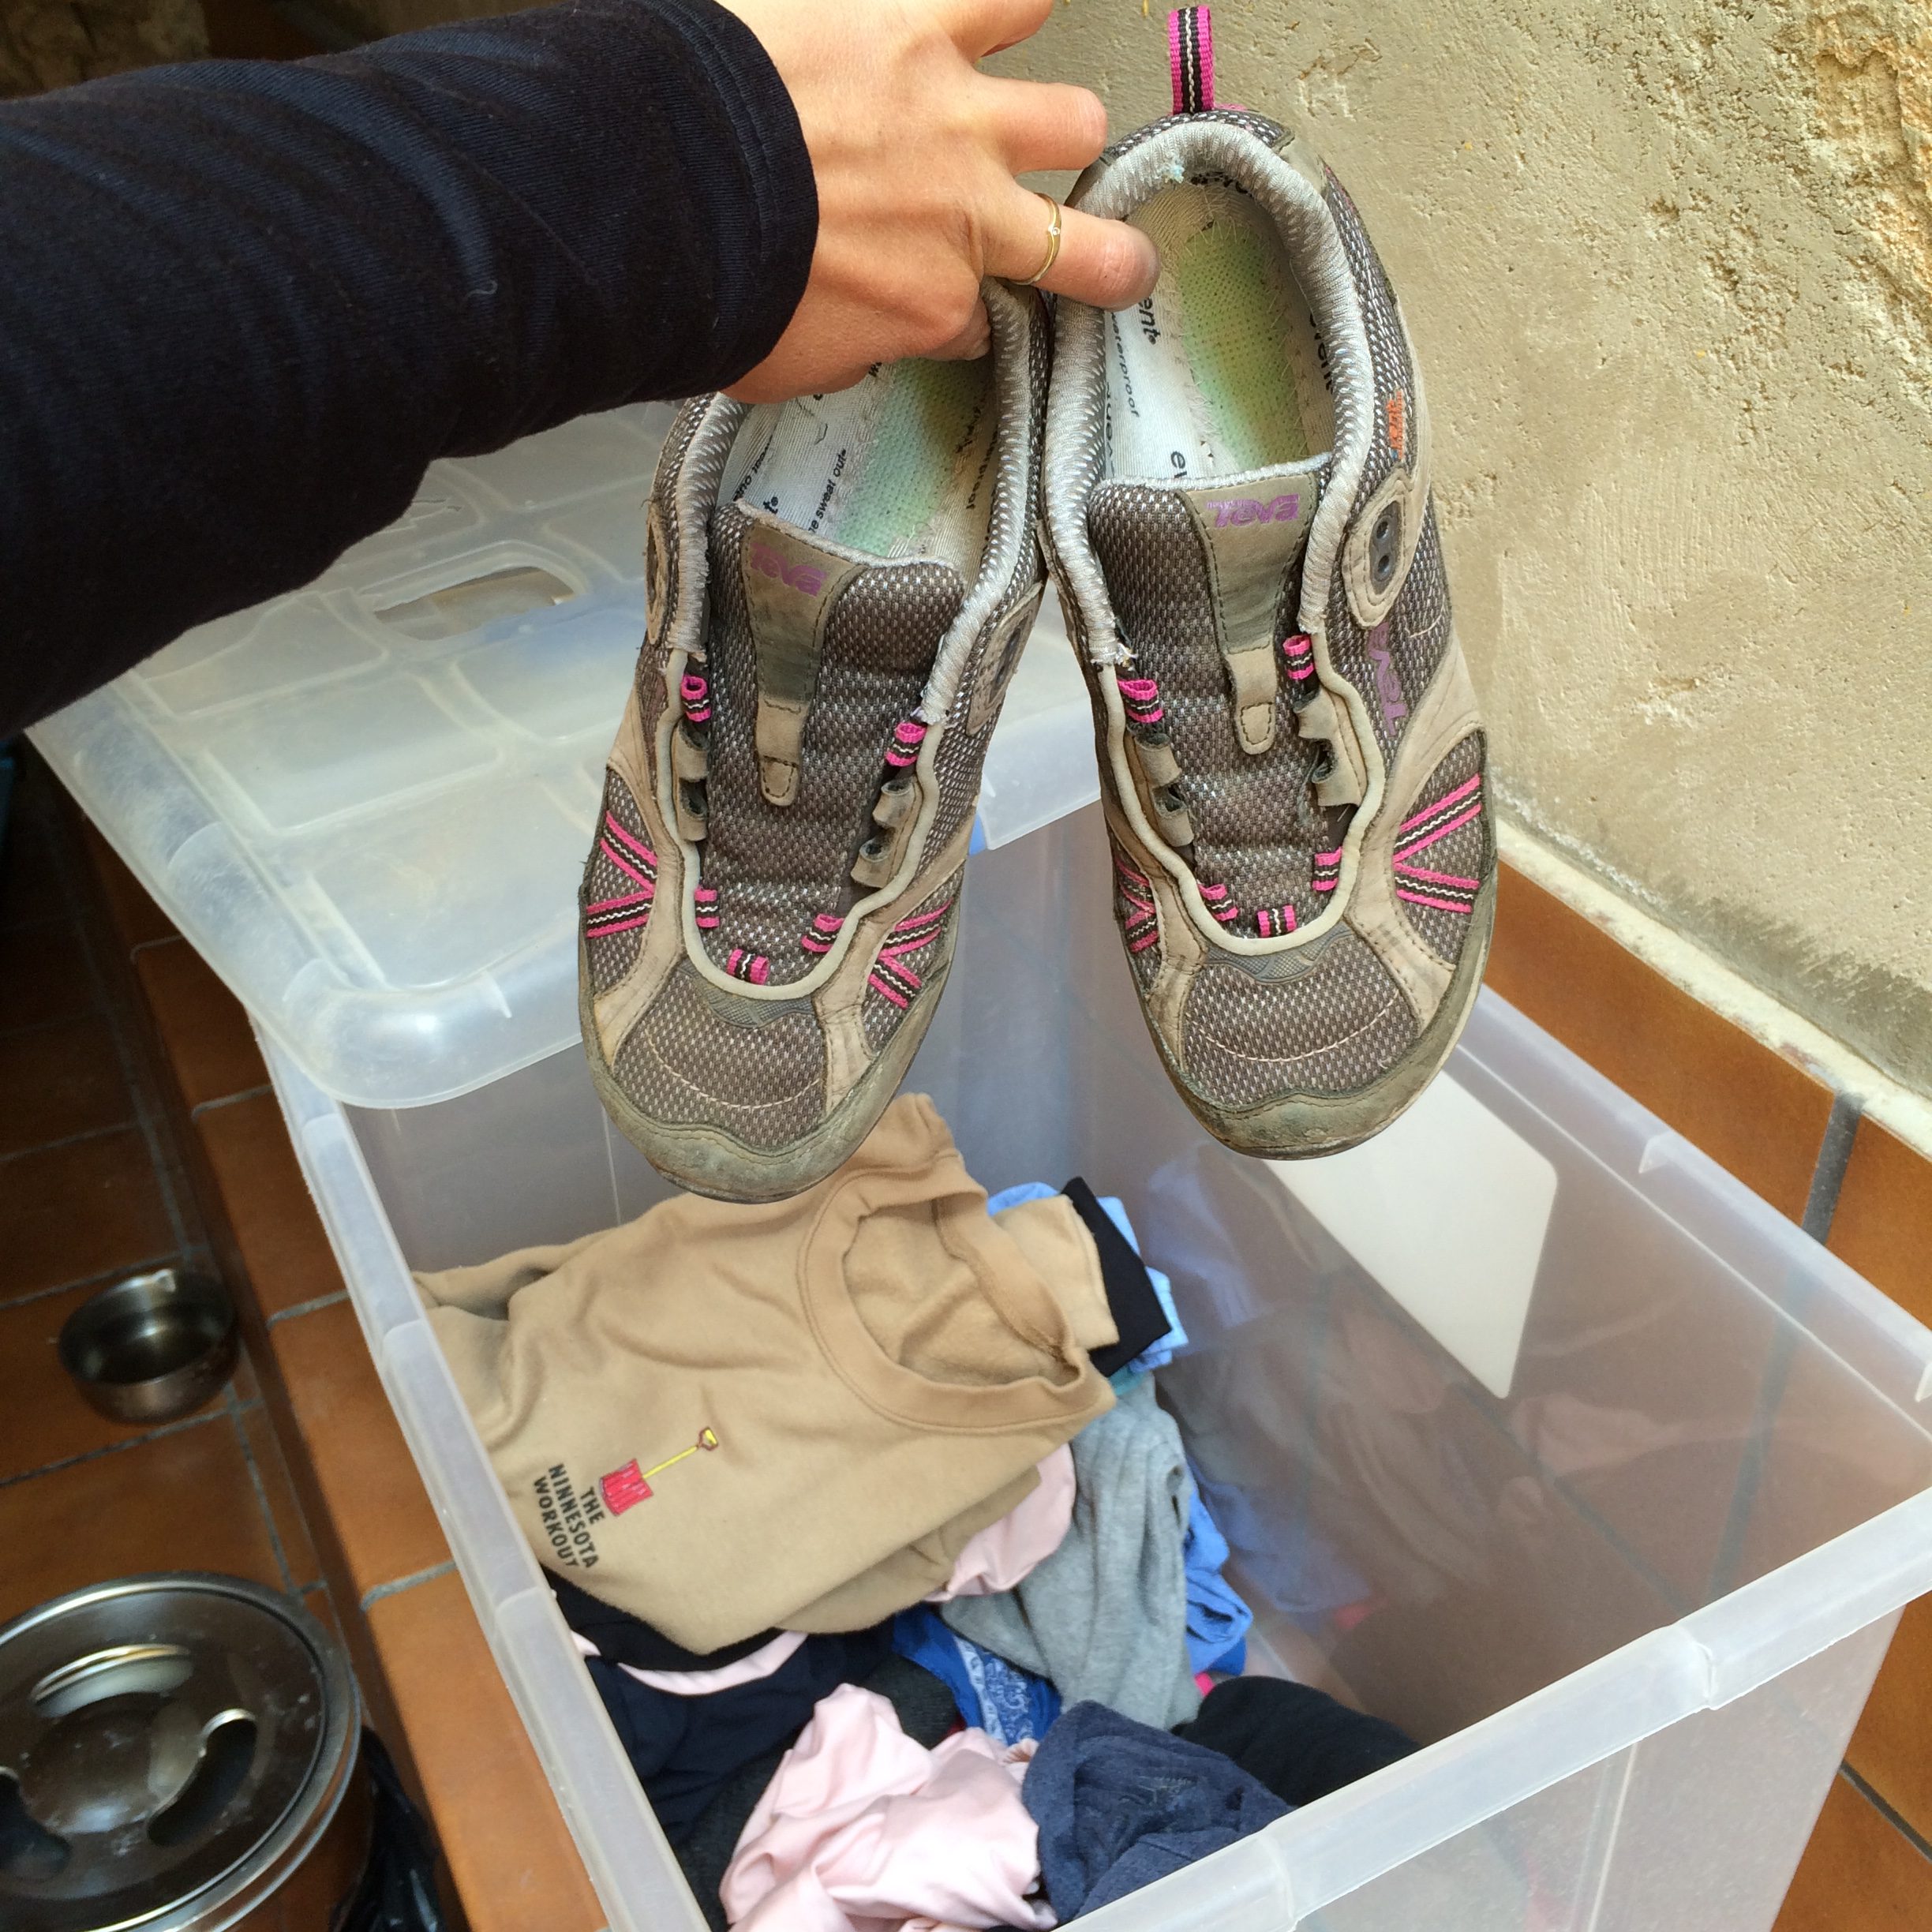
1x Teva Sky Lake Event Hiking Sneakers
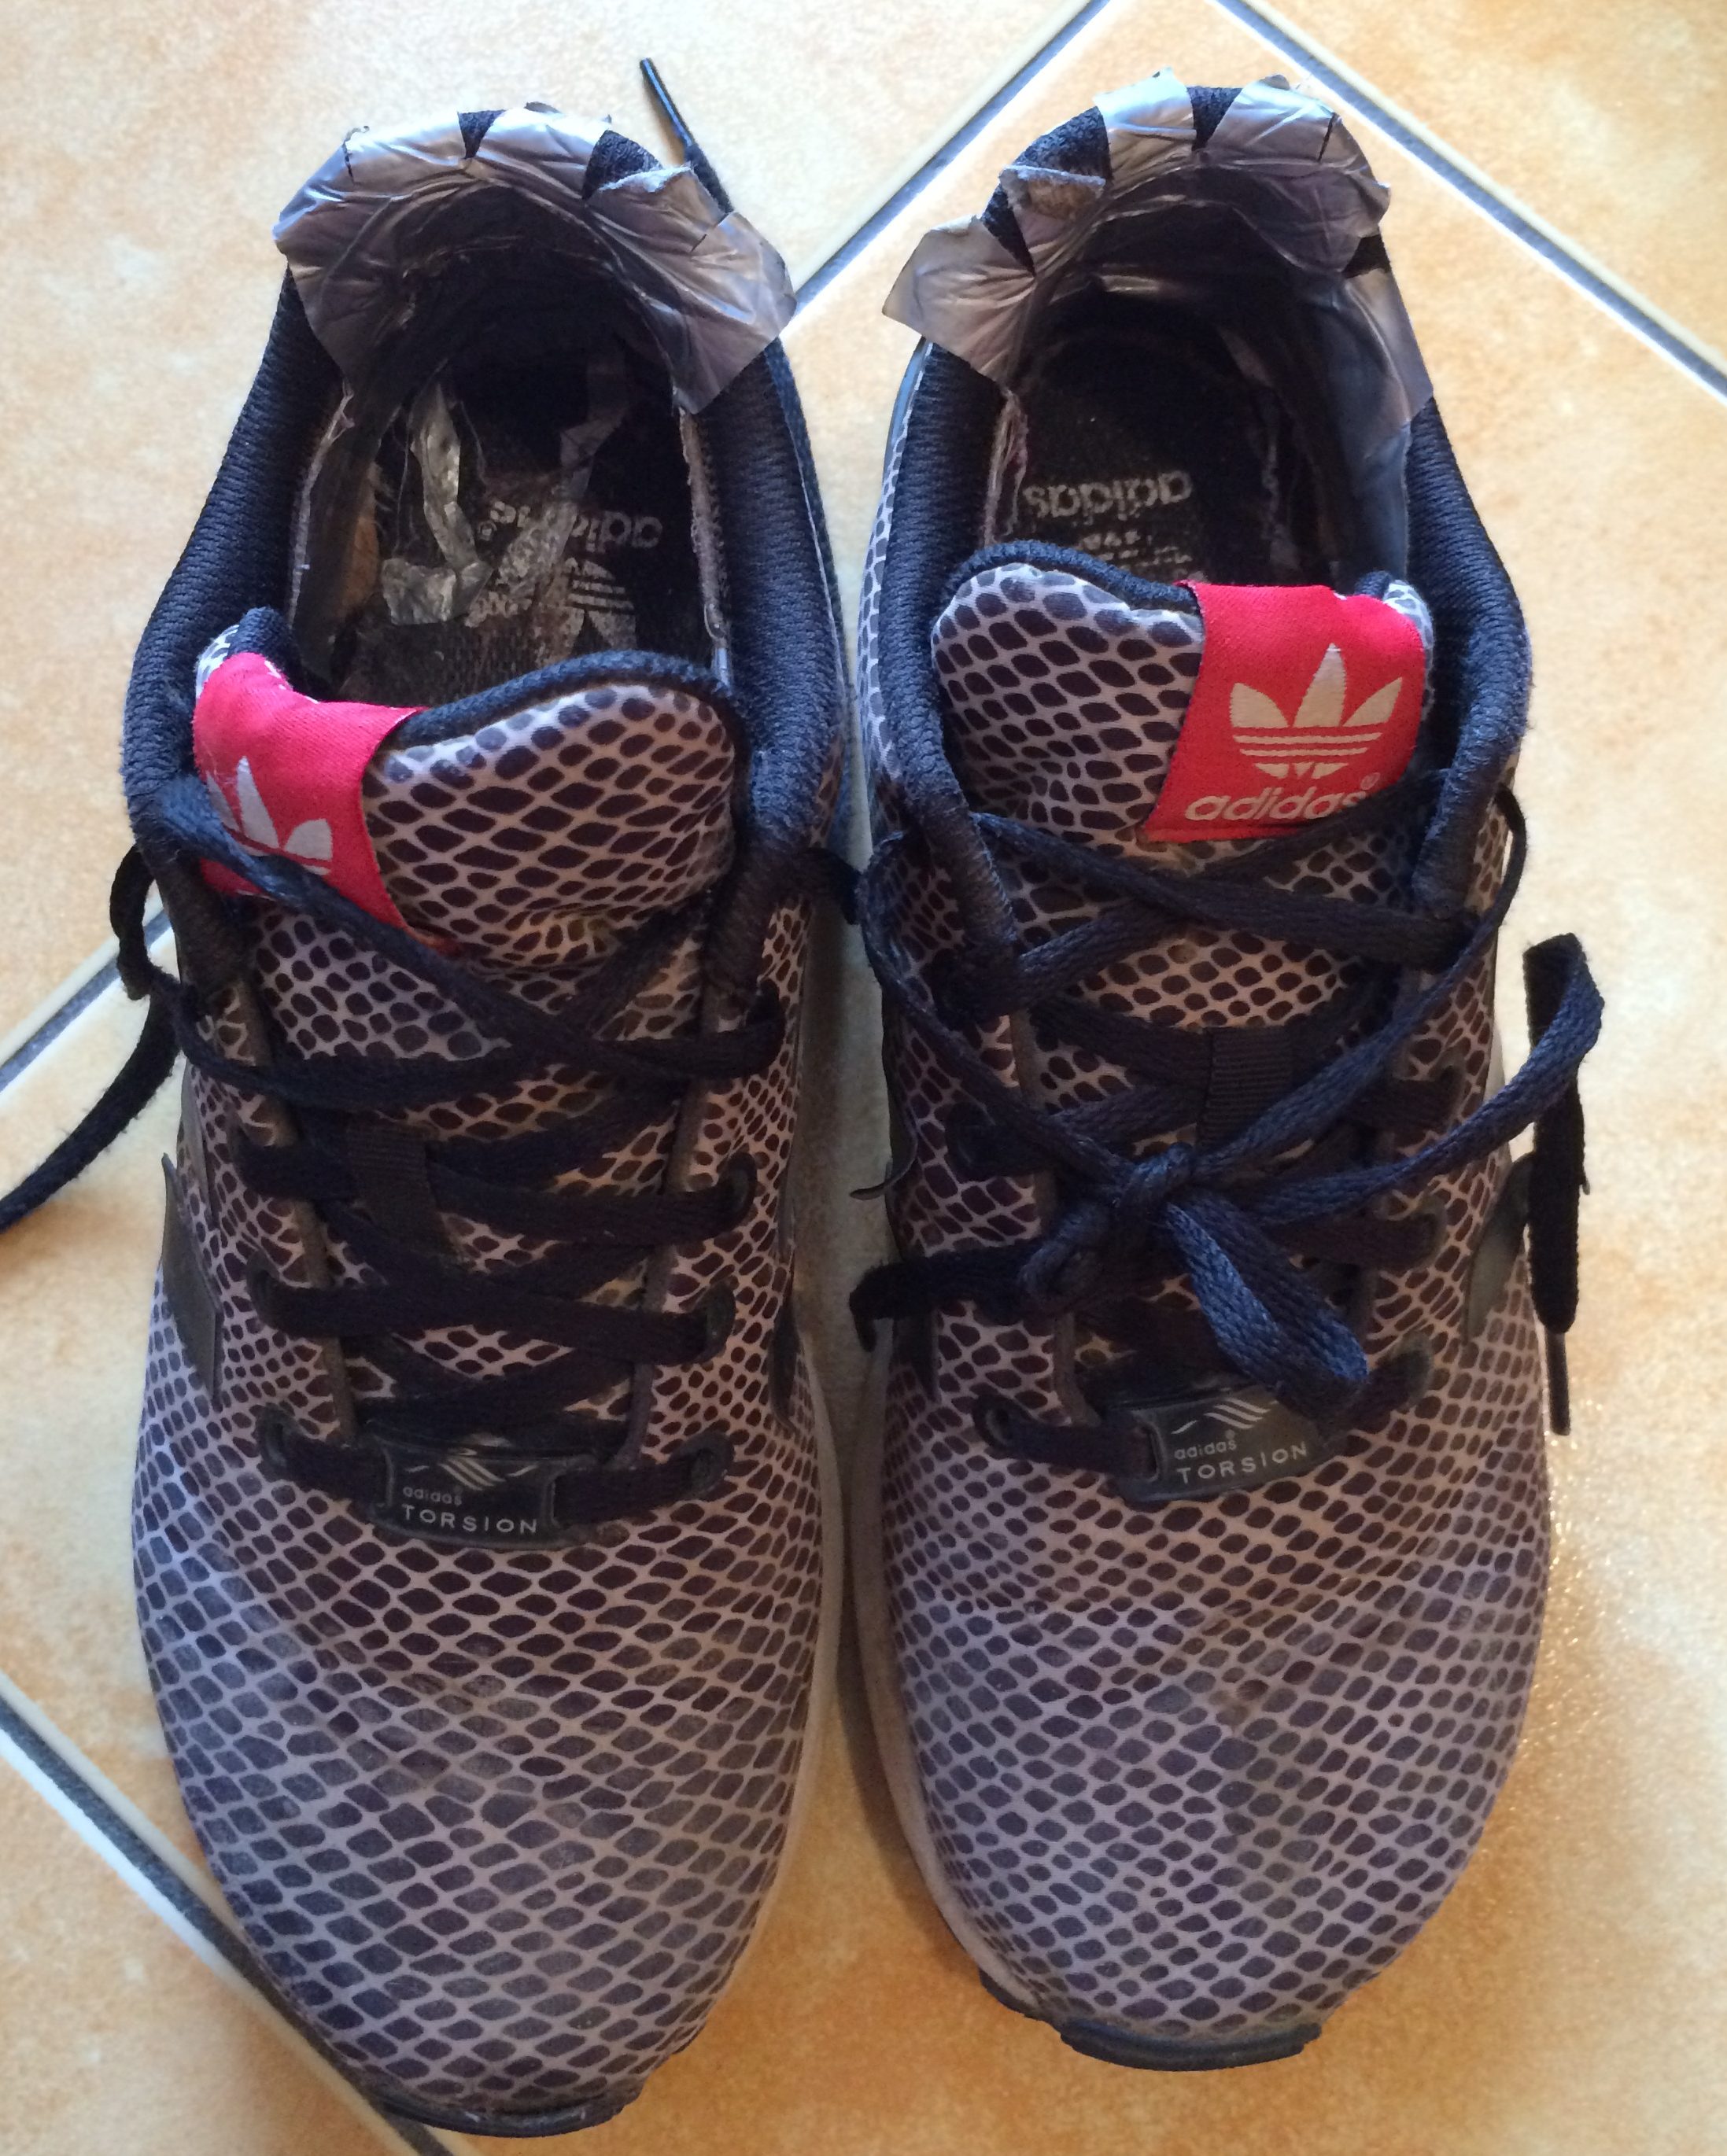
1x Adidas ZX Flux Running Shoes
1x Teva Tirra Sport Sandals
1x Pack Rain Cover
1x One Planet Cocoon 5 Sleeping Bag
1x Satin Sleeping Bag Liner*
1x Cotton Sleeping Bag Liner*
1x Toiletry Bag
1x Travel Towel
1x Medical Kit
1x Mobile phone with charger and cable
1x Headphones
1x Head Torch
1x AMPY kinetic energy battery pack
1x Plastic drink bottle
1x Flexible plastic drink bottle
1x Bag of snacks
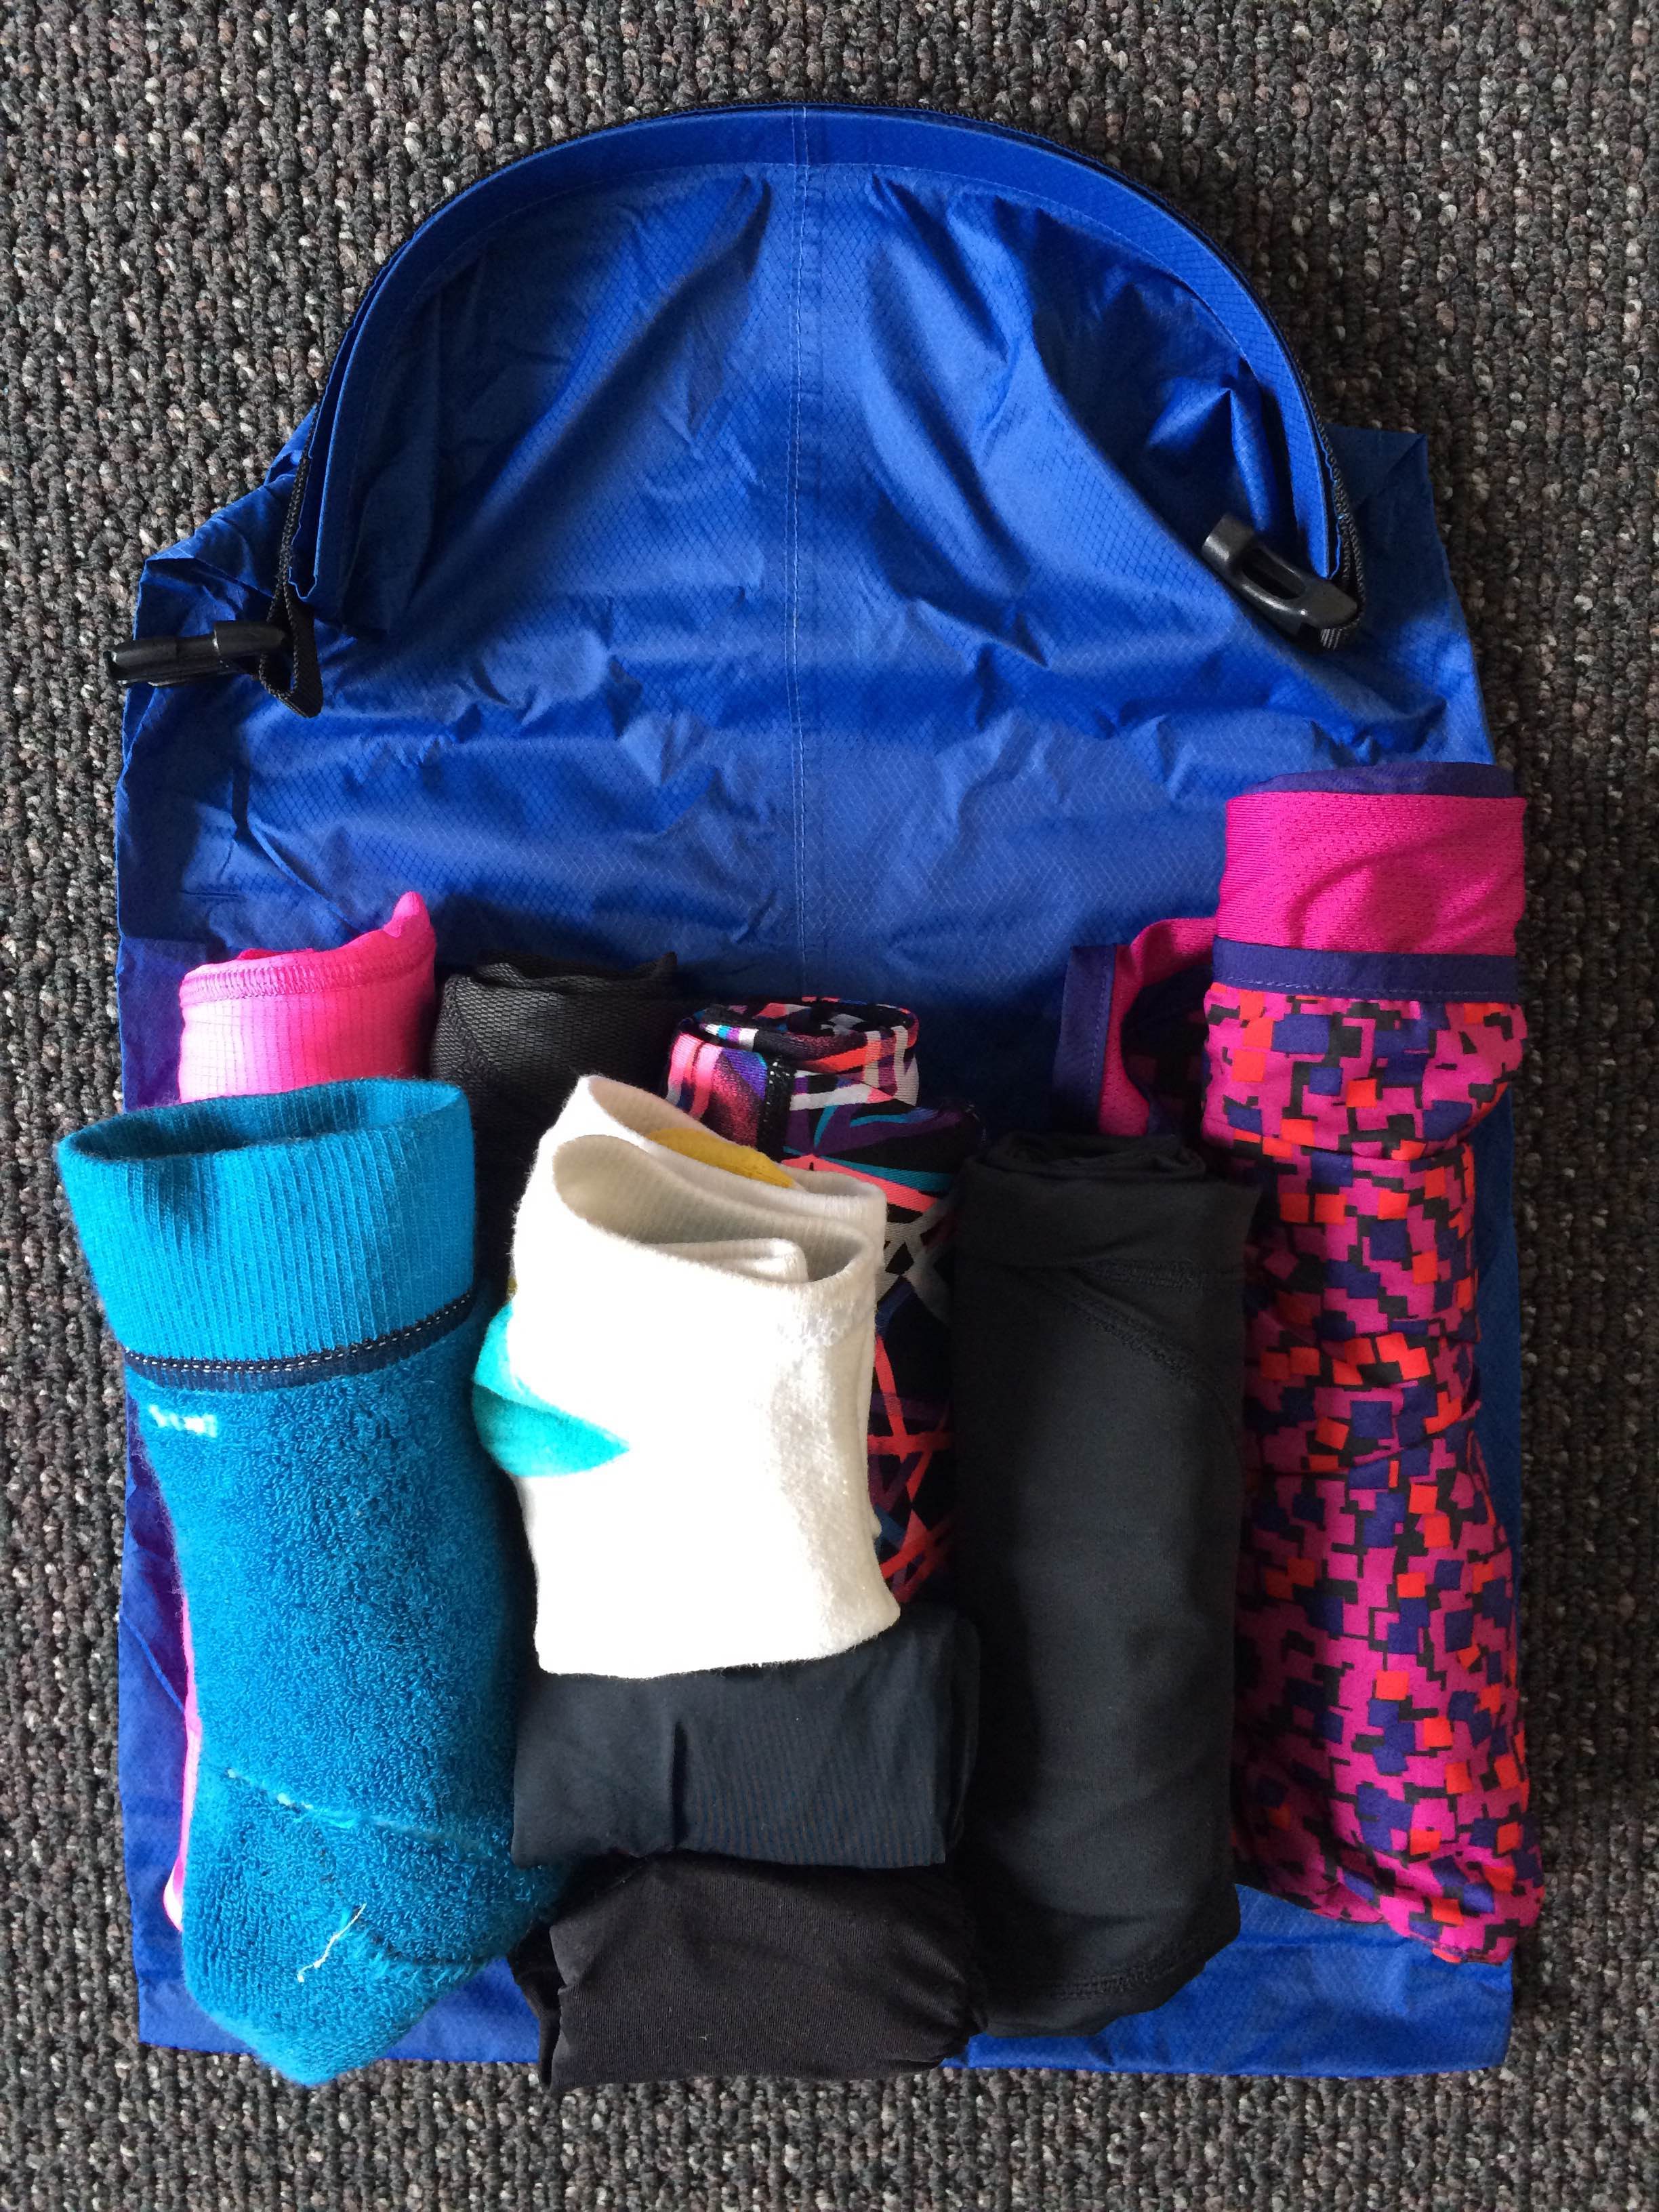
I like packing things in packing cells or dry bags so that packing and repacking is much easier. I use the Kathmandu Dry Bags.
I had one dry bag containing all my clothes each rolled up for compression, one dry bag containing all my medical supplies, a toiletry bag with toiletries and of course a sleeping bag.
When I anticipated rain, I put my sleeping bag and sleeping bag liner in a trash bag to keep them dry. Despite having two or three days where I was completely soaked from the rain, nothing inside my pack ever got wet.
My pack cover and raincoat were kept in an easily accessible outer pocket.
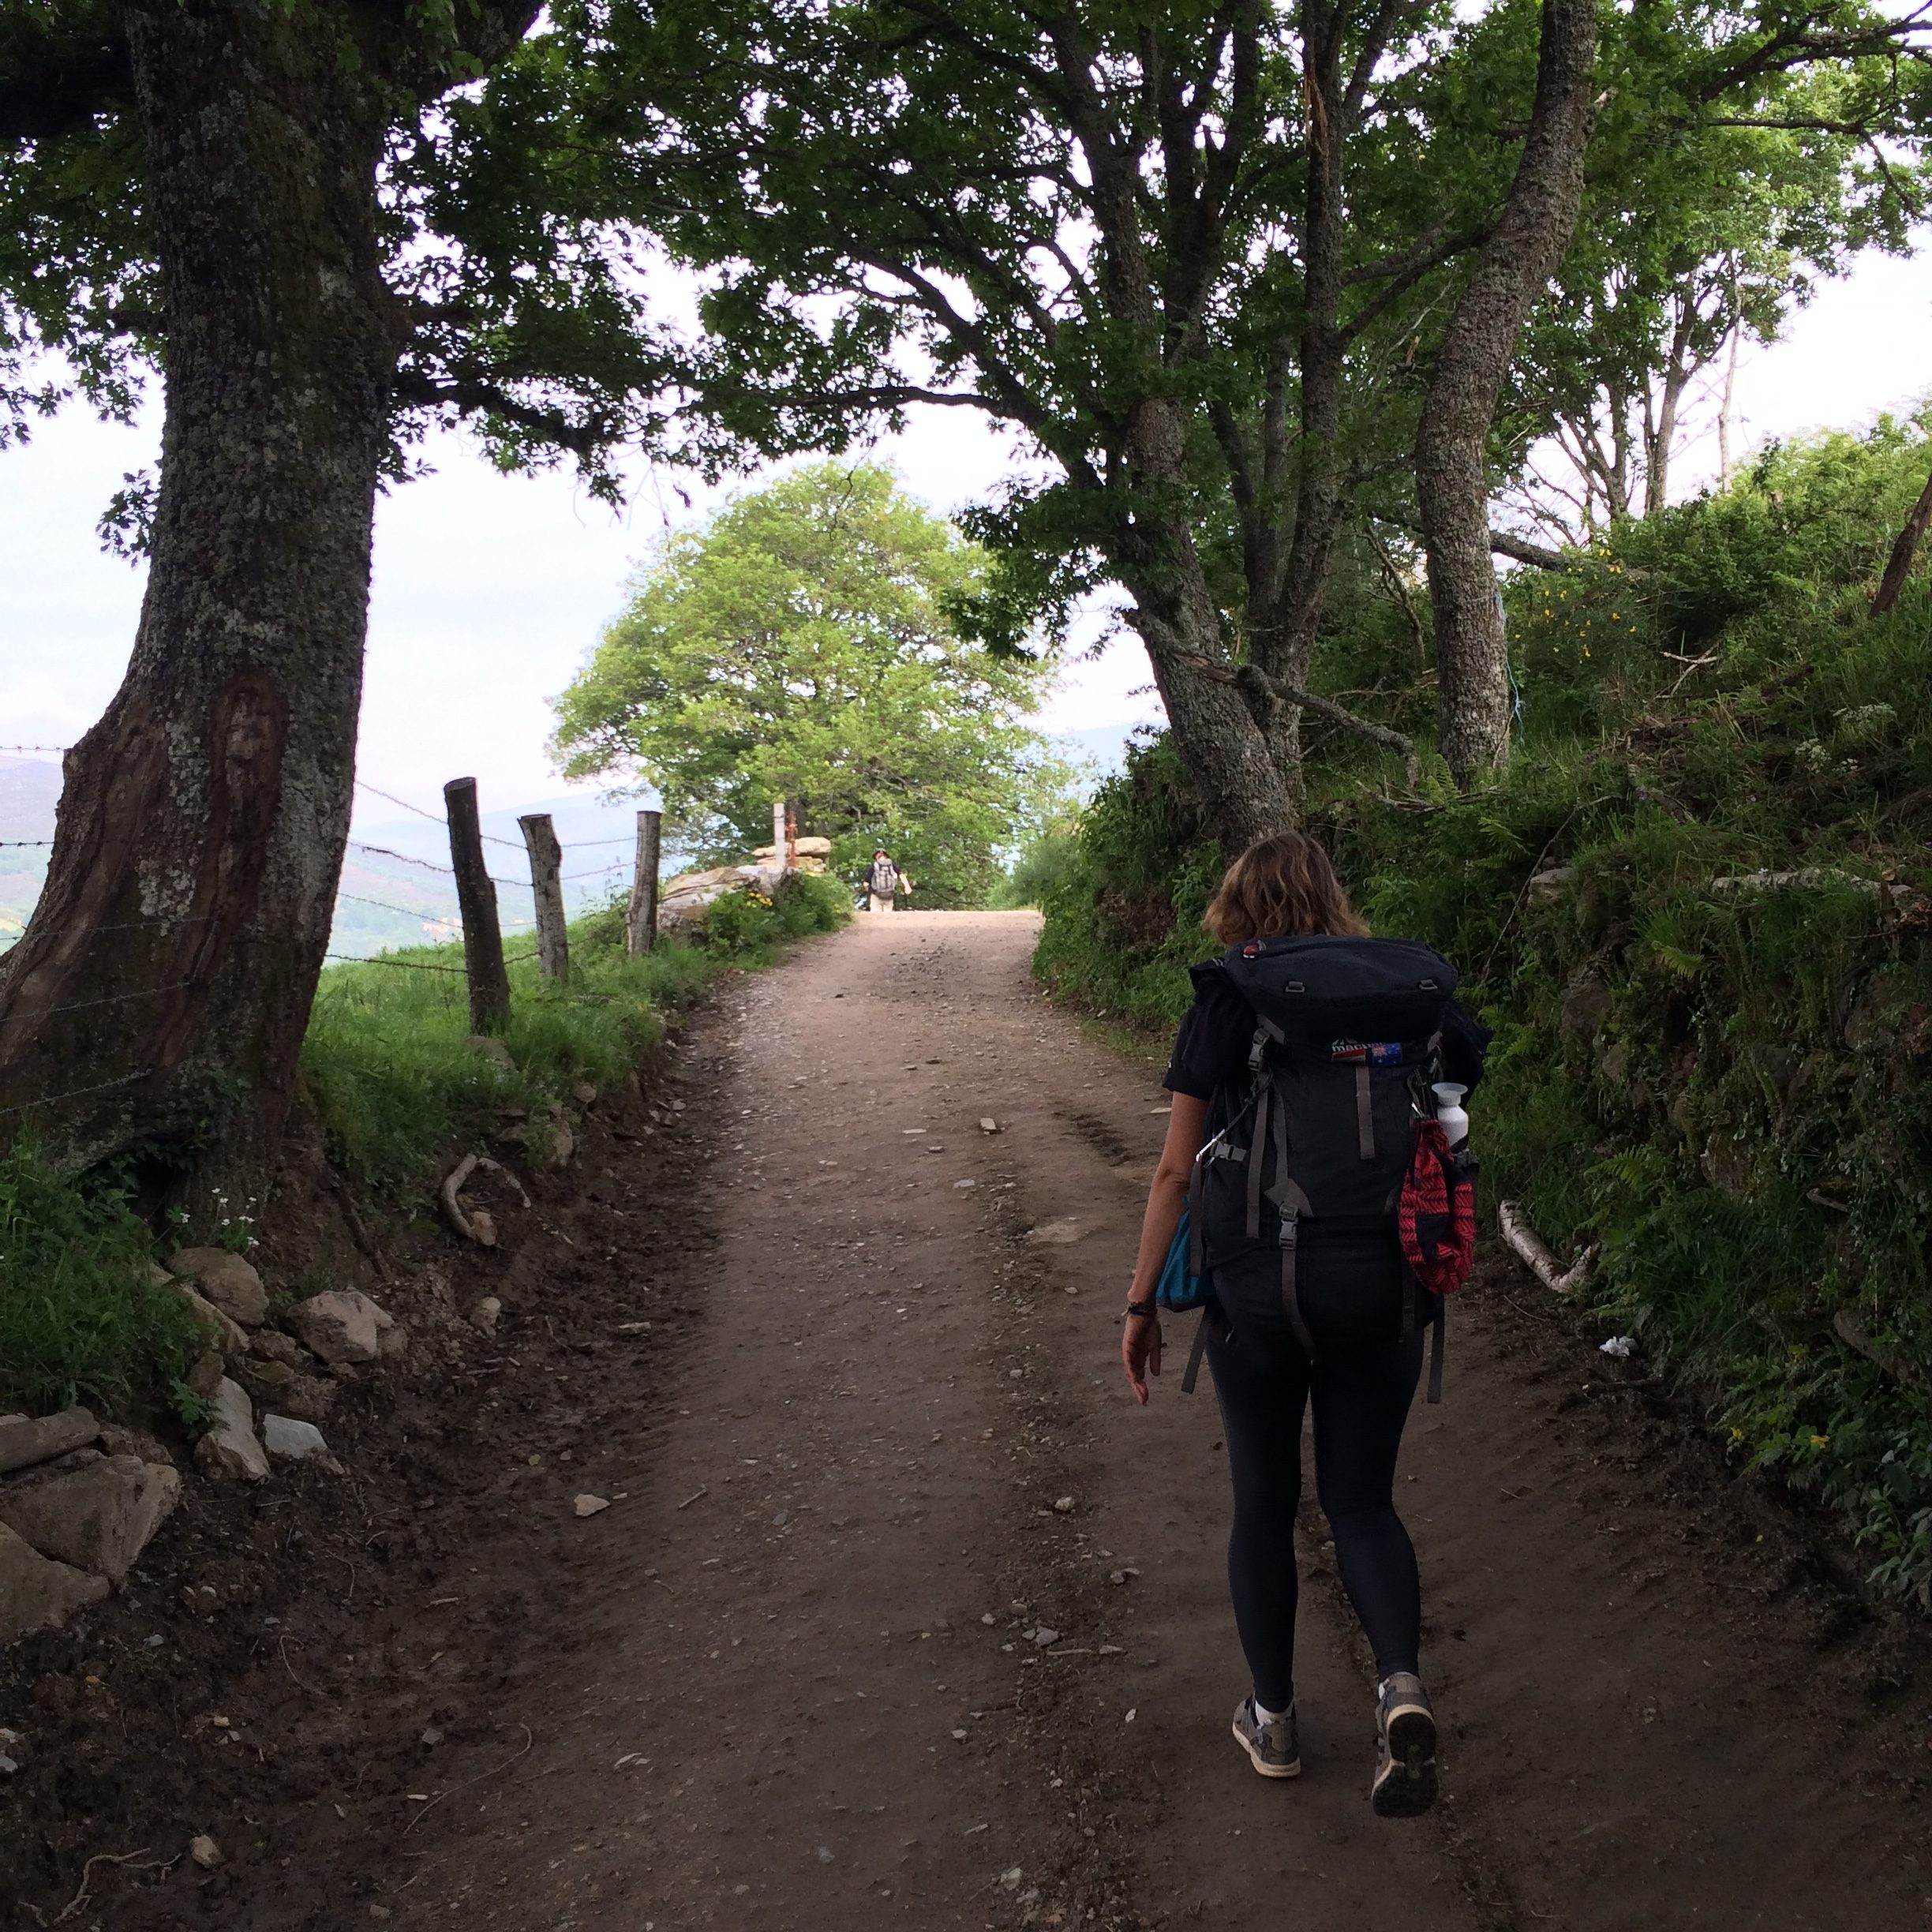
Travel Pack
My Macpac Genesis Aztec 55L Travel Pack was not ideal for the Camino, but it was what I had and it worked just fine. The Positives: comfortable harness, easy to pack, lockable compartments, heavy duty weatherproof fabric construction The Negatives: bigger and bulkier than necessary so lots of empty space, heavier overall bag weight
AMPY
The AMPY kinetic energy battery pack was a great idea. In theory you generate energy whilst walking, so that when you get to a hostel you can charge your phone without needing access to a wall socket. The Positives: Clean energy The Negatives: it is reasonably weighty, the movement of walking was not vigorous enough to generate charge
Sleeping Paraphernalia
I have issues with full body sweats at night time, often in reaction to synthetics. I took a satin sleeping bag liner as well as a cotton one. When I was having issues with the satin one, I switch to cotton. It was mildly better but I chose to stick with it.
The bonus of the satin sleeping bag liner was that I could leave it in the sleeping bag when I packed it up each morning. The cotton one didn’t pack as small and had to be packed separately.
Yes, I packed pyjamas, yes I know that was a luxury. Call me a traditionalist if you will, but I enjoy sleeping in pyjamas. Particularly for the fact that they aren’t synthetic active wear. Many people simply slept in their hiking clothes for the following day, definitely a smart thing in some regards, particularly with the very early starts before lights are switched on. However, I wore my hiking clothes multiple times between washes, so I was not keen to do this!
Also the MUST-HAVE items are an eye mask and ear plugs!!!!! My sleeping bag has a little zip pocket in it, so I was able to keep these readily accessible in my sleeping bag.
Sleeping Pills are not for everyone, but I really appreciated having some sleeping pills with me. Some nights the snoring was really bad, my mind was overactive or I was in pain and the sleeping pills helped me to nod off. I only resorted to them twice, but was grateful to have them with me. I use Temazepam, which the doctor described to me as being a pill that will help you to fall asleep but will not maintain sleep, which is perfect for me and it also means you wake up clear headed and functional the next day. Note: Temazepam IS a prescription drug, it can be addictive. You must consult a doctor before taking any pills of this nature.
Bras
Loads of people recommended packing sports bras because you are active and walking so they provide good support. Additionally the straps would be in a different position to the pack straps and thereby reduce rubbing and abrasions on the shoulders. Despite these recommendations I opted to pack normal bras and am glad I did. The benefit of a standard bra is that in the dorms rooms I was able to get dressed/changed without flashing any skin or needed to go to the bathrooms. Having spent a lot of time in dorm rooms I am quite comfortable stripping down to my underwear in order to change. Once in just my bra, I could drop the straps to put on my pyjama shirt before unclipping my bra. In reverse I was able to clip up my bra, take off my shirt, pull up the straps and put on my t-shirt. There is no way I could have done this in a sports bra. In regards to the rubbing of the straps, I had no issues there. My pack harness is very well designed and I adjusted it appropriately so the weight was on my hips and not my shoulders.
Shoes
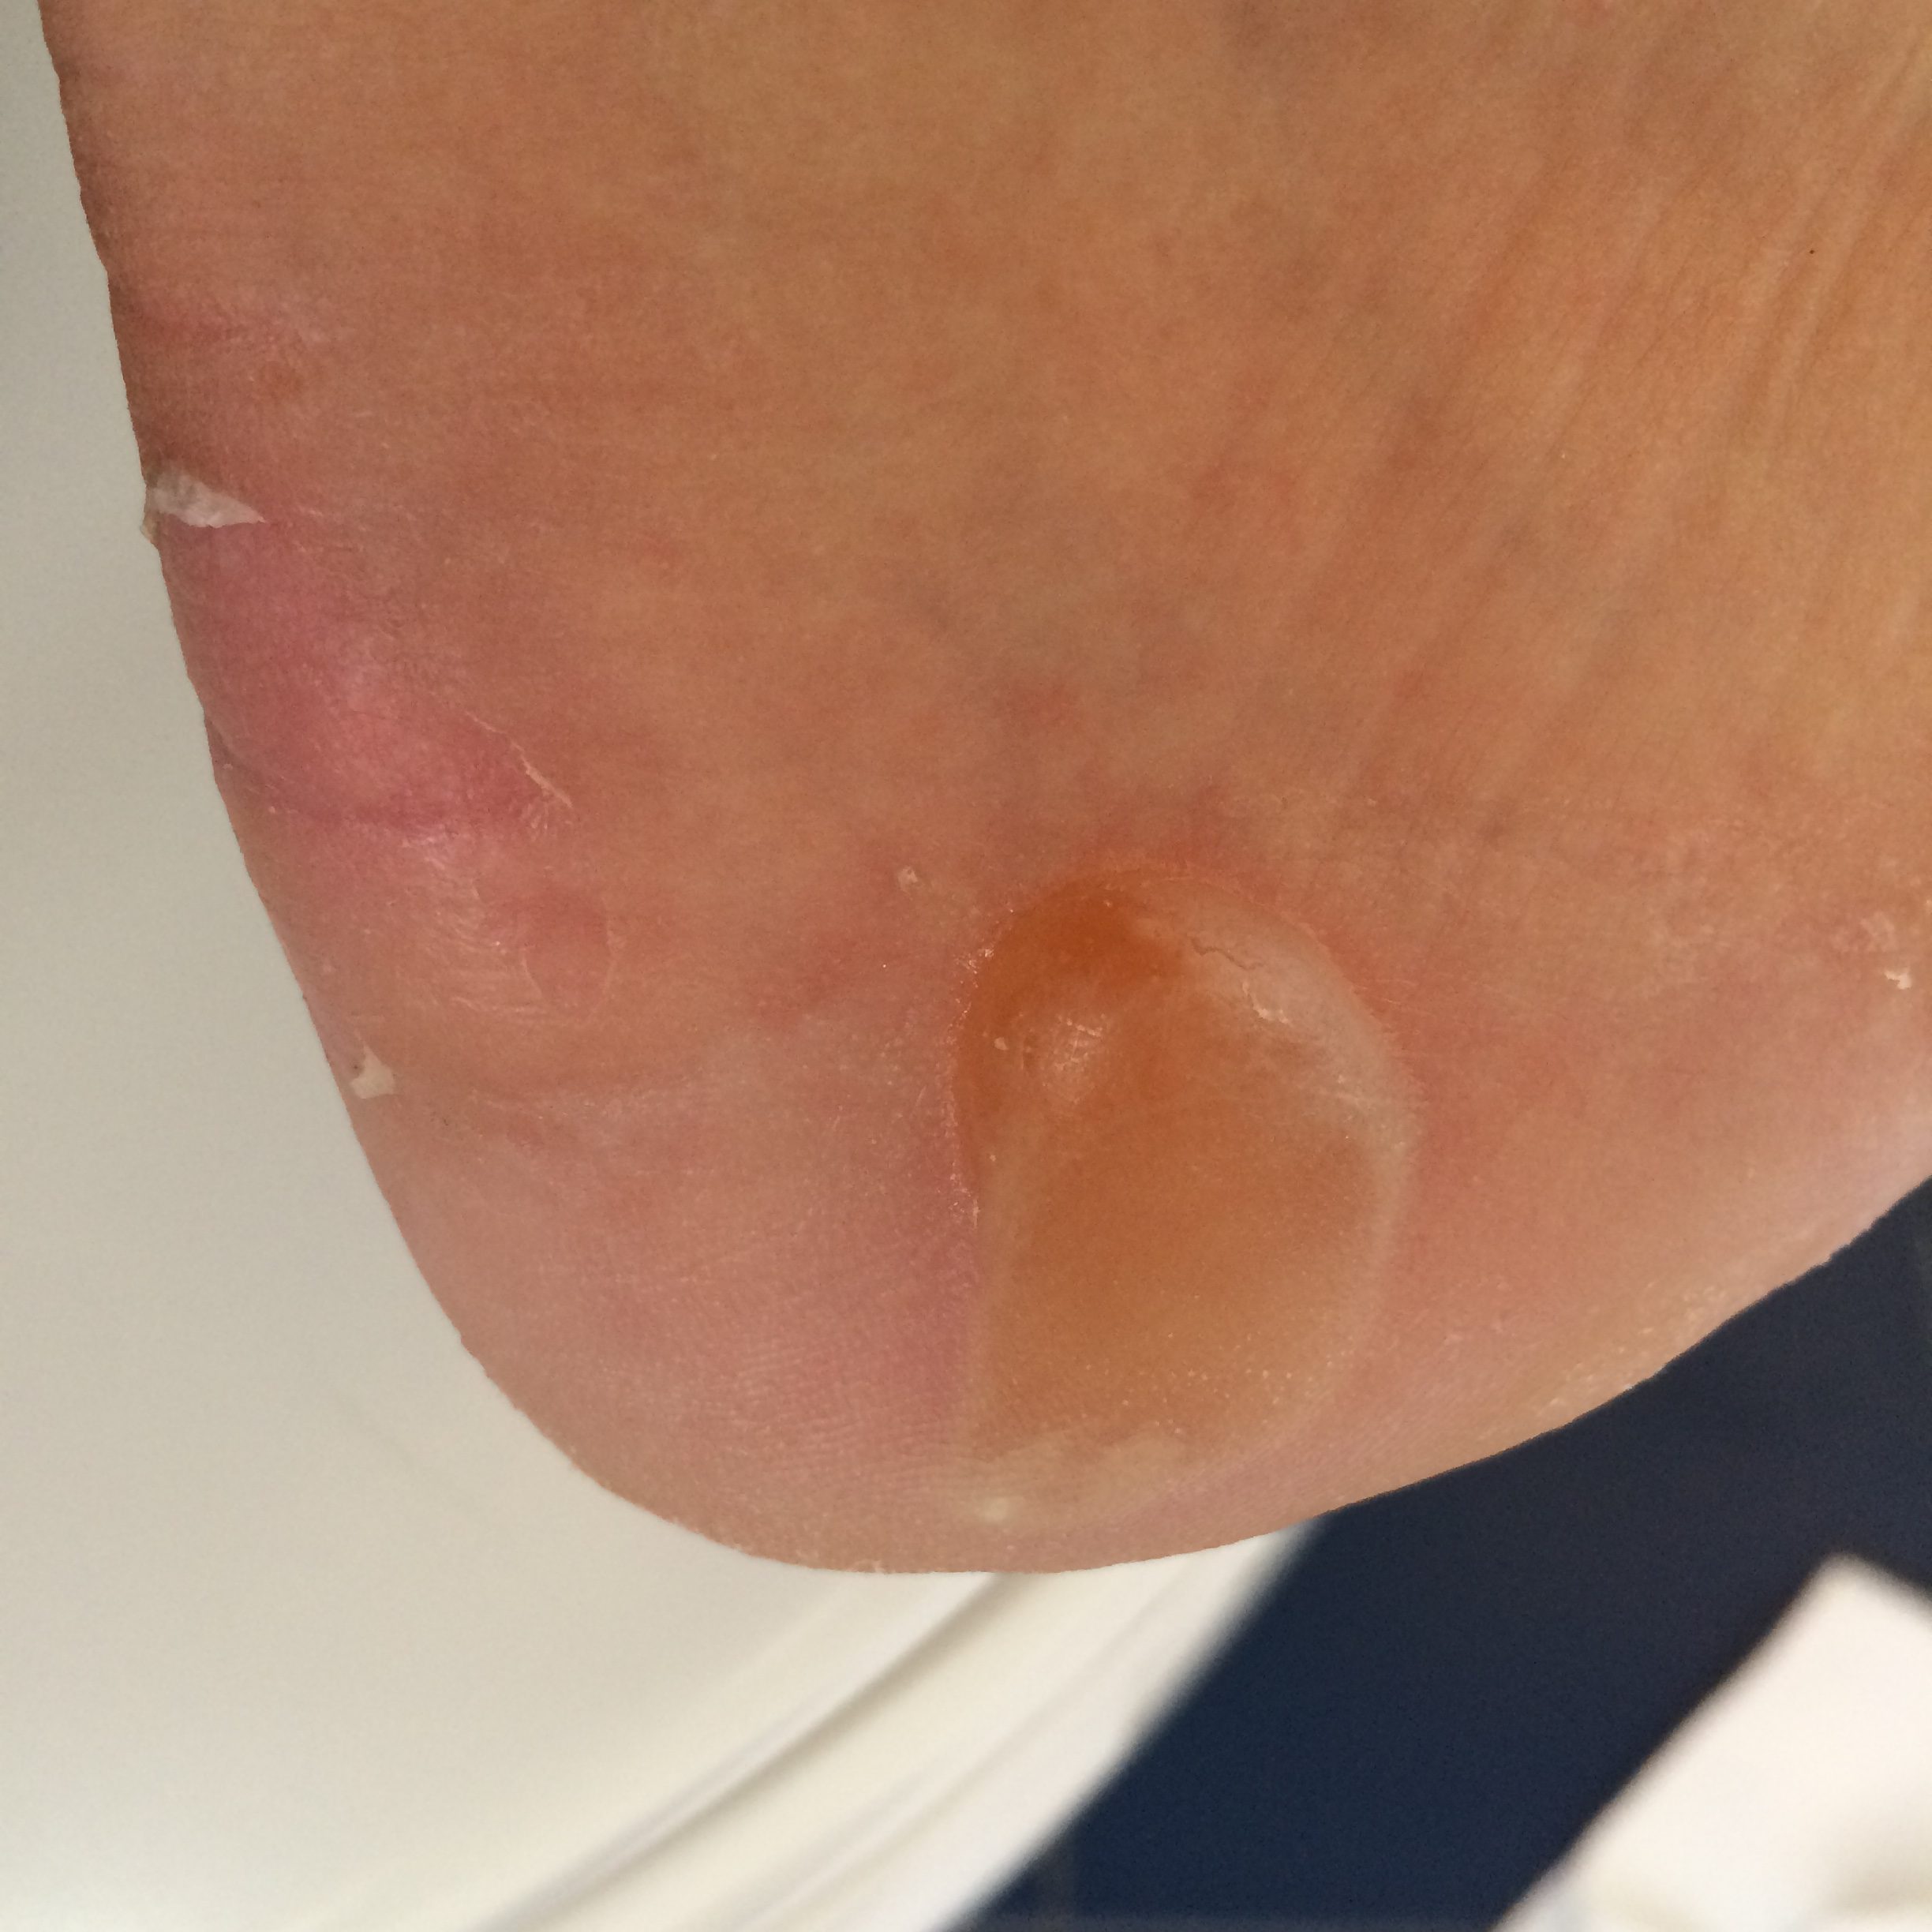
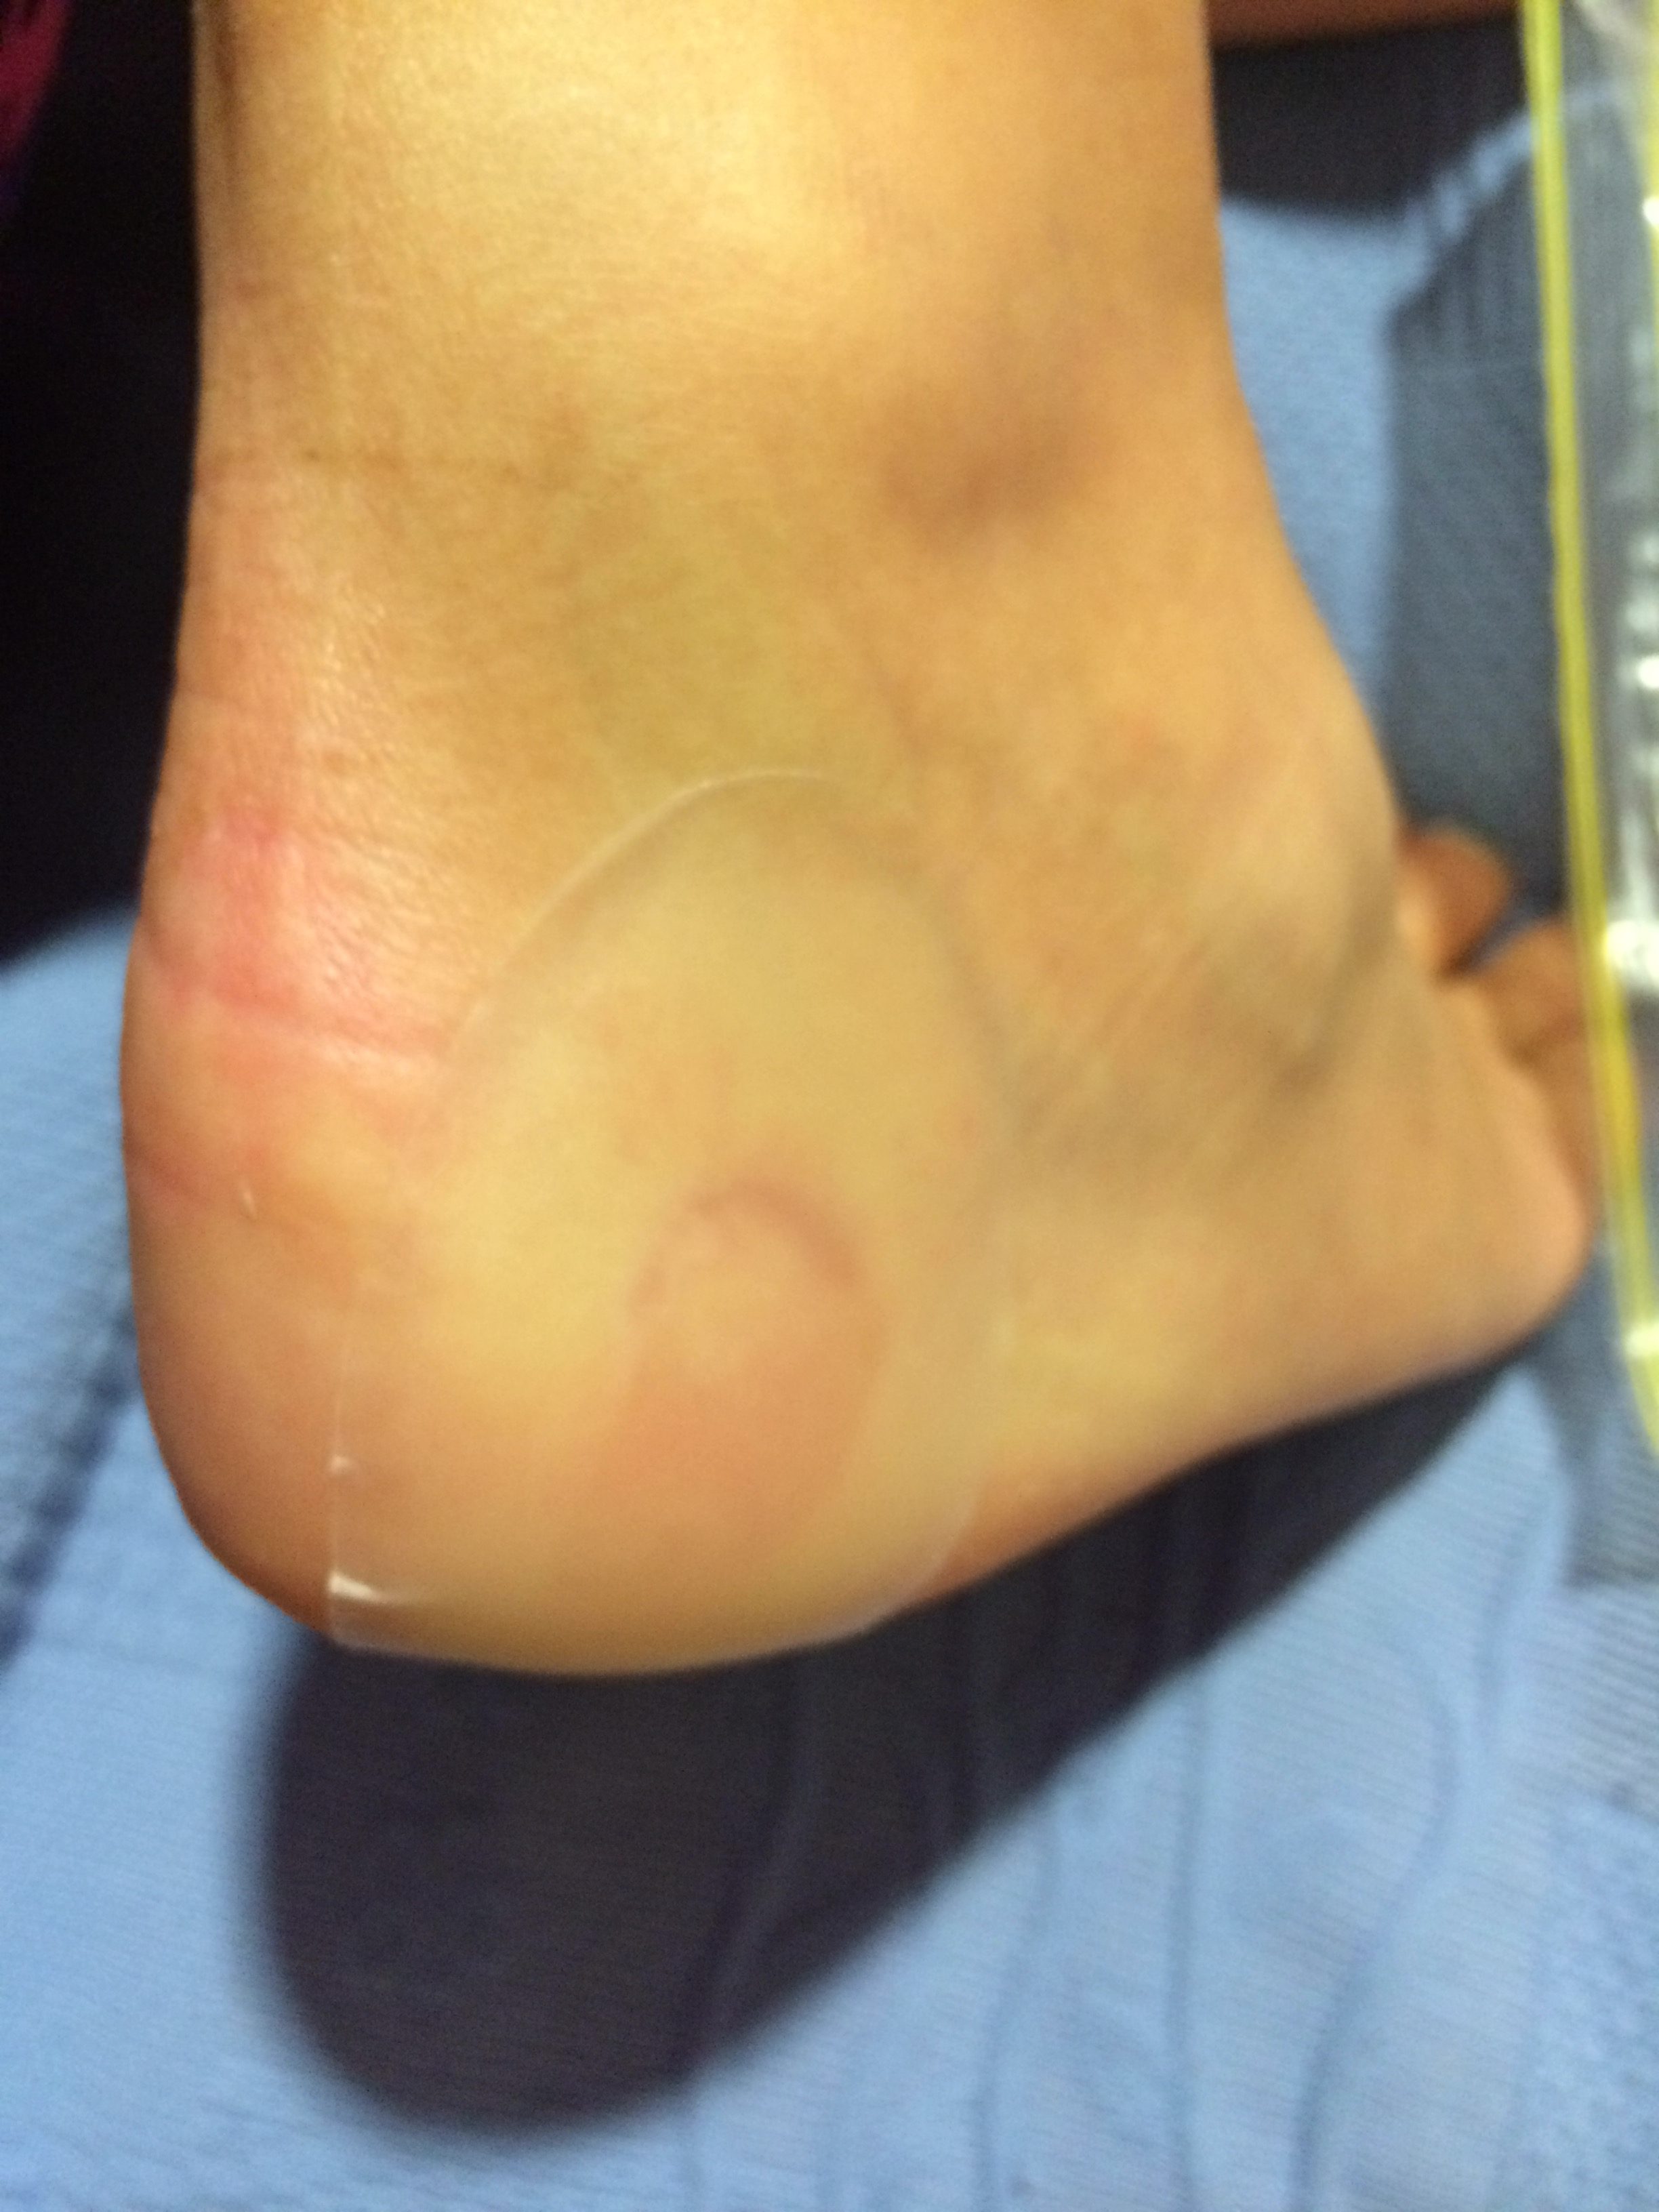
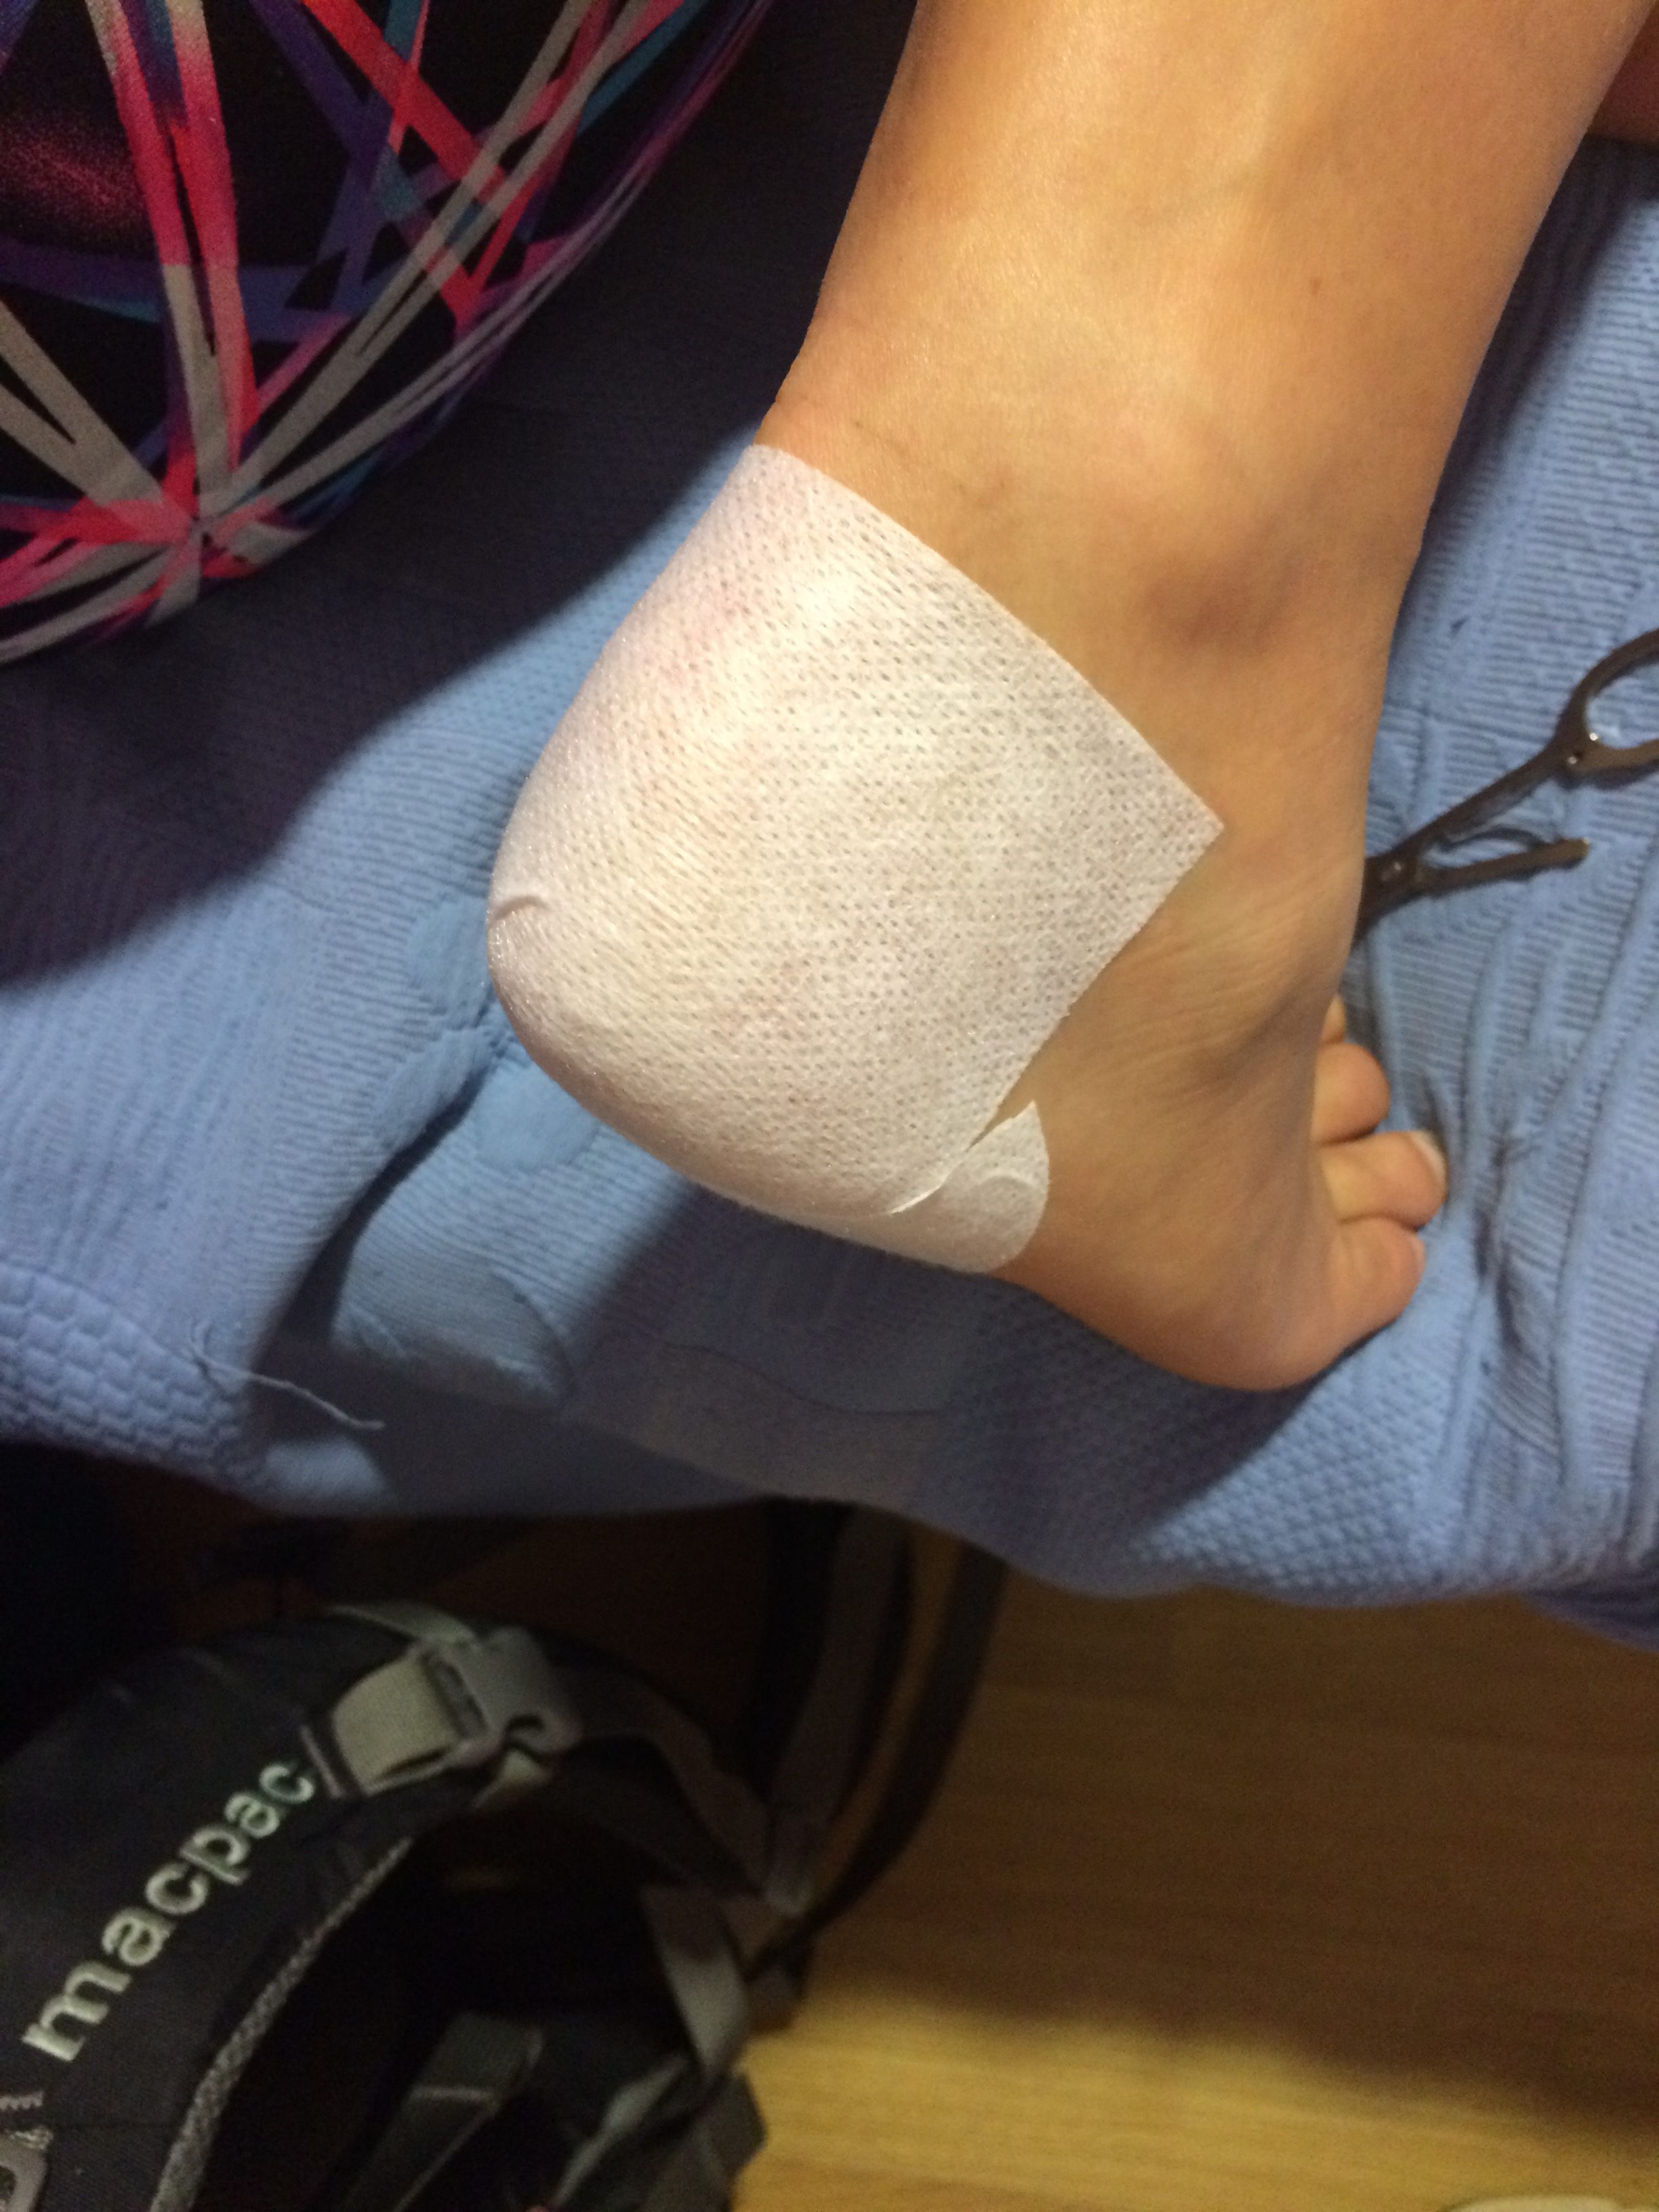
This is where I had some issues. Despite having owned and walked in my hiking sneakers for the last four years with no issues, on the camino I had issues from the start.
I developed huge blisters on both my heels which made walking excessively painful, then when walking downhill my toes continually hit the end of the shoes and both my big toenails were damaged so badly they were about to fall off. So my feet were destroyed on day one. I tried walking in my hiking shoes only one other time, and again experienced excessive pain. Within a short amount of time I decided to throw my shoes away and left the in a box at a hostel that was labelled “Take what you want, leave what you don’t”.
I walked 29 out of 31 days in my running shoes. This was not ideal as the soles as a bit too thin for long term hiking. I tried to minimise this with the use of a sports gel insole, but the soles of my feet still became excessively sore as though bruised. Even so, the comfort level was much better than my hiking sneakers. The running shoes were larger overall with more space in the toe box and while I still experienced some blisters, none of the pain of day 1. After a few weeks, the padding in the heels started to wear out and for the last two weeks I stuck them together with duct tape and was able to nurse them to the finish line.
Once I was down to one pair of shoes, I bought a pair of sports sandals to wear for comfort in the afternoons. They were very pricey but a purchase well worth it! My feet were incredibly grateful! Note: I was surprised at just how much my feet swelled up during the day, I think close to a full shoe size. The swelling didn’t go down until three days after I had stopped walking.
Medical Kit
In my medical kit I had a few items I used regularly and a couple of items I never used.
Items that I regularly used:
Needle
Compeed
Hypafix
Scissors
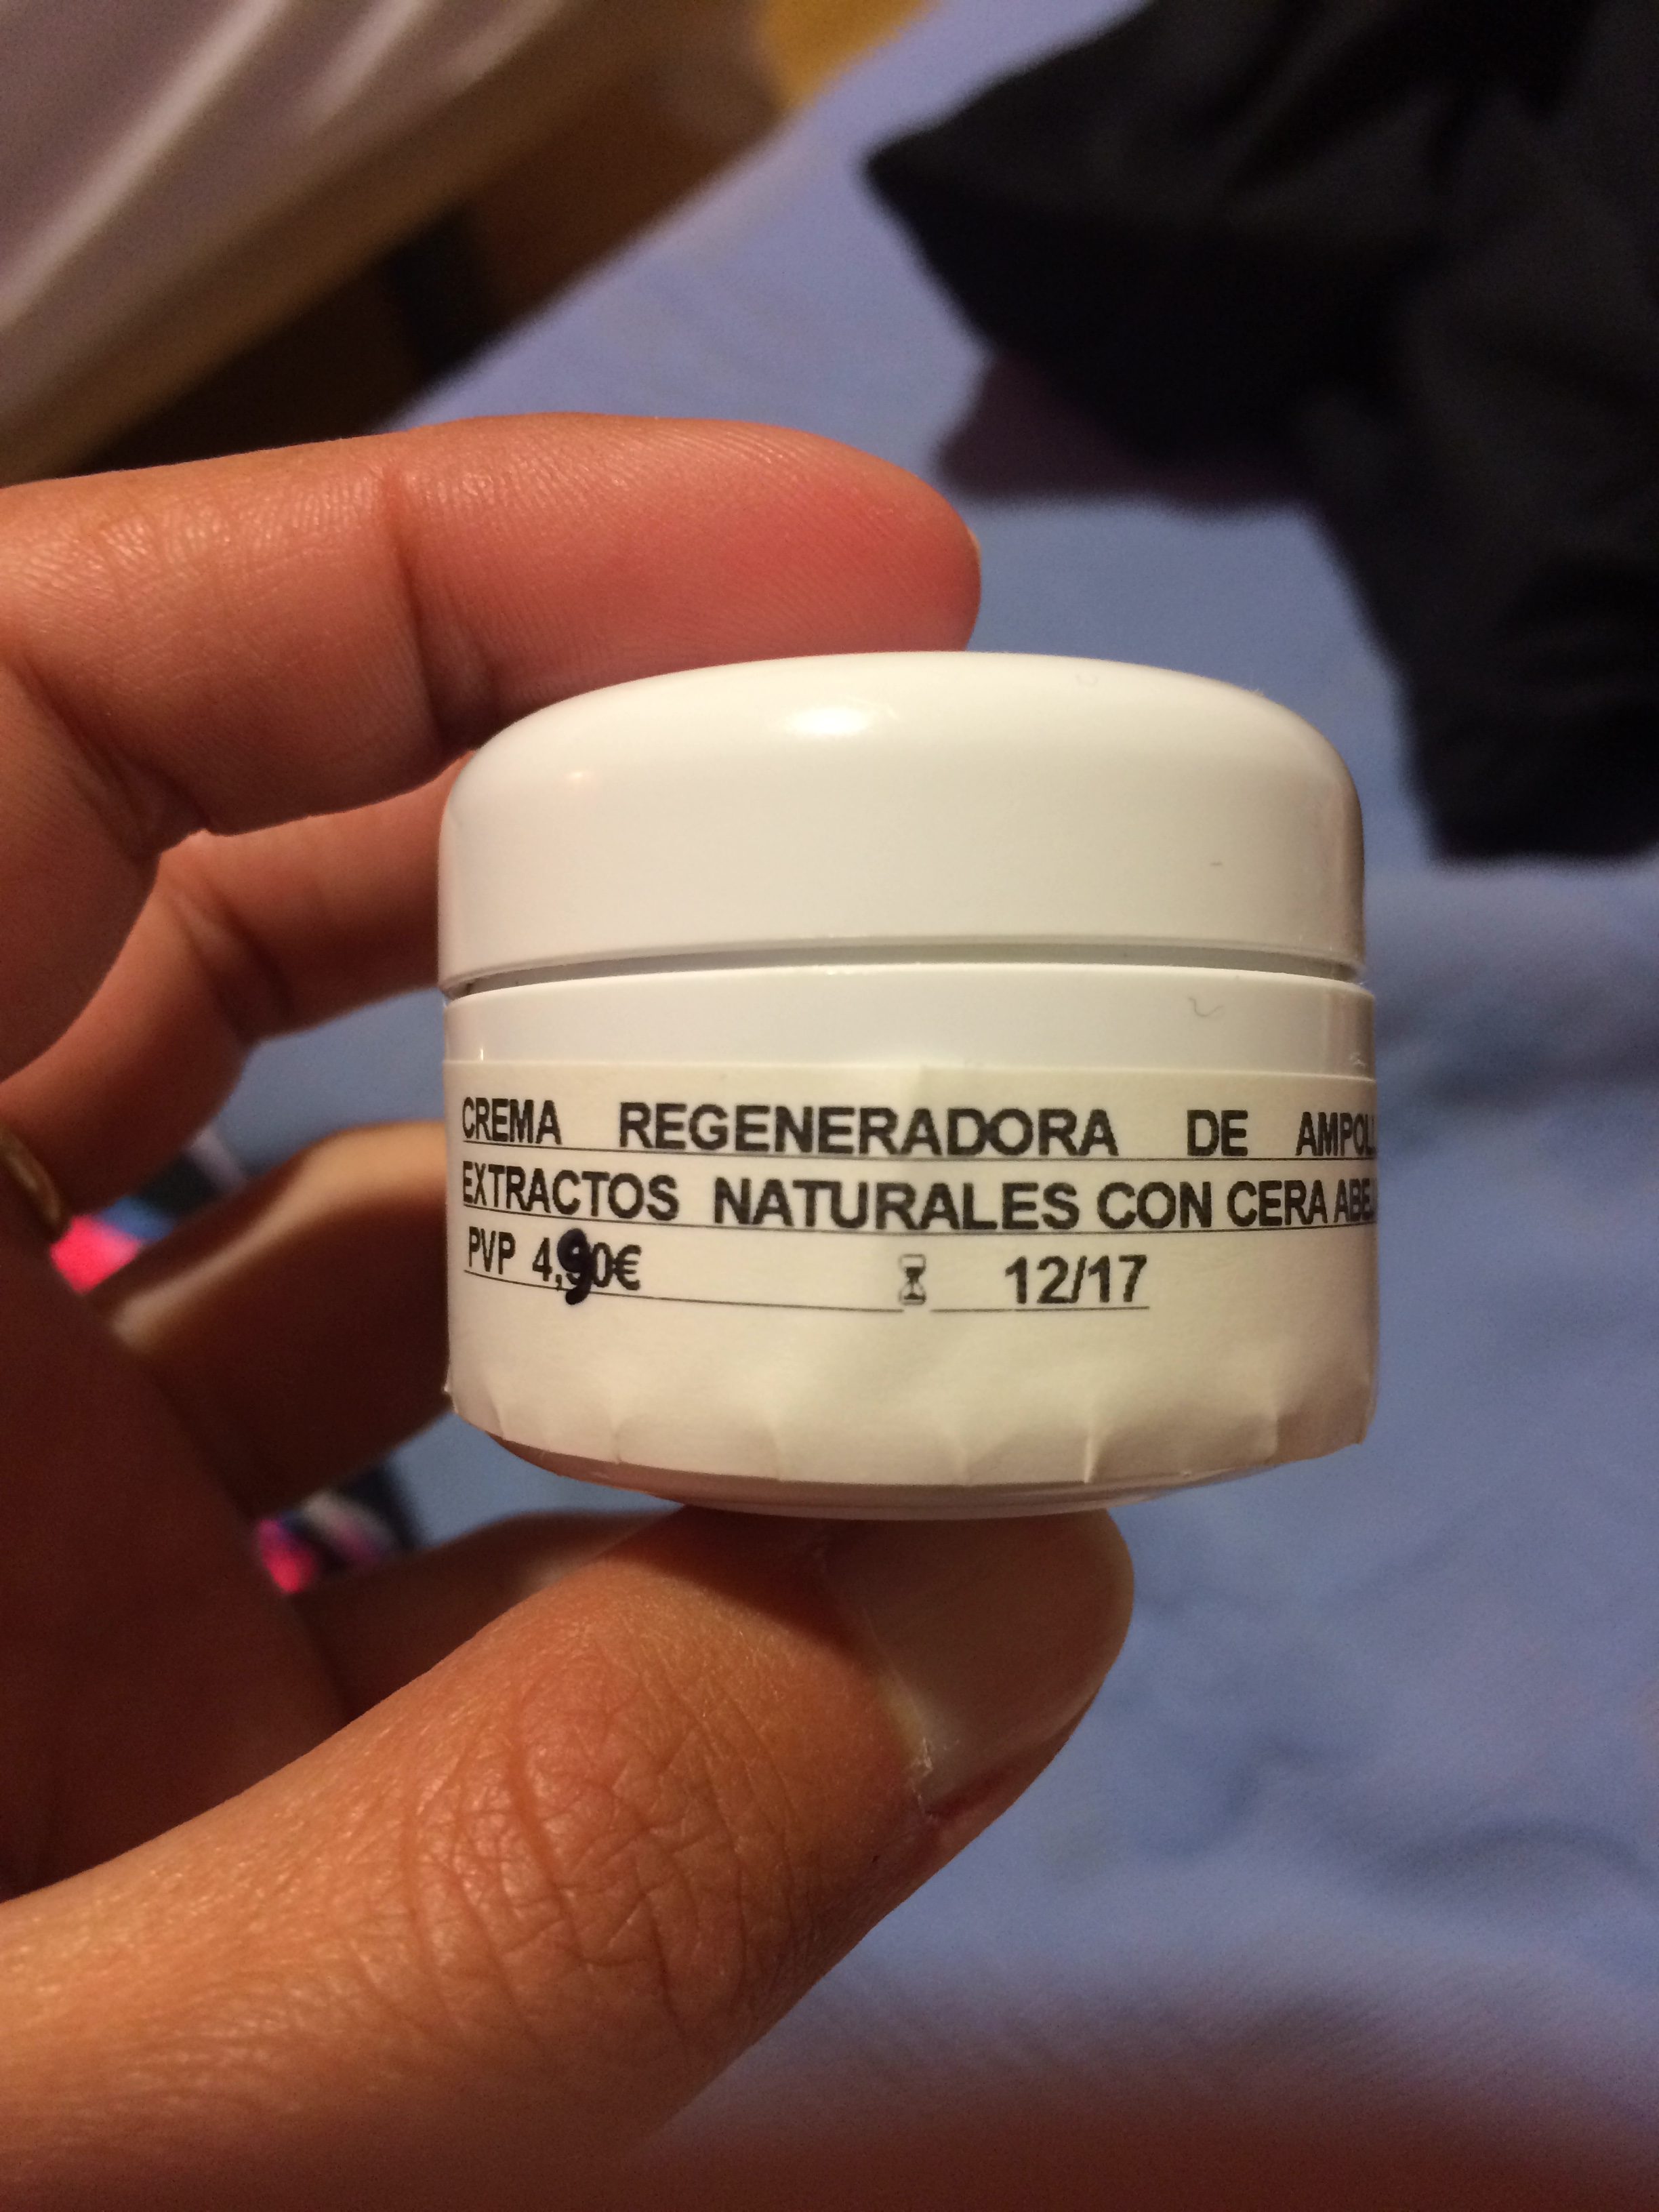
Blister cream from the pharmacist in Fromista
Ibuprofen Gel
Ibuprofen Tablets
Knee Brace
Items I did not use:
Antiseptic Cream
Bandaids
Ankle Brace
For some tips on blister care and dealing with foot and joint pain, check out my discussion in my final post about the Camino experience: Everyone walks their own Camino
Things I posted home:
AMPY: didn’t work as effectively as I had hoped
Head Torch: never used it
1x Merino Wool Socks: with the thick socks and swelling in my feet I couldn’t get my shoes on.
Rain Pants: never used it
Satin Sleeping Bag Liner: opted to use the cotton one
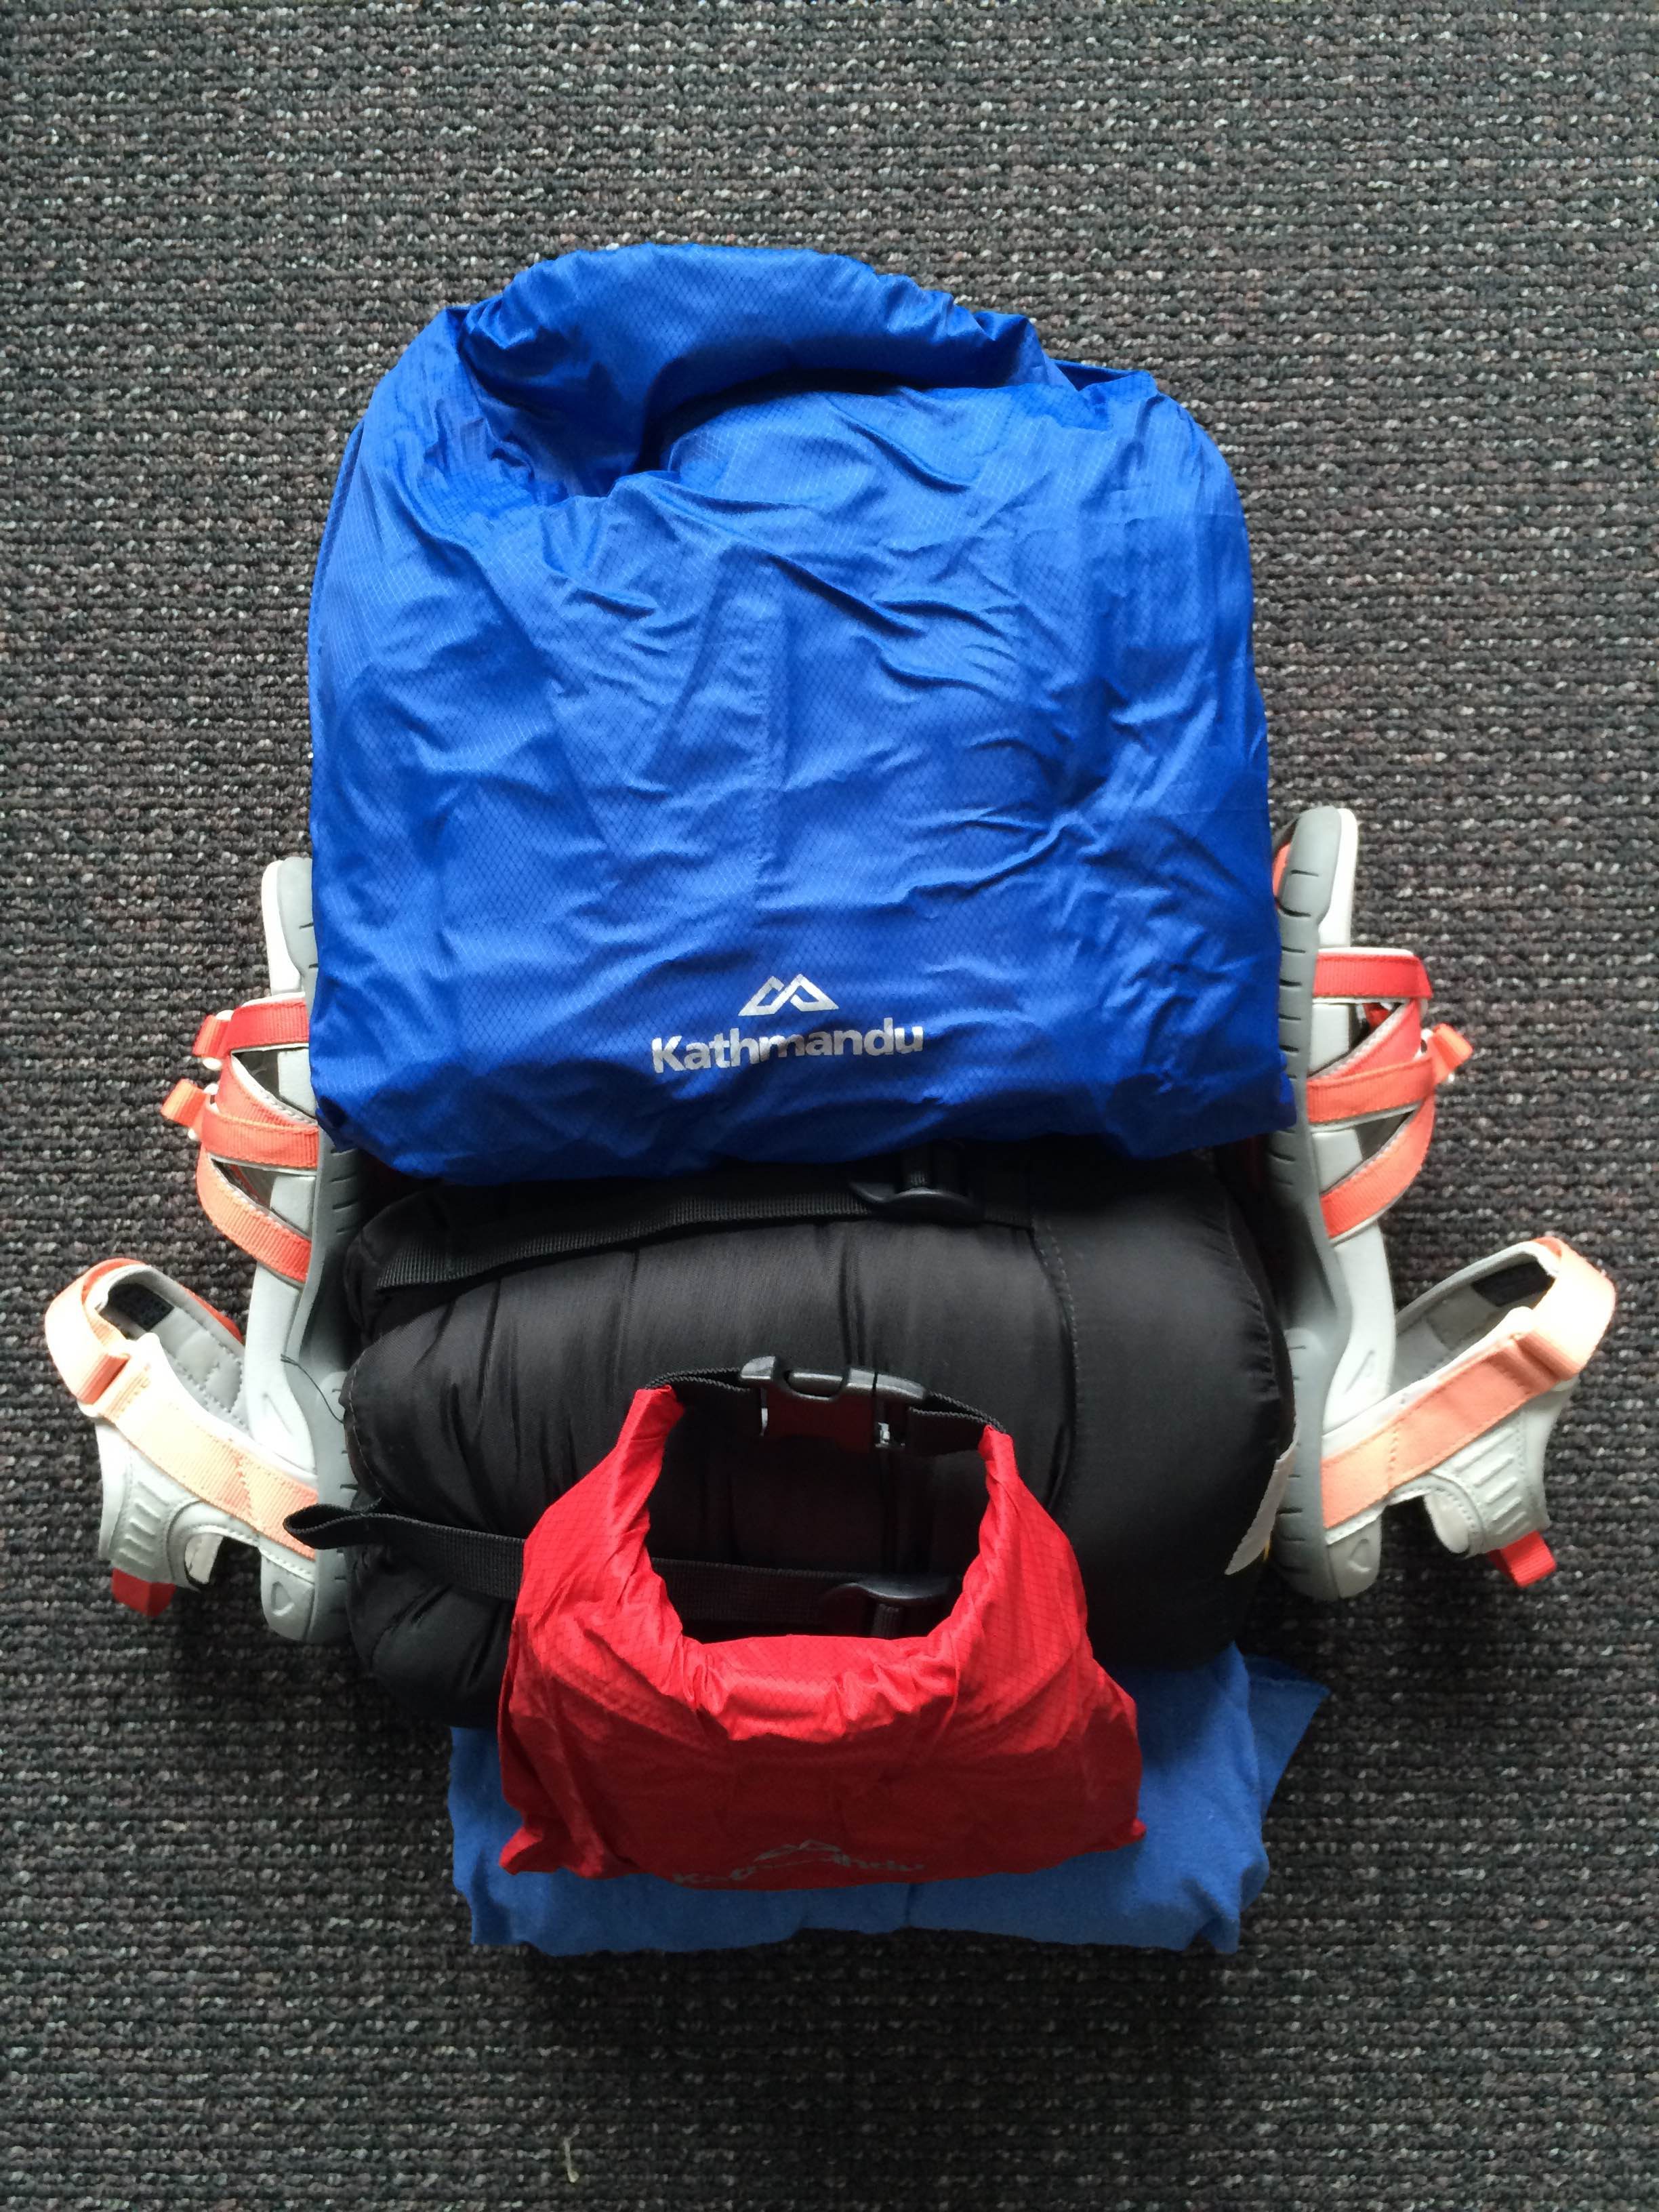
How to pack a bag effectively
Once you have decided what to pack, another important thing is knowing how to pack your bag effectively for weight distribution to minimise the negative impacts on the body when carrying it for a long time.
The important considerations are to keep things centred and to keep the heaviest items as close to your body as possible, preferably around the middle of the back.
My style, put the sleeping bag and sleeping bag liner down the bottom, centred. Put the toiletry bag on top but against my back, put clothes bag in front of that. Put shoes and/or sandals to each side of the packed items. Squish the medical kit into whatever gap remains.
Front view of items as they would be packed
Side view of items as they would be packed
On top of these items would be a shopping bags with all my lunch items: bread, meat, cheese and piece of fruit. The two external side pockets of the bag each contained a water bottle. My hat was clipped to the front of the pack. The front zippered pocket contained the pack cover and my raincoat. The hood pocket had my passport, pilgrim passport, money, and sunscreen. I had a tiny dry bag which I attached near my waist containing my phone and headphones.
Once your pack is filled with your necessary items, make sure to adjust it appropriately so the waist strap is nice and tight so that your hips hold the packs weight. Ensure the shoulder straps are tight enough that the pack is snug to your body and the weight of it is not pulling you backwards.
A well fitted, well balanced and properly packed bag shouldn’t cause you too much hassle for the long haul. My pack might not have been the ideal bag for the camino, but you make do with what you have and I was really happy with it.
El Camino de Santiago de Compostela: the official distance is 775kilometres from Saint-Jean-Pied-de-Port to Santiago de Compostela. The most physically challenging and rewarding experience of my life.
I knew that with enough determination I would be physically capable of walking the full distance. Once I have set my mind to something and publicised my intentions, I can be an awfully determined and stubborn person. While my family and friends continually told me I could do it, I suspect they wondered why I would bother and whether I would quit. With shouts of pride and wonder they were all very impressed when I finished!
So without giving myself too much of a pat on the back for kicking Camino butt, I do want to tell you about the experience in a way that is factual and informative for anyone considering doing it themselves, as well as giving interesting information about the experience as a whole.
Attached is a Spreadsheet of Camino Stats and Costs listing my walking days: start, finish, steps, distance, time taken and costs for the day. In addition to the stats of all 31 days of walking, it tallies all costs from my departure in The Netherlands to my return in The Netherlands and everything in between.
(The steps and distance were calculated by use of the Apple Health app on the iPhone – it obviously won’t be 100% accurate, but it’s not too far off)
Everyone walks their own camino…
I want to start by saying this: Everyone walks their own camino.
This is the most important thing to remember about the camino. It is yours and yours only. You may chose to share your experience with others, but you are there for yourself.
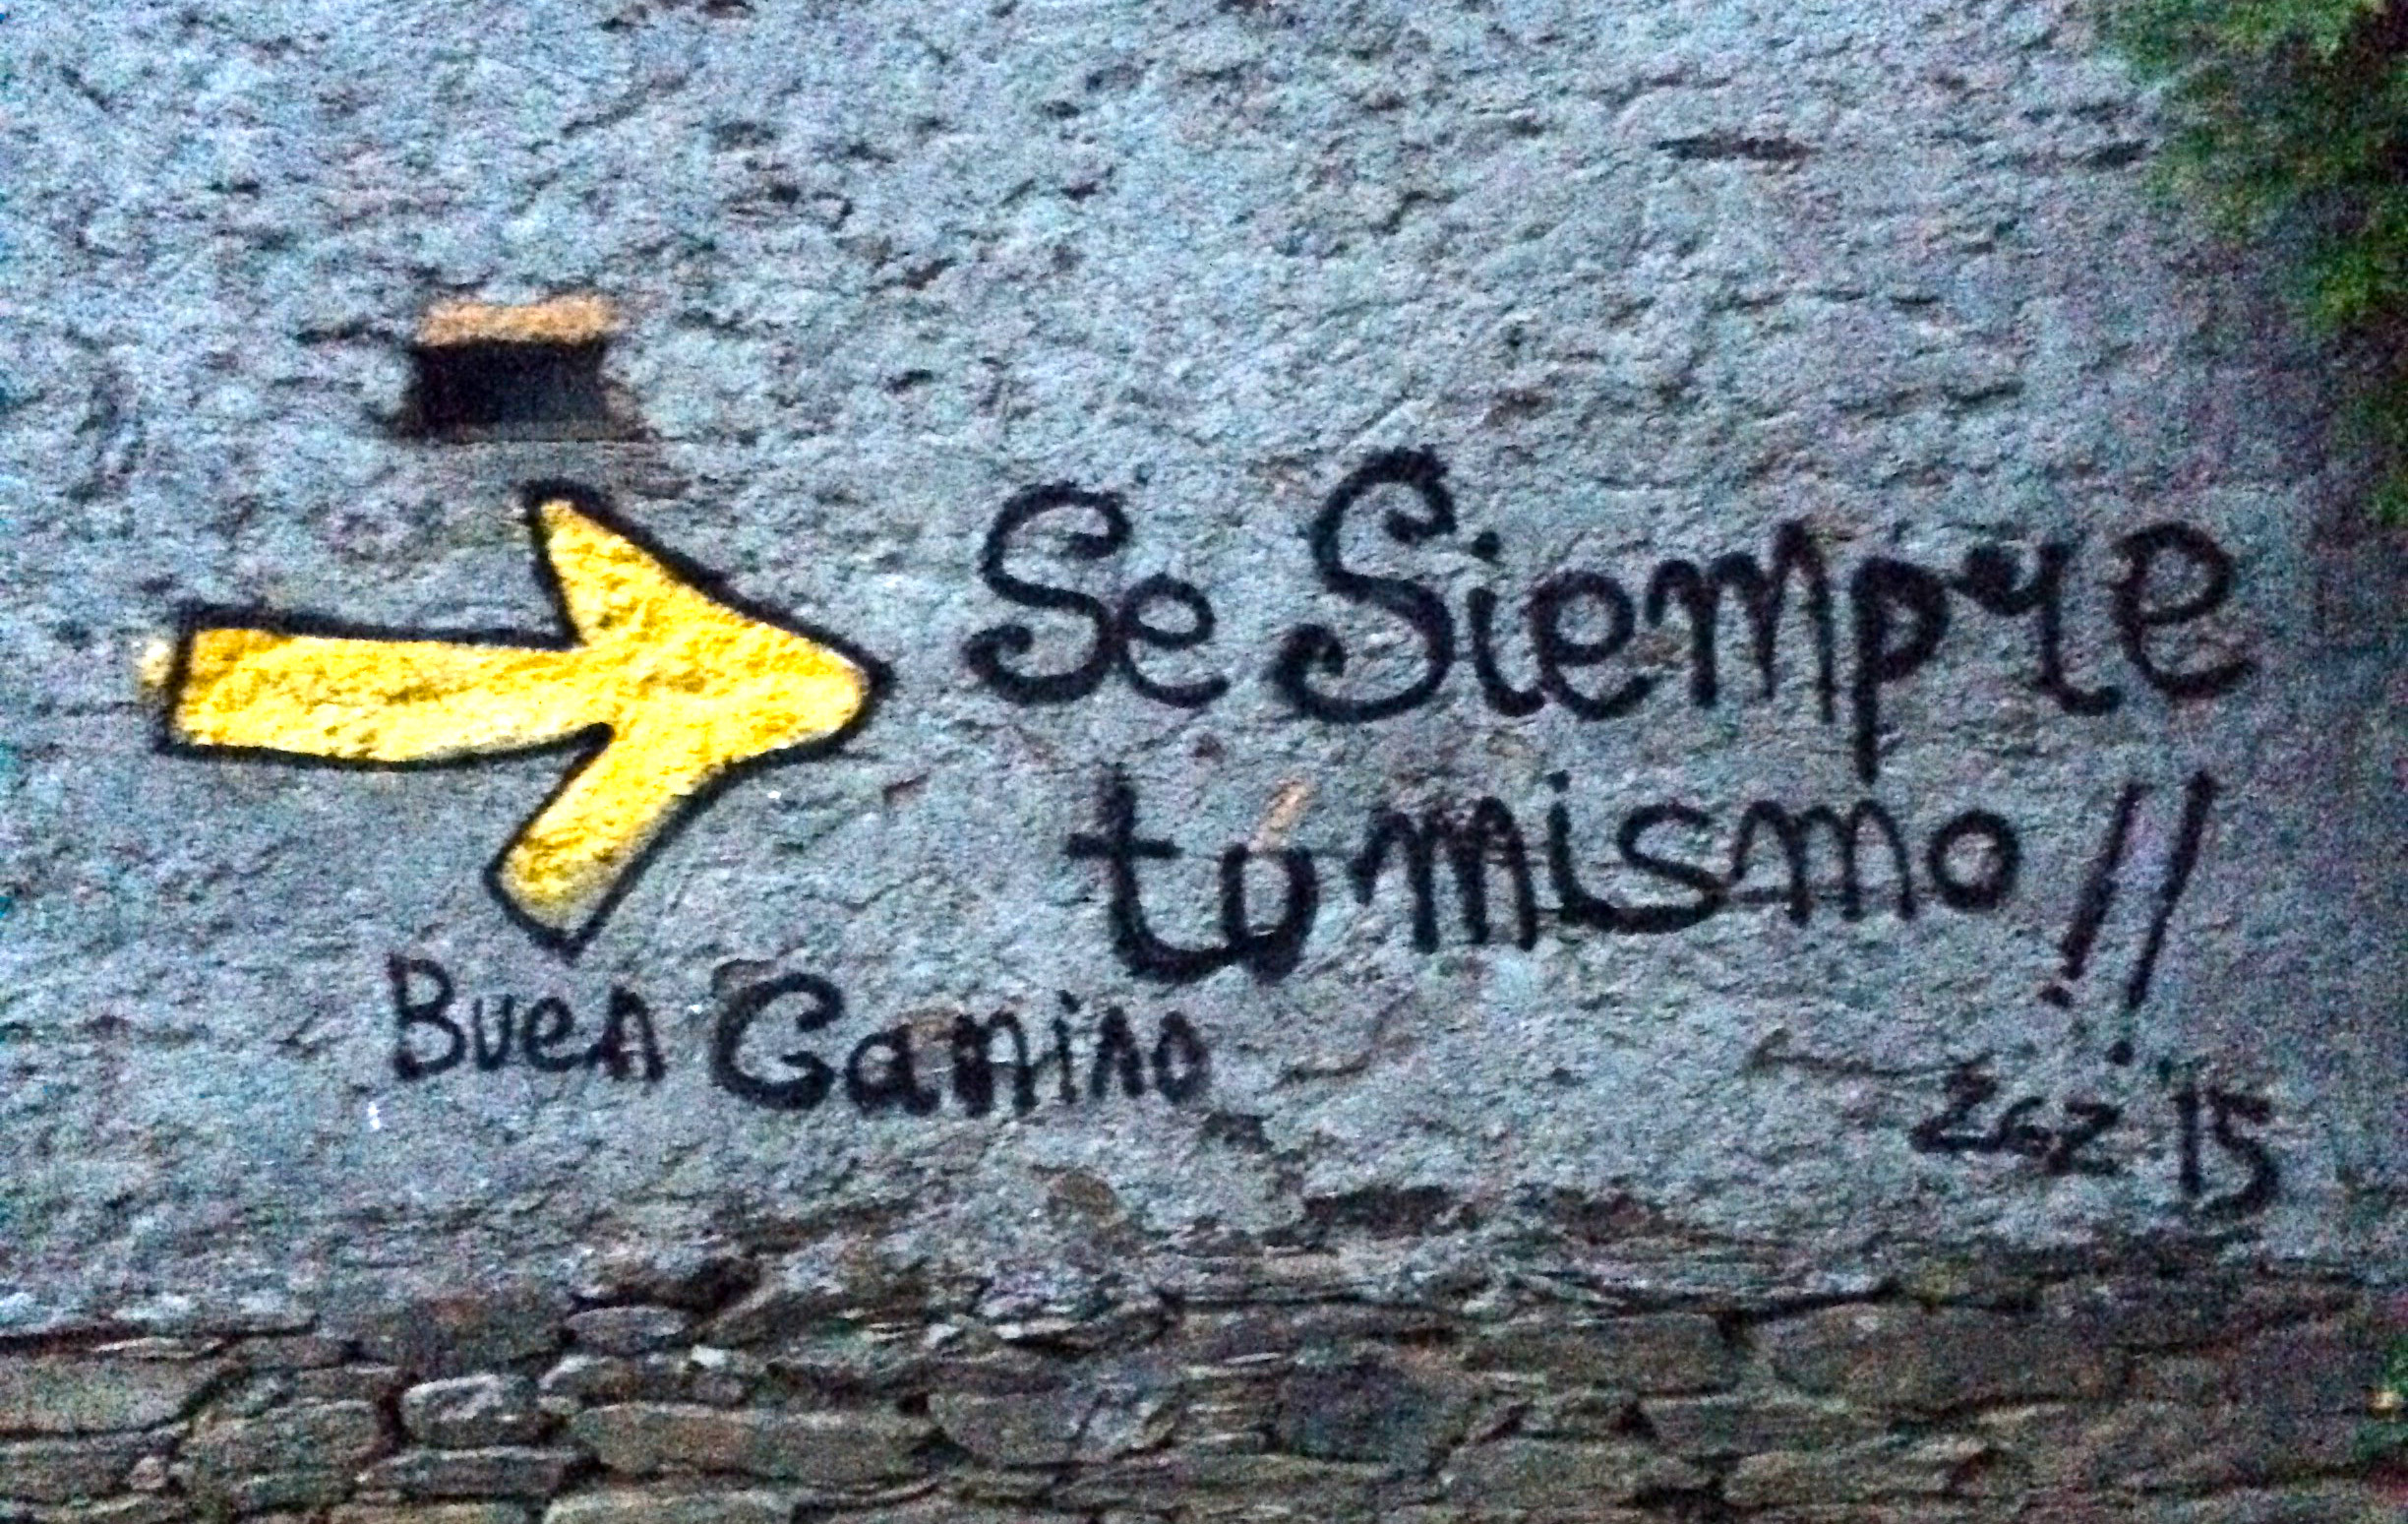
Be Always Yourself
It is up to you to choose how you walk it: fast or slow; alone or with others; in silence, in conversation or listening to music; with rest days or without; collecting many stamps or a few; carrying your bag or sending it on each day; camping, staying in albergues or in hotels.
It is important to have an idea for how you want to walk your camino, but remain open-minded about how this may or may not change as you make friends and your priorities or situation change. Some people had to catch a bus or taxi for a section when they became unwell, there was no accommodation available or they didn’t want to walk a particular section. Some people sent their bags ahead each day because they physically couldn’t carry it, didn’t want to carry it or they suffered an injury meaning they could no longer carry it.
Whatever choices you make for yourself, do not try to convince others to do the same or change what they are doing (it made me angry to hear someone trying to convince others to change what they were doing).
No matter what, remain true to yourself and feel comfortable in the knowledge that you will be respected by others for making your own decisions. There is no judgement on the camino.
Some Facts..
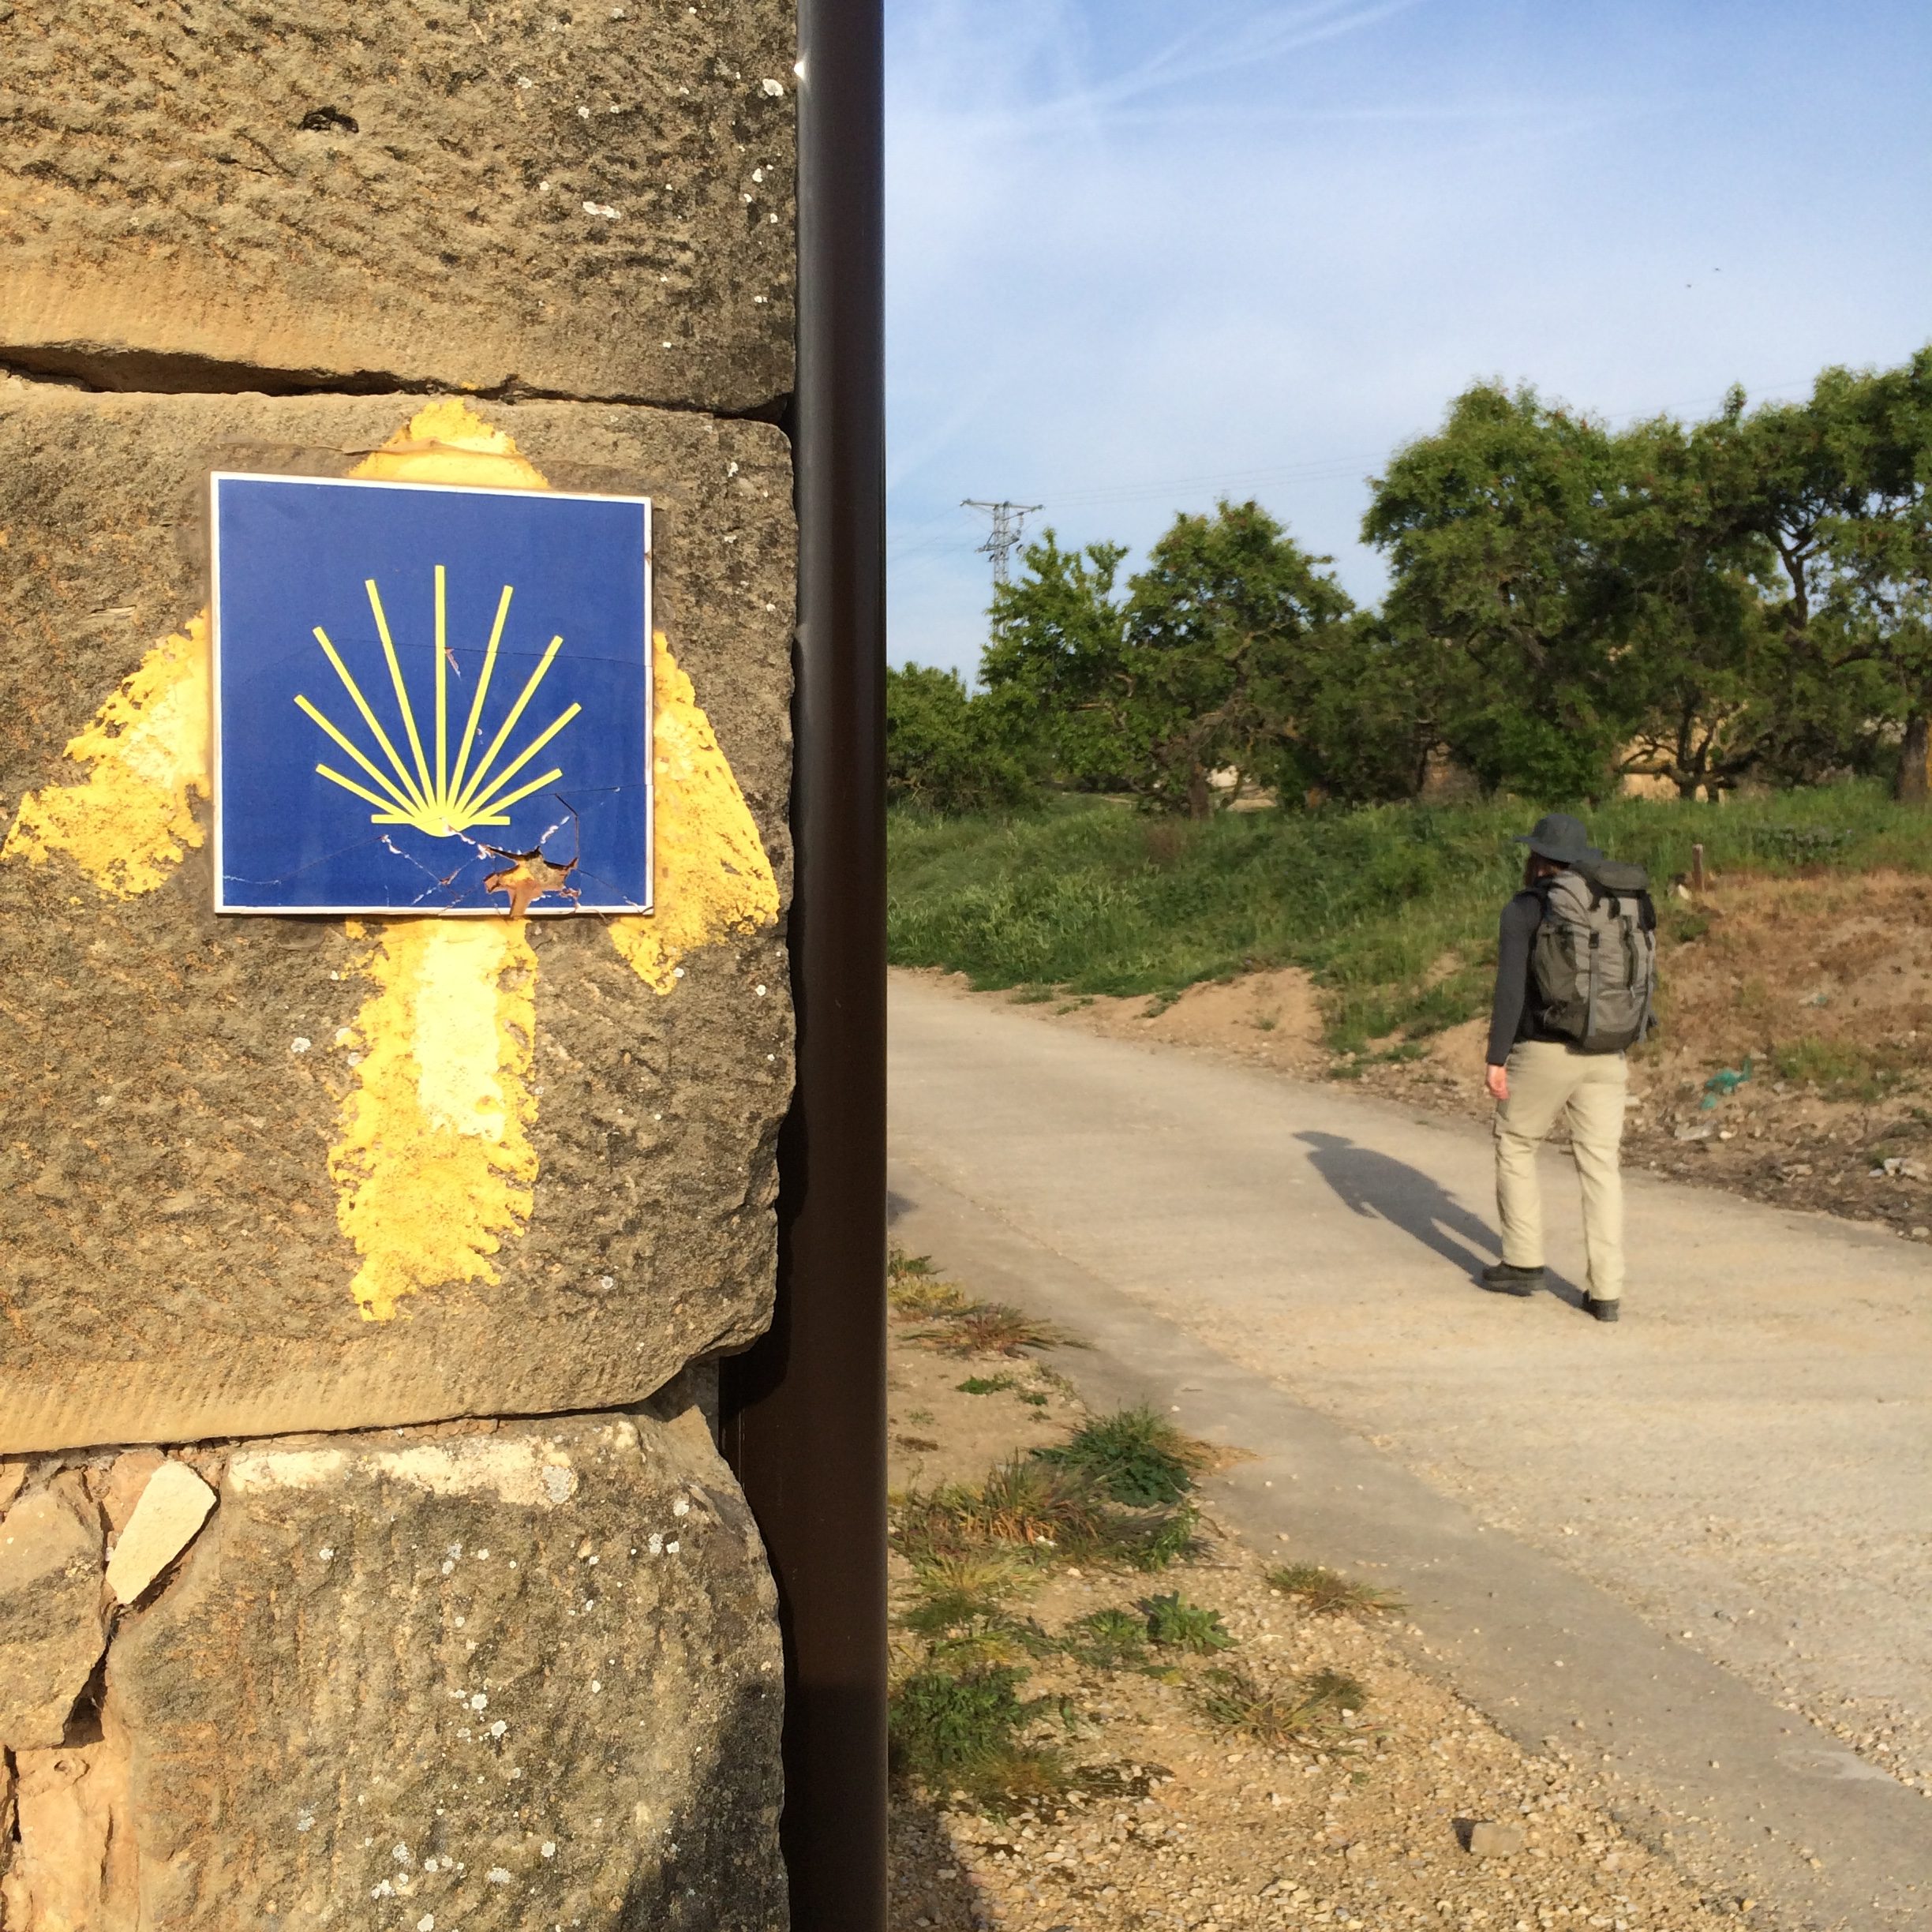
The most traditional starting point of the Camino Frances, or Way of St James, is Saint-Jean-Pied-de-Port in France. You can however, start wherever you like along the route. To achieve a compostela at the end, you must walk at least the final 100 kilometres to the finishing point of Santiago de Compostela in Spain.
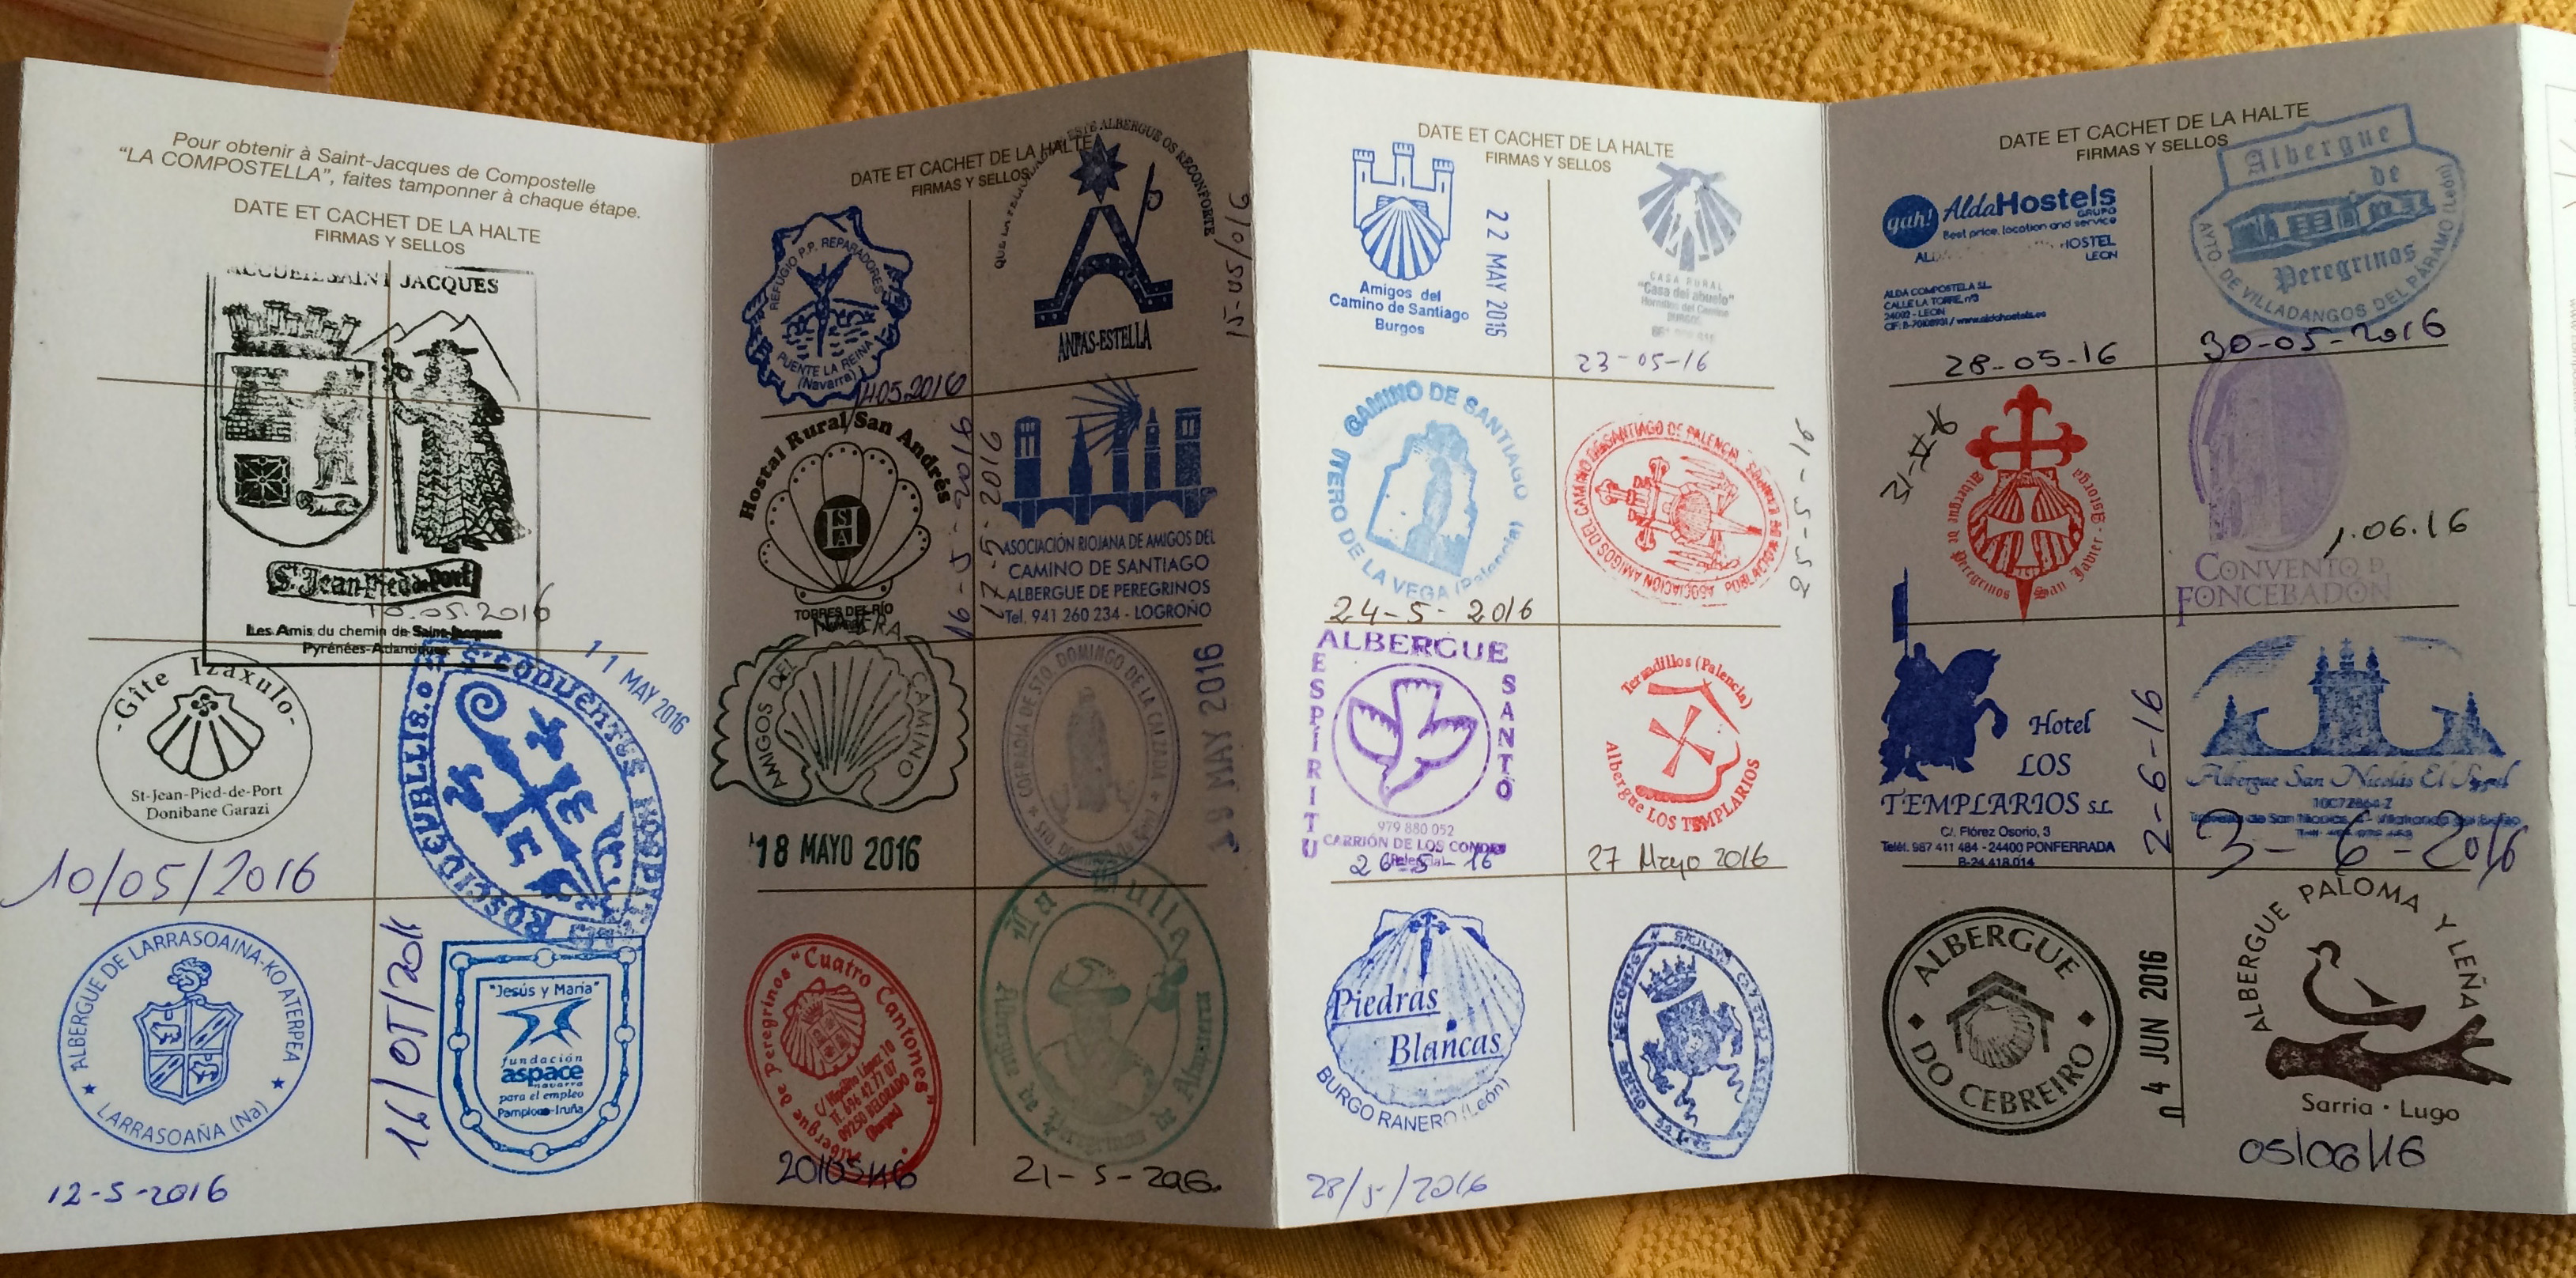
One of the things you need when you begin is a pilgrims passport, known as a credencial. You can buy one online, at your hostel or from the local pilgrims office. I got mine from the pilgrims office in St-Jean.
In your credencial you collect stamps from the pilgrims albergues (hostels) where you stay as well as churches, cafes, bars and other memorable locations. If you walk the entire camino from St-Jean then you need at least one stamp per day. If you only walk the last 100km, you require a minimum of two stamps per day as evidence of walking the distance. It is up to you which stamps you collect, my choice was to only get stamps from the places I stayed. Some friends got churches and notable places and others got as many as they possibly could.
The full distance from Saint-Jean-Pied-de-Port to Santiago de Compostela is 775 kilometres. There are no rules as to how far you should walk each day or how many days you should take. Many of the guide books provide a suggested 34 day plan that you can follow if you choose to. No matter how you walk your camino, the distance you walk each day will vary daily.
I took 31 consecutive days to complete my Camino, this means I would have averaged a distance of 25 kilometres per day. In reality my longest walking day was 42 kms and my shortest was 15 kms.
You are not required to walk consecutive days; many people take rest days when they are tired, unwell or there is a city they wish to explore. Whether you take rest days or not is simply your own choice. However, if you are staying in a pilgrims’ albergue you need to be aware that they have a one night rule. To stay a rest day you will need to book a private albergue or hotel.
A typical day on the camino
A vague outline of a fairly standard day on the camino, times are obviously approximate and dependent on the distance walking in the day, the temperature, level of exhaustion and pain etc. The times in this outline would be around 25-28kms walking.
Time
Activity
0600
Get up, get dressed, pack
0630
Make and eat breakfast with groceries purchased day before
0700
Start walking
0900
Stop for second breakfast and a coffee, after walking between 10kms
1130
Stop for coffee and a snack, after walking 20kms
1300
Finish walking for the day and check in to an albergue
1330
Shower
1400
Wash dirty clothes
1430
Find a supermarket to get food supplies and dinner ingredients if the albergue has a kitchen
1500
Sit down and chill out for a wee while
1830
Cook OR find restaurant offering a pilgrims meal
2100
Go to bed
We typically broke our days into blocks of 10 kilometres. A 22km day we would aim to break into two chunks of around 11kms. A 30 kilometre day we would aim for three block of 10kms.
At the albergue’s or nearby cafes and restaurants there are breakfast and dinner options. Due to the high level of physical activity and early starts, we typically ate four meals per day: Breakfast, Second Breakfast, Lunch and Dinner.
I found that for variety, quantity and cost effectiveness, buying food from the supermarket for most meals was the best option for me.
Over the full 31 days of walking, I spent €435.11 on food. The most expensive individual meal was €15 for an amazing seafood paella and beer. My average daily spend on food was €14.04.
Breakfast, Second Breakfast and Lunch
Pilgrim breakfast ranges from €3 – €4 and is typically a glass of fresh orange juice, a coffee and two pieces of toast with butter and jam. There was not always a pilgrim breakfast available at the time we would start walking for the day. Aside from this I thought it was overpriced and not enough food for long walking days. So I would make my own.
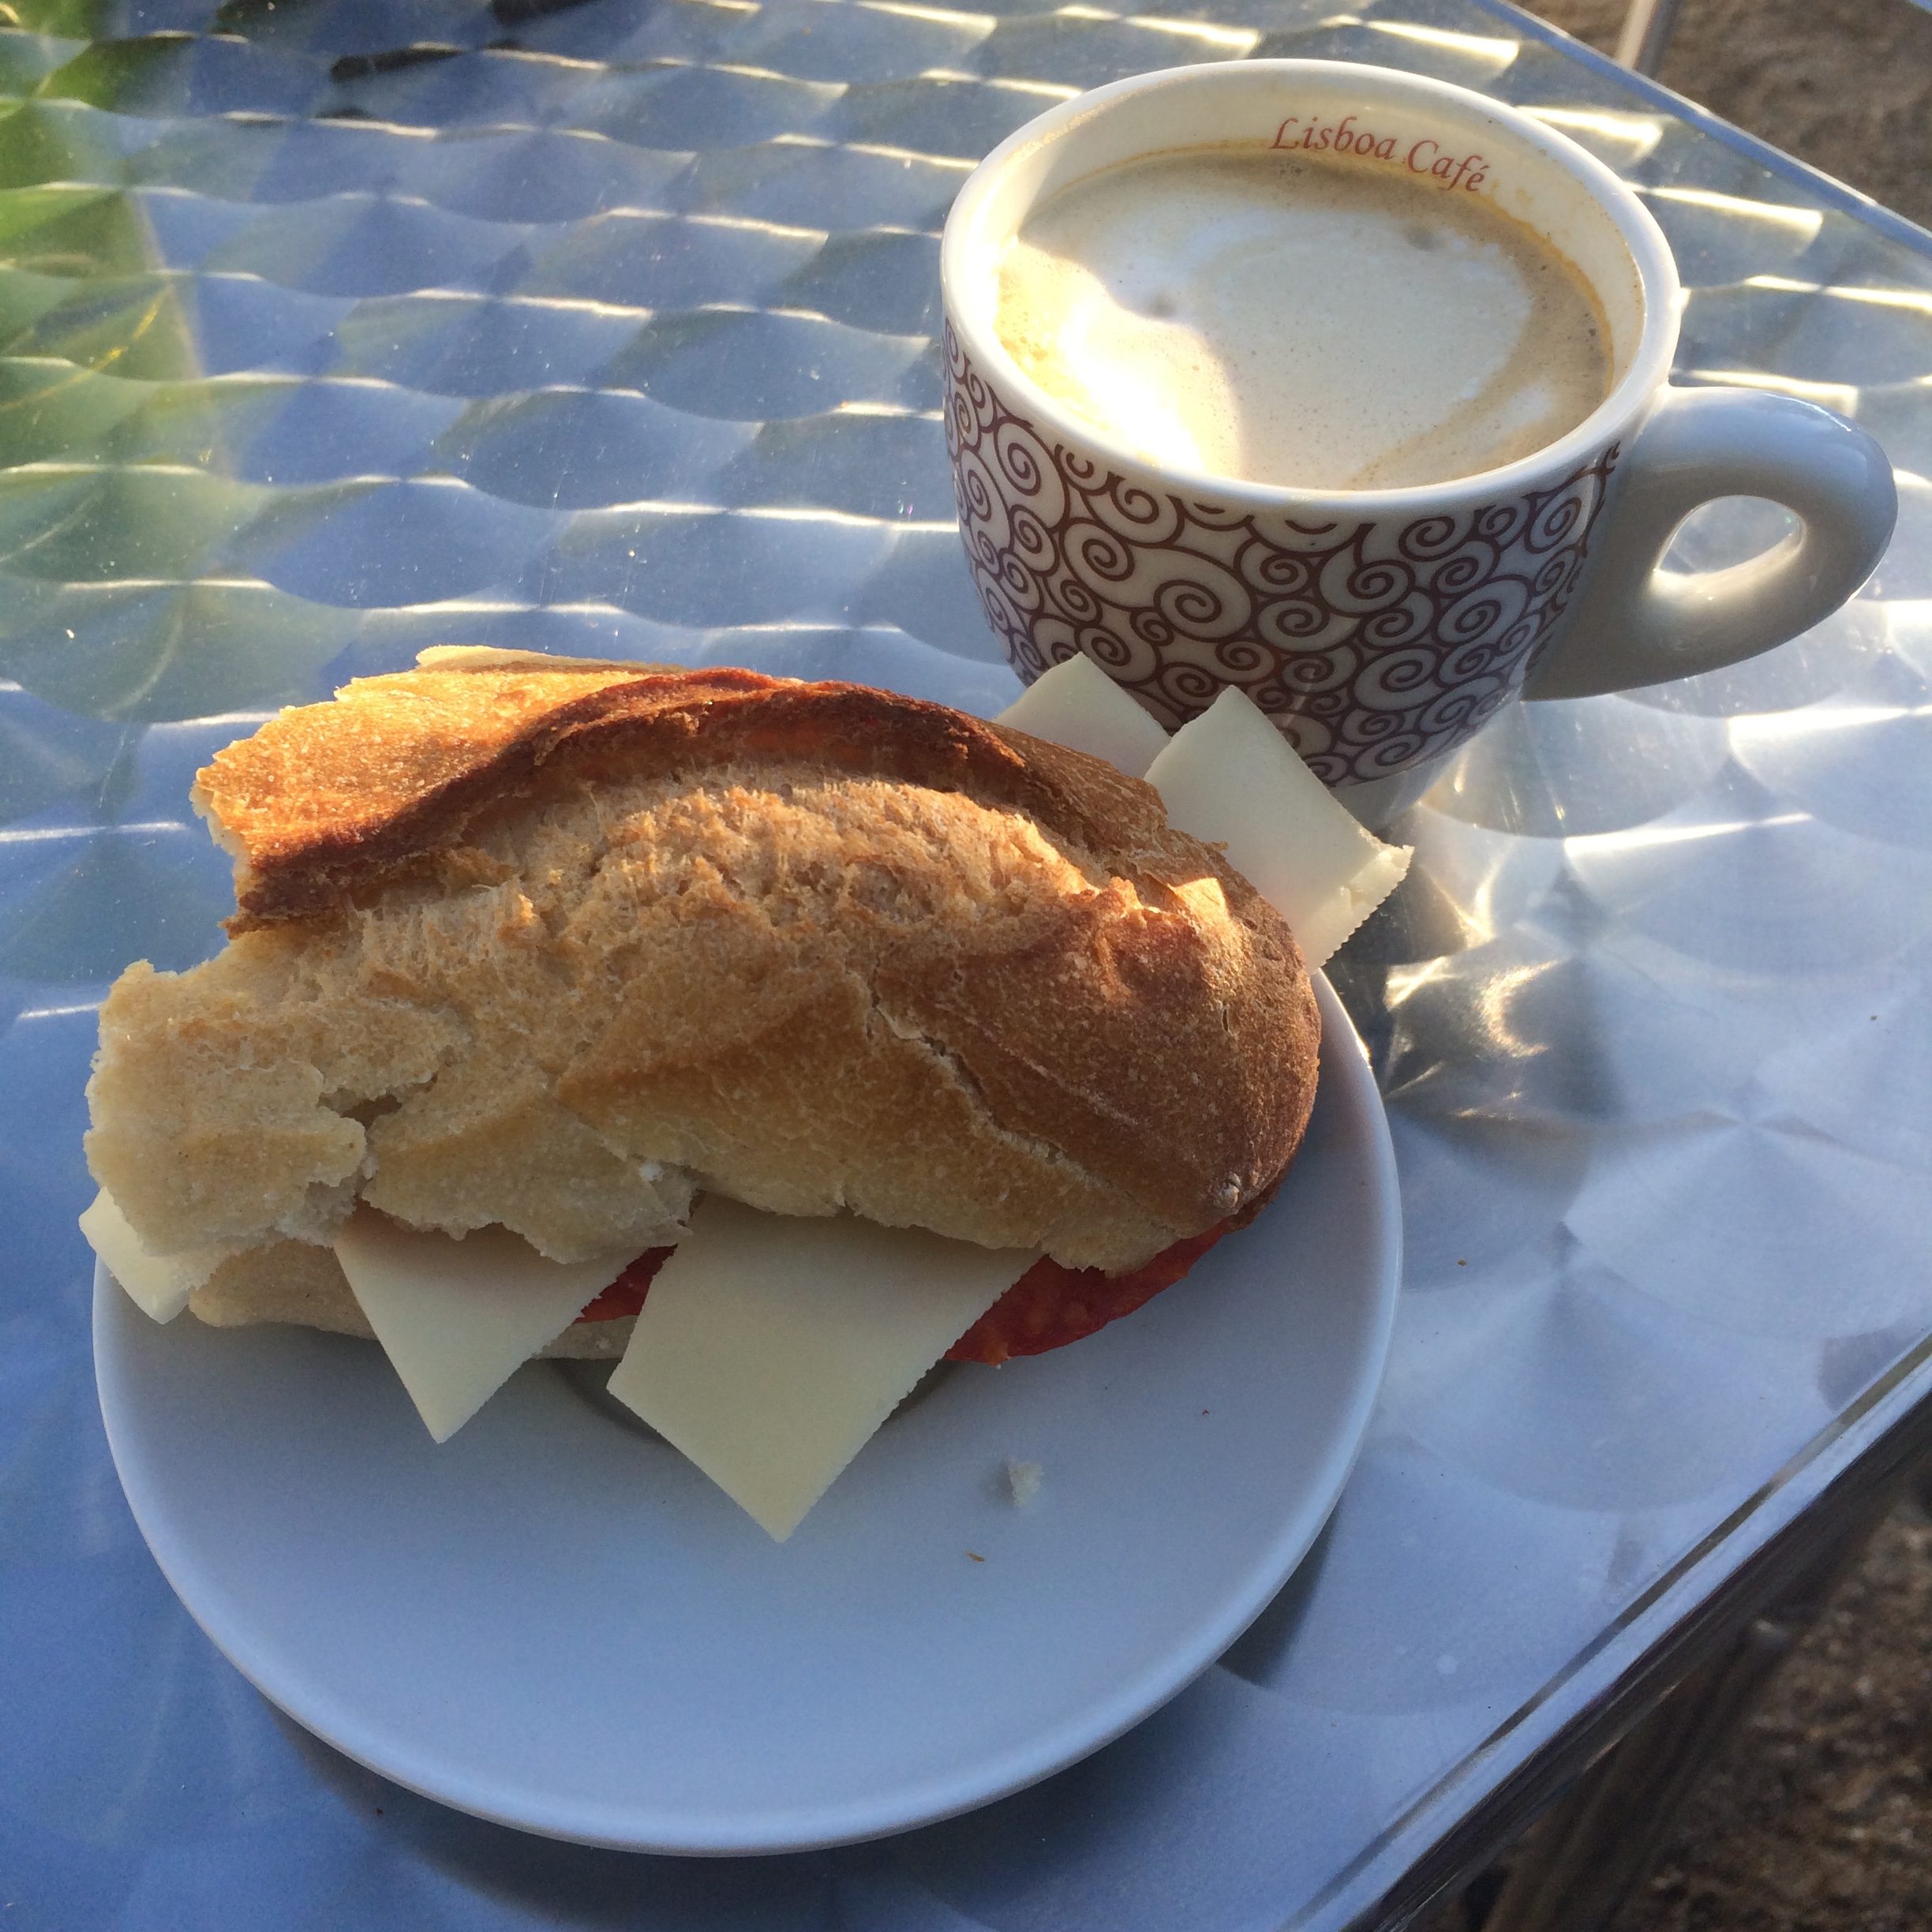
For the first three meals of each day I would typically make myself a bocadillo using the cheese and meat I purchased from the supermarket. I would accompany this with a piece of fruit and often for breakfast a small tub of yoghurt.
Sometimes I splashed out and bought a pastry or tortilla to go with my regular stops for a “CCL” (Cafe Con Leche – coffee with milk).
Dinner
Most restaurants offered a pilgrim meal for €10 – €12 (they were always 10 or less until we got to Santiago and beyond, where the price increased to 12).
A pilgrim meal has entree, main, dessert, bread and red wine (or water and sometimes you can ask for beer instead). In terms of quantity, the pilgrim meal is a pretty good deal, but in terms of variety you will very quickly find you diet lacking in vegetables! (We began to supplement with daily multivitamin tablets)
Some pilgrim meals are fully set menus and other provide a few options for you to choose from. A typical entree selection would include pasta with a tomato sauce, mixed salad or soup. A main would typically be some form of meat and hot chips.
Again my preference, when we had access to a fully equipped kitchen was to chip in for groceries and cook. Shared meals were really enjoyable, healthier and much cheaper. Often we ate for €4 per person!
Accommodation
There are several accommodation options on the Camino: Pilgrim Albergue, Monastery, Convent, Casa Rural, Hotel Rural and Hotel (these last three are essentially all hotels). Accommodation is traditionally in pilgrim albergues.
Where you stay is completely your choice. I typically opted for the municipal albergue in the town I chose to stay in. Occasionally I splashed out on private rooms. On one occasion Hannah, Will and I walked in El Burgo Ranero soaked to the bone and got a private room just so we could warm up, dry out, be comfortable and quell our misery.
Over the full 31 days of walking, I spent €323.42 on accommodation, the cheapest hostel bed was €5 and the most expensive private hotel room was €30. I averaged €10.43 per day.
Pilgrim Albergues
There are municipal, private and xunta albergues; convents and monsateries also tend to fall into the albergue category.
To have a bed in an albergue you are required to provide evidence of being a pilgrim, your credencial. This entitles you to stay in the albergue for one night. Prices for municipal albergues range from €5 – €10. I paid up to €15 for a private albergue.
It is important to be aware of standard albergue rules. Never put your bag on the bed. Shoes go on the shoe rack, which is basically never in your dorm room – thankfully! Doors are locked between 10-11pm and if you are locked out, bad luck. No noise before 7am, you must be out by 8am.
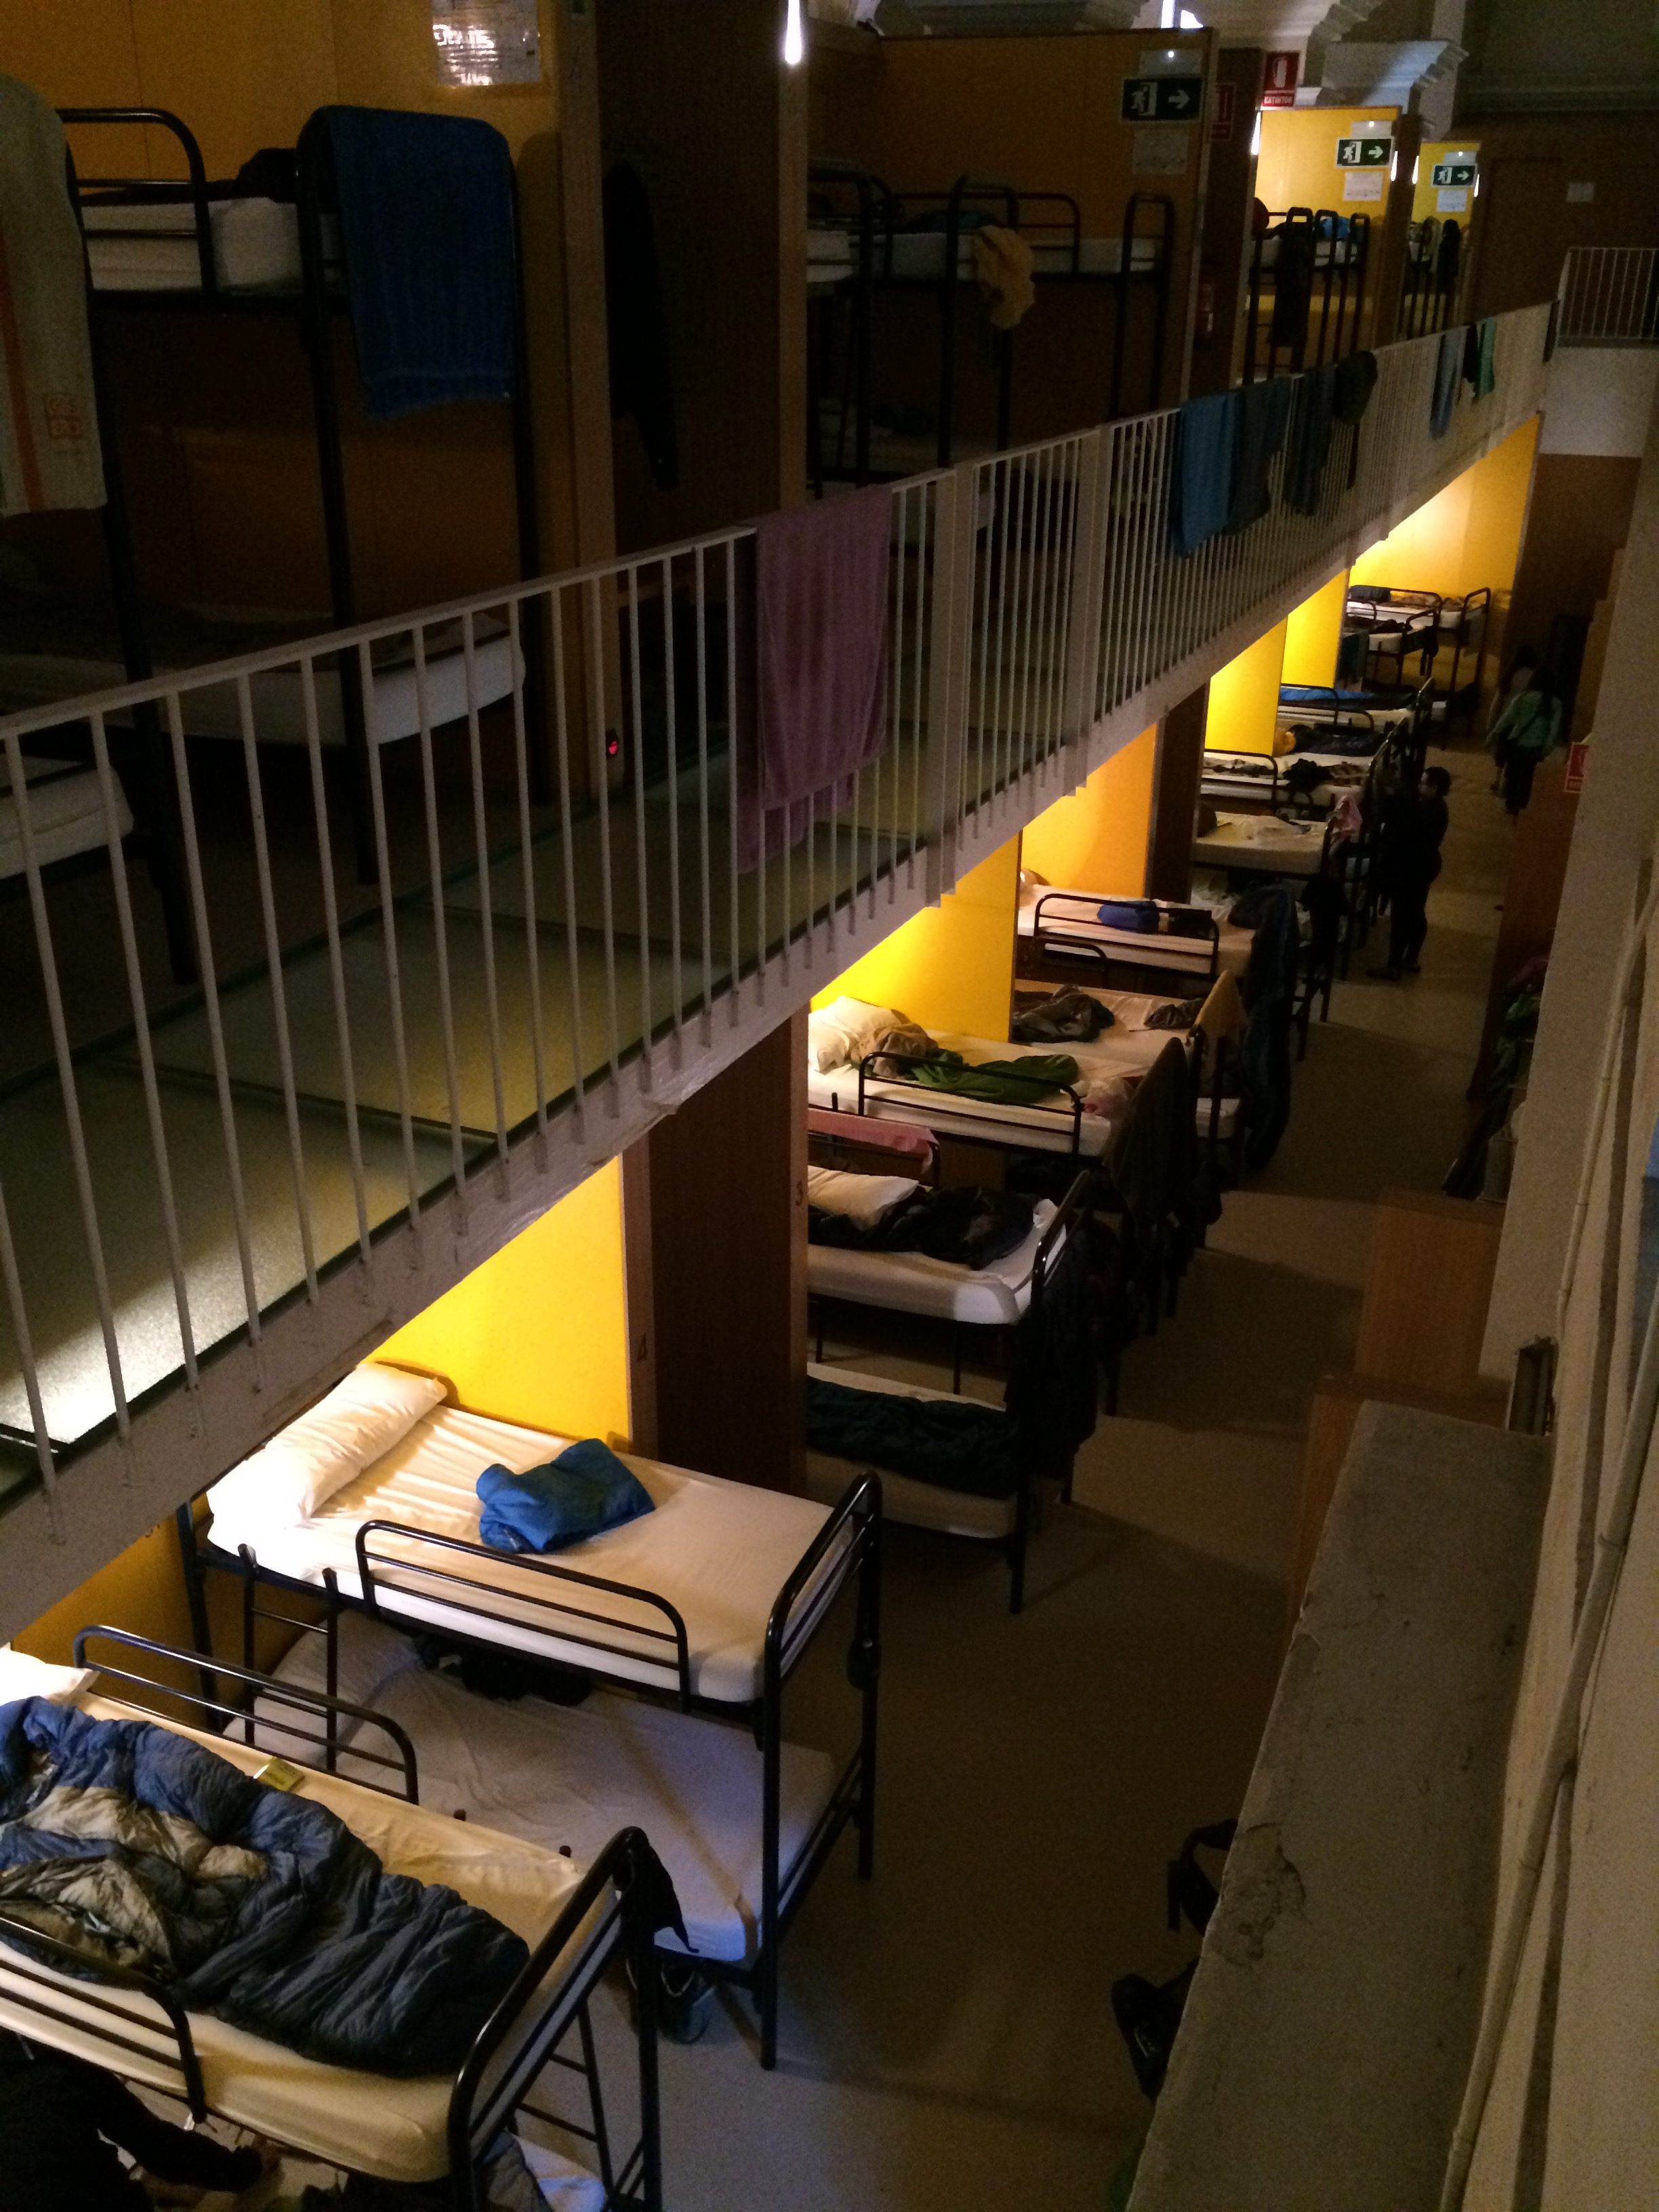
Albergues vary in size, from 10 -150 beds. Those beds may be separated into small rooms with as few as 4 beds per room and others are huge halls of beds.
Bathrooms are shared, most are quite private. Occasionally when bathroom are single sex privacy appears to be missing, along with the shower doors. With so many pilgrims in each albergue, be aware that everyone is also competing for hot water. I was caught out with cold water on a few occasions.
My two favourite Albergues were both private family owned and run. They were Cuatro Cantones in Belorado and Paloma y Leña in San Mamed do Camiño. They were both only €10 and provided a €10 pilgrim meal – food and accommodation were both AMAZING!
Bed Bugs
I am ridiculously grateful not to have encountered these evil little critters, but that being said, I took some precautions along the way.
In Saint-Jean-Pied-de-Port I paid an obscene amount of money for Bed Bug repellent spray, which I dutifully sprayed over all of my stuff inside and out (sleeping bag, sleeping bag liner, hiking pack, clothes etc) every two to three days. Many people had their belongings pre-treated with a bed bug killer and/or repellant. I never knew such a thing existed, so certainly didn’t do it.
Additionally, many hostels give you the option to purchase disposable bed sheets for €1 – €1.50. I would highly recommend doing so, it just provides an extra protection between your stuff and the mattress. (Many albergues have plastic covered mattresses, which I think is a huge help in preventing bed bug problems)
Laundry
Almost every albergue will provide hand washing facilities and washing lines. Some also have washing machines and clothes dryers, these typically have an additional cost of€3 – €4 per load, per device.
I typically hand washed my socks and underpants every day. Every few days or once a week I would pool dirty laundry with some friends and we would all chip in for the cost of using a machine. It was nice to have everything ‘proper’ clean every so often.
Packing
I had way too much to say about packing, that it doesn’t fit in this blog post. Check out my blog post on packing for the Camino.
Pain and Exhaustion
When researching the Camino there are so many comments about how wonderful it is and that it’s a life changing experience, which it is, but they seem to skip the part where you experience pure exhaustion and extreme physical pain.
Exhaustion: When sleeping in dorm rooms, you rarely get a good solid night sleep due to noise and snoring. In addition to which you have very early starts to the day. The alarm is typically set for 6am, but people start rustling around in the dorm room at 5:15am. I’m not a great sleeper, so this meant I was awake very early each day.
You typically spend 5-10 hours in the day walking, including stops. Despite feeling completely exhausted upon reaching the hostel, we always had things to do and even if we didn’t, I seem unable to nap. The first two weeks of adjusting to this schedule had me so exhausted I literally passed out the minute my head touched the pillow every night. But by week 3 you are generally fairly used to it. While still exhausted, you don’t have that ‘pass out’ level of tiredness at the end of every day.
The exhaustion is manageable, but the pain is just crazy! The pain also kept me up at night. My hips were so sore that attempting to sleep on my side was excruciating. My heels were throbbing in pain when they were resting on the mattress, the only way to get the pain to a manageable level was to sleep on my stomach with my toes hooked over the end of the bed.
So I talk about pain, but what do I mean?
Muscle Pain: I experienced quite a lot of muscle pain in the first week or two, simply because my legs were not used to walking so much, together with carrying the weight of a pack and ascending and descending mountains. The muscle pain was the most manageable, and you adapted to it very quickly.
Toe Pain: On day one, descending the mountain in shoes that were too small resulted in both my big toes ramming the end of the shoe. This pushed the nails back towards the nail bed, and caused so much damage it would result in my toenails falling off. For the first week this meant that my big toes around the nail were very tender. However, despite the nails taking a very long time to die, after that first week I did not experience any more pain. (7 weeks on from day one the nails are still attached at the base but not the sides, and are completely dead, white and hollow underneath)
Joints, Bones and Soft Tissue: With the continual walking often on a hard surface, carrying your own body weight and the weight of your pack, your joints, bones and soft tissue take a bit of a beating. My hip and knee joints often became quite achy at carrying the extra load. I spent a week or two wearing a knee brace for additional support. The soles of my feet had it the worst. Because I threw out my hiking shoes (because they were too small once my feet had swollen), I walked the full camino (less two days) in my running shoes with an additional gel sports insole. Running shoes don’t have a sturdy enough sole for this type of walking and do not provide enough support. So the soles of my feet came to feel bruised, so badly bruised that I still wonder if I have stress fractures in many of the little bones of the feet. When standing after periods of rest, I could barely put weight on my feet, I almost couldn’t walk and steps were taken very tentatively. It took a little while to get going after each break, but then I numbed to the pain and could push through. For a number of us many days started and finished with Ibuprofen pain tablets. I would also use ibuprofen gel on my knees each night.
Blisters: Last but most certainly not least, blisters, the bane of most people’s Camino. I had epic blisters on both heels instantly on day one, taken to the extreme where I wanted to scream each step I took. Once I took proper care of those blisters and switched shoes the pain dropped to a manageable level. I later got blisters in other places, like the right side of the heel on my right foot when the padding inside my shoe wore away, under the arch of my foot as my insoles disintegrated, on the ball of my foot near my toes probably from grit in my socks on a rainy day and the right side of my left heel as the padding on the other shoe wore through. Eventually where the gaps in padding appeared in my shoes, I filled them and then covered them in duct tape (I walked with duct taped shoes for 2.5 weeks!) Believe it or not the most painful blisters I experienced were the two on the side of the heels, at the point where the soft skin turns to hard skin near the sole of the foot – I suspect there are a whole collection of nerve endings there, because the tiniest blisters were the most obscenely painful things I ever experienced!
So as you imagine I have some brand new knowledge about how to best treat blisters on a big walk like the camino. I tried a few different things but came up with a process that worked really well for me. Firstly, the key to handling a blister effectively is do whatever you can to prevent the roof of the blister tearing off as it increases pain level and drastically increases chance of infection.
If the blister occurs in the middle of your walking day, skip step 2. After walking for the day drain the blister by piercing it with a needle, many people choose to run thread through it to keep it open as it drains. I just pierce it and squish out the liquid into tissue.
After showering and giving the blister time to dry, smother it in the home made whizz bang amazing blister repair cream from the pharmacist in Fromista (HOT TIP: The pharmacist in Fromista is AWESOME, if you need any supplies, stop there! When you cross over the road in town, there a couple cafes to the right, and the pharmacist is to the left)
If you don’t have the super awesome cream, possibly put on some antiseptic cream, I don’t know if it helps the blister heal but it does protect against infection.
In the morning, make sure the blister area is dry and that it remains drained.
Heat up a piece of compeed with your hands and then stick it over the blister.
Cut a large-ish sheet of hypafix, stick that over the whole area including the compeed. It’s stretchy, so make use of that to get a nice tight clean fit. My blisters were mostly around the heel area, so I would make a full heel with hypafix.
Why cover the compeed with Hypafix I hear you thinking…when you walk a really long time, the compeed heats up and loses its grip on where it’s been stuck, this means it starts to move and pull the skin with it making the blister much worse. The hypafix somehow reduces some of the friction on the compeed and keeps it nicely in place.
Do not remove any of these layers until you absolutely have to. By keeping it all covered you reduce risk of infection. Also the compeed it sticky and will tear the top off the blister if you try to take it off. My day-one foot coverings remained on for 1.5weeks. When I took everything off, I gave them an afternoon/night of air, and then put hypafix back on them to maintain a protective layer to prevent the new skin from irritation and further damage.
Note: If your blisters become red and angry, go see a pharmacist or doctor as soon as possible to treat any infections.
It took roughly one to two weeks to get used to the constant walking, high pain levels and to learn the most effective way to deal with blisters. The pain never went away, but it became familiar and tolerable. It ends up as just being a part of the walk.
The People
I met so many weird, wonderful and amazing people along the way. I met some in passing; others I bumped into regularly; and others who I spent many days walking with who will be life long friends.
In discussion with the people I met along the way, I found that all the people walking the full Camino Frances were unemployed. We are all between jobs, changing careers or retired. Everyone was at some kind of crossroads. So for many of these people, they had the time to complete the Camino and it allowed them to mentally work through any issues they had and make some decisions for what they wanted to do in life. For some, like me, it was more about the physical challenge as well as the opportunity to travel at a slower pace and live a simple life for a while. For others it was religious reasons, and for some, particularly those who just did the 100km, it is for their CV (apparently it can be challenging to get a job in Spain if you don’t have a compostela)
The ages of people walking the Camino range from 12 years old with parents, through to people in their 70s and from a huge varieties of countries including: Australia, New Zealand, the United States, Canada, England, Ireland, The Netherlands, Germany, Denmark, Italy, Finland, Spain, France, Switzerland, Croatia, Slovenia, Poland, Brazil and Korea.
Some people walk the whole Camino from Saint-Jean-Pied-de-Port like I did, others started before that (I met a guy who had walked from Le Puy in France, I met him 100km before Santiago and he had already walked 1400km), and others start later. Some people walk the camino in stages, 100-150km per year until they have completed it.
Aside from the families and couples, basically everyone I met had started out solo. Very quickly you have conversations at the breakfast table, on the trail, at a coffee stop or perhaps in the afternoon commiserating over sore feet. You form friendships, some of which involve conversations each time you pass each other, other times it means walking together in a group. A group that sticks together is usually referred to as a Camino family. From day 1 I had a camino family, formed over breakfast before we all set out. We walked together for the first week or more, when I started to branch off so that I could maintain my own pace and daily schedule. Pretty soon, I walked with a friend, still seeing my old walking partners, then eventually I melded into another group. Often we walked together, but other times we would choose our final destination and meet there so I could walk my own faster pace.
The second family I formed was the group I finished with: Allan from Denmark, Will and Hannah from Seattle, Steve from Boston and in the last week we also picked up Jake and Laura from New Zealand.
Walking
Starting out every day was a real challenge, but once my foot pain had dulled to manageable, I liked to take in the scenery, the sunrise and the sounds of nature as I walked. I really enjoy silence, so I would often walk ahead or start early so that I could walk solo and with nothing but the sounds of my own footsteps. This gave me time to think: ponder life, work, family, the camino, the next adventure etc.
I spent most of my time walking with others, this time was usually spent in conversation, sometimes in comfortable and companionable silence and other times playing word games (Will and Hannah had a particularly fun repertoire of word games and we spend a good deal of every day in stitches. In fact almost every day Hannah and I got to the point where we laughed so much we cried)
Sometimes when walking with the group or even without the group, it was nice to have other things going on. Occasionally I listened to Spanish podcasts to work on my Spanish language or listened to music. I love good dance beats, so when I wanted to walk at a fast pace and was struggling with the pain, I would put on some good tunes and it made the time and distance pass quicker and in a much more pleasant way.
The pace of everyone varies; it is really nice when you walk with a group of a similar pace. My first family was slower and enjoyed frequent long breaks that left me frustrated. But my second family had a reasonably similar pace to me so we often walked together. However, I started to find as the group got bigger the pace slowed a little. With a slower pace I felt time dragging and the pain in my feet was less tolerable. I also found that I had spent so much time in a group I wanted to have a few days solo for reflection. So certainly in the last week I mostly walked ahead at my own pace, often joined by Allan who marches along equally quickly and enjoys silence as much as I do, and we got through the walking day as quickly as we could. As strange as it sounds, I felt less pain by walking faster. (I think Allan was just in agony and did it to get the walking over and done with).
The Trail
The entire camino is well marked with scallop shells and yellow arrows and sometimes distance markers, but there are a couple of things for me to point out.
Let me start with the distance markers. Within the space of 200 metres you could be told you are 610km from Santiago or 580km. Perhaps in Galicia they are believable, but everywhere else, don’t pay them much attention. Your guidebook, app or website will have a more accurate indication, though even they can vary up to a few kilometres.
Out on the open trail, it is really easy to find all the trail markers and particularly challenging to get lost. Within cities or towns it is sometimes a different story. Some cities do a great job of it and others less so. You need to be vigilant in looking for markers. Sometimes the yellow arrows are on the curb of the road, side of buildings or painted on the ground. Shells can also be on the ground on walls or on signs. If you aren’t sure if you are on the right trail, locals will typically point you in the right direction.
Do be careful though, sometimes albergues also use yellow arrows to get you to their doorstep, and it is often challenging to know which ones are the trail and which are for the albergue.
In regards to the arrows and trail markers, it is surprising how quickly you assimilate to the simplicity of following an arrow. Equally surprising is how disconcerting it is when you can’t find one and aren’t sure where to go.
Hannah and I both really enjoyed the simplicity and the message in following an arrow and continually moving forward. So much so, that we both got an arrow tattoo on our wrist.
Todos somos unos
It is so hard to condense into words everything I experienced while walking the camino, but a phrase that sums up my feelings effectively is: Todos somos unos, “we are all one”. We share in our experiences, we share in our joy and we share in our pains (all kinds). The Camino brings all types of people from all ages, nations and religions together in a harmonious way. It is a brilliant experience to walk the Camino and is a reminder of how humanity should be: full of love, kindness and unity where we all work towards a common goal.
The Camino, a once in a lifetime experience well worth doing!

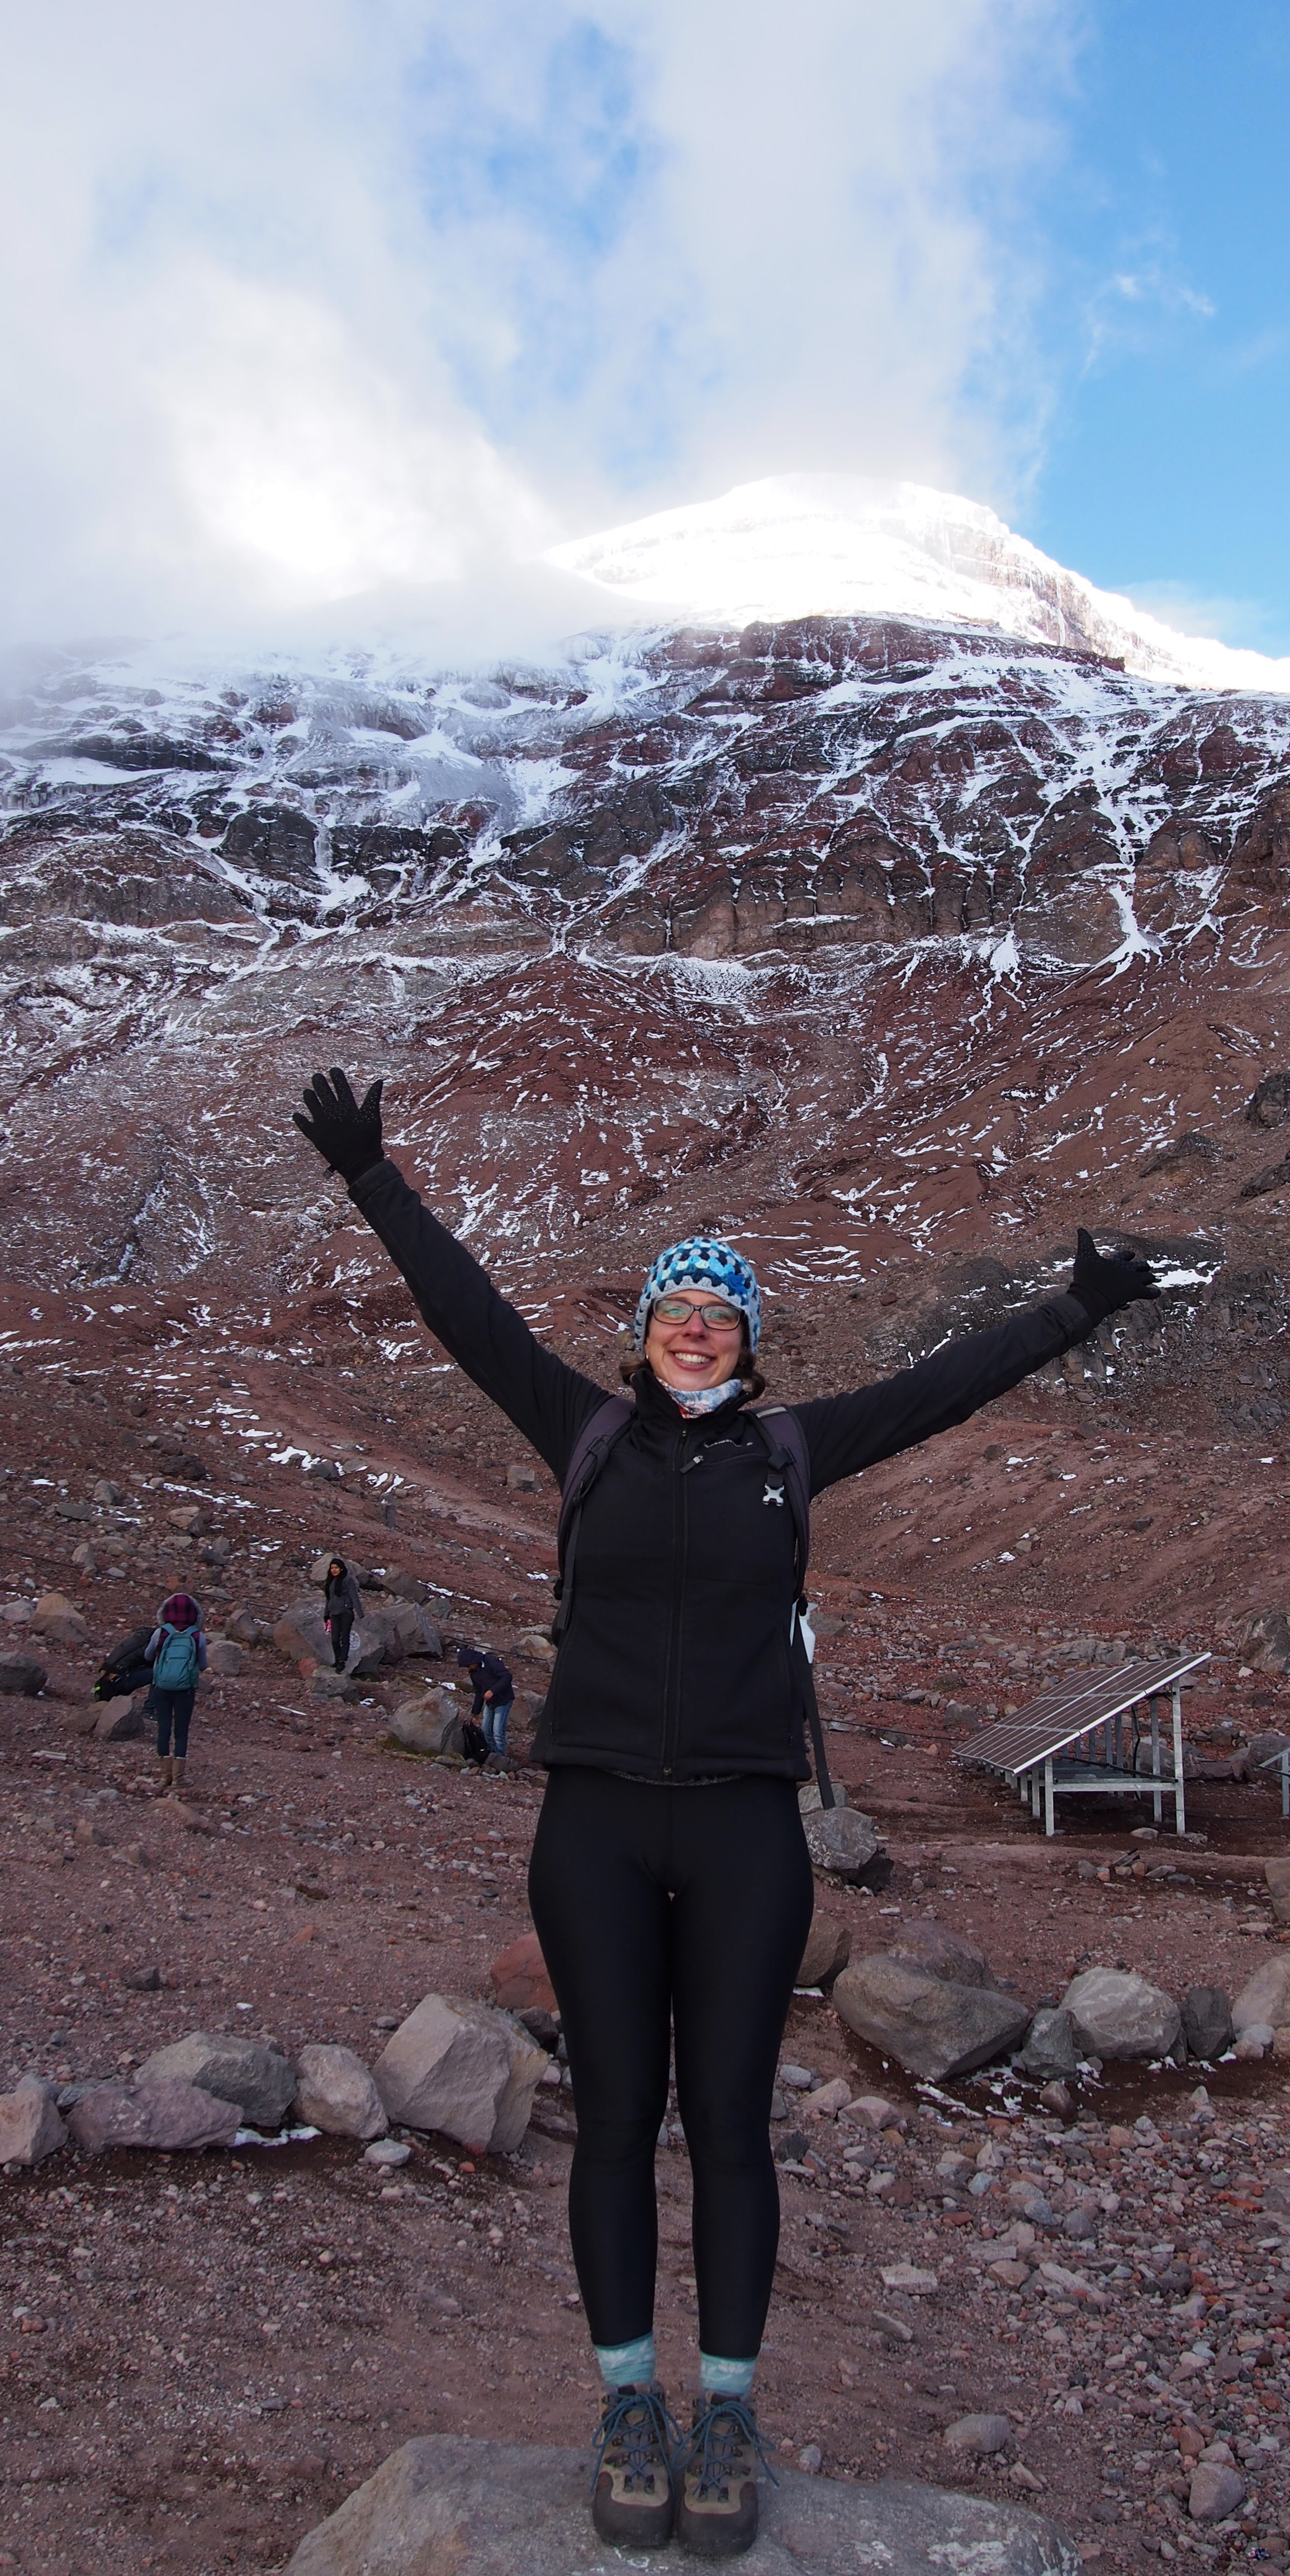 My first weekend adventure was spent together with eight other volunteers from the volunteer house in Salasaka. We headed to a volcano called Chimborazo, which claims to be the highest mountain in the world, 2 kilometres taller than Mount Everest when measure from the centre of the earth.
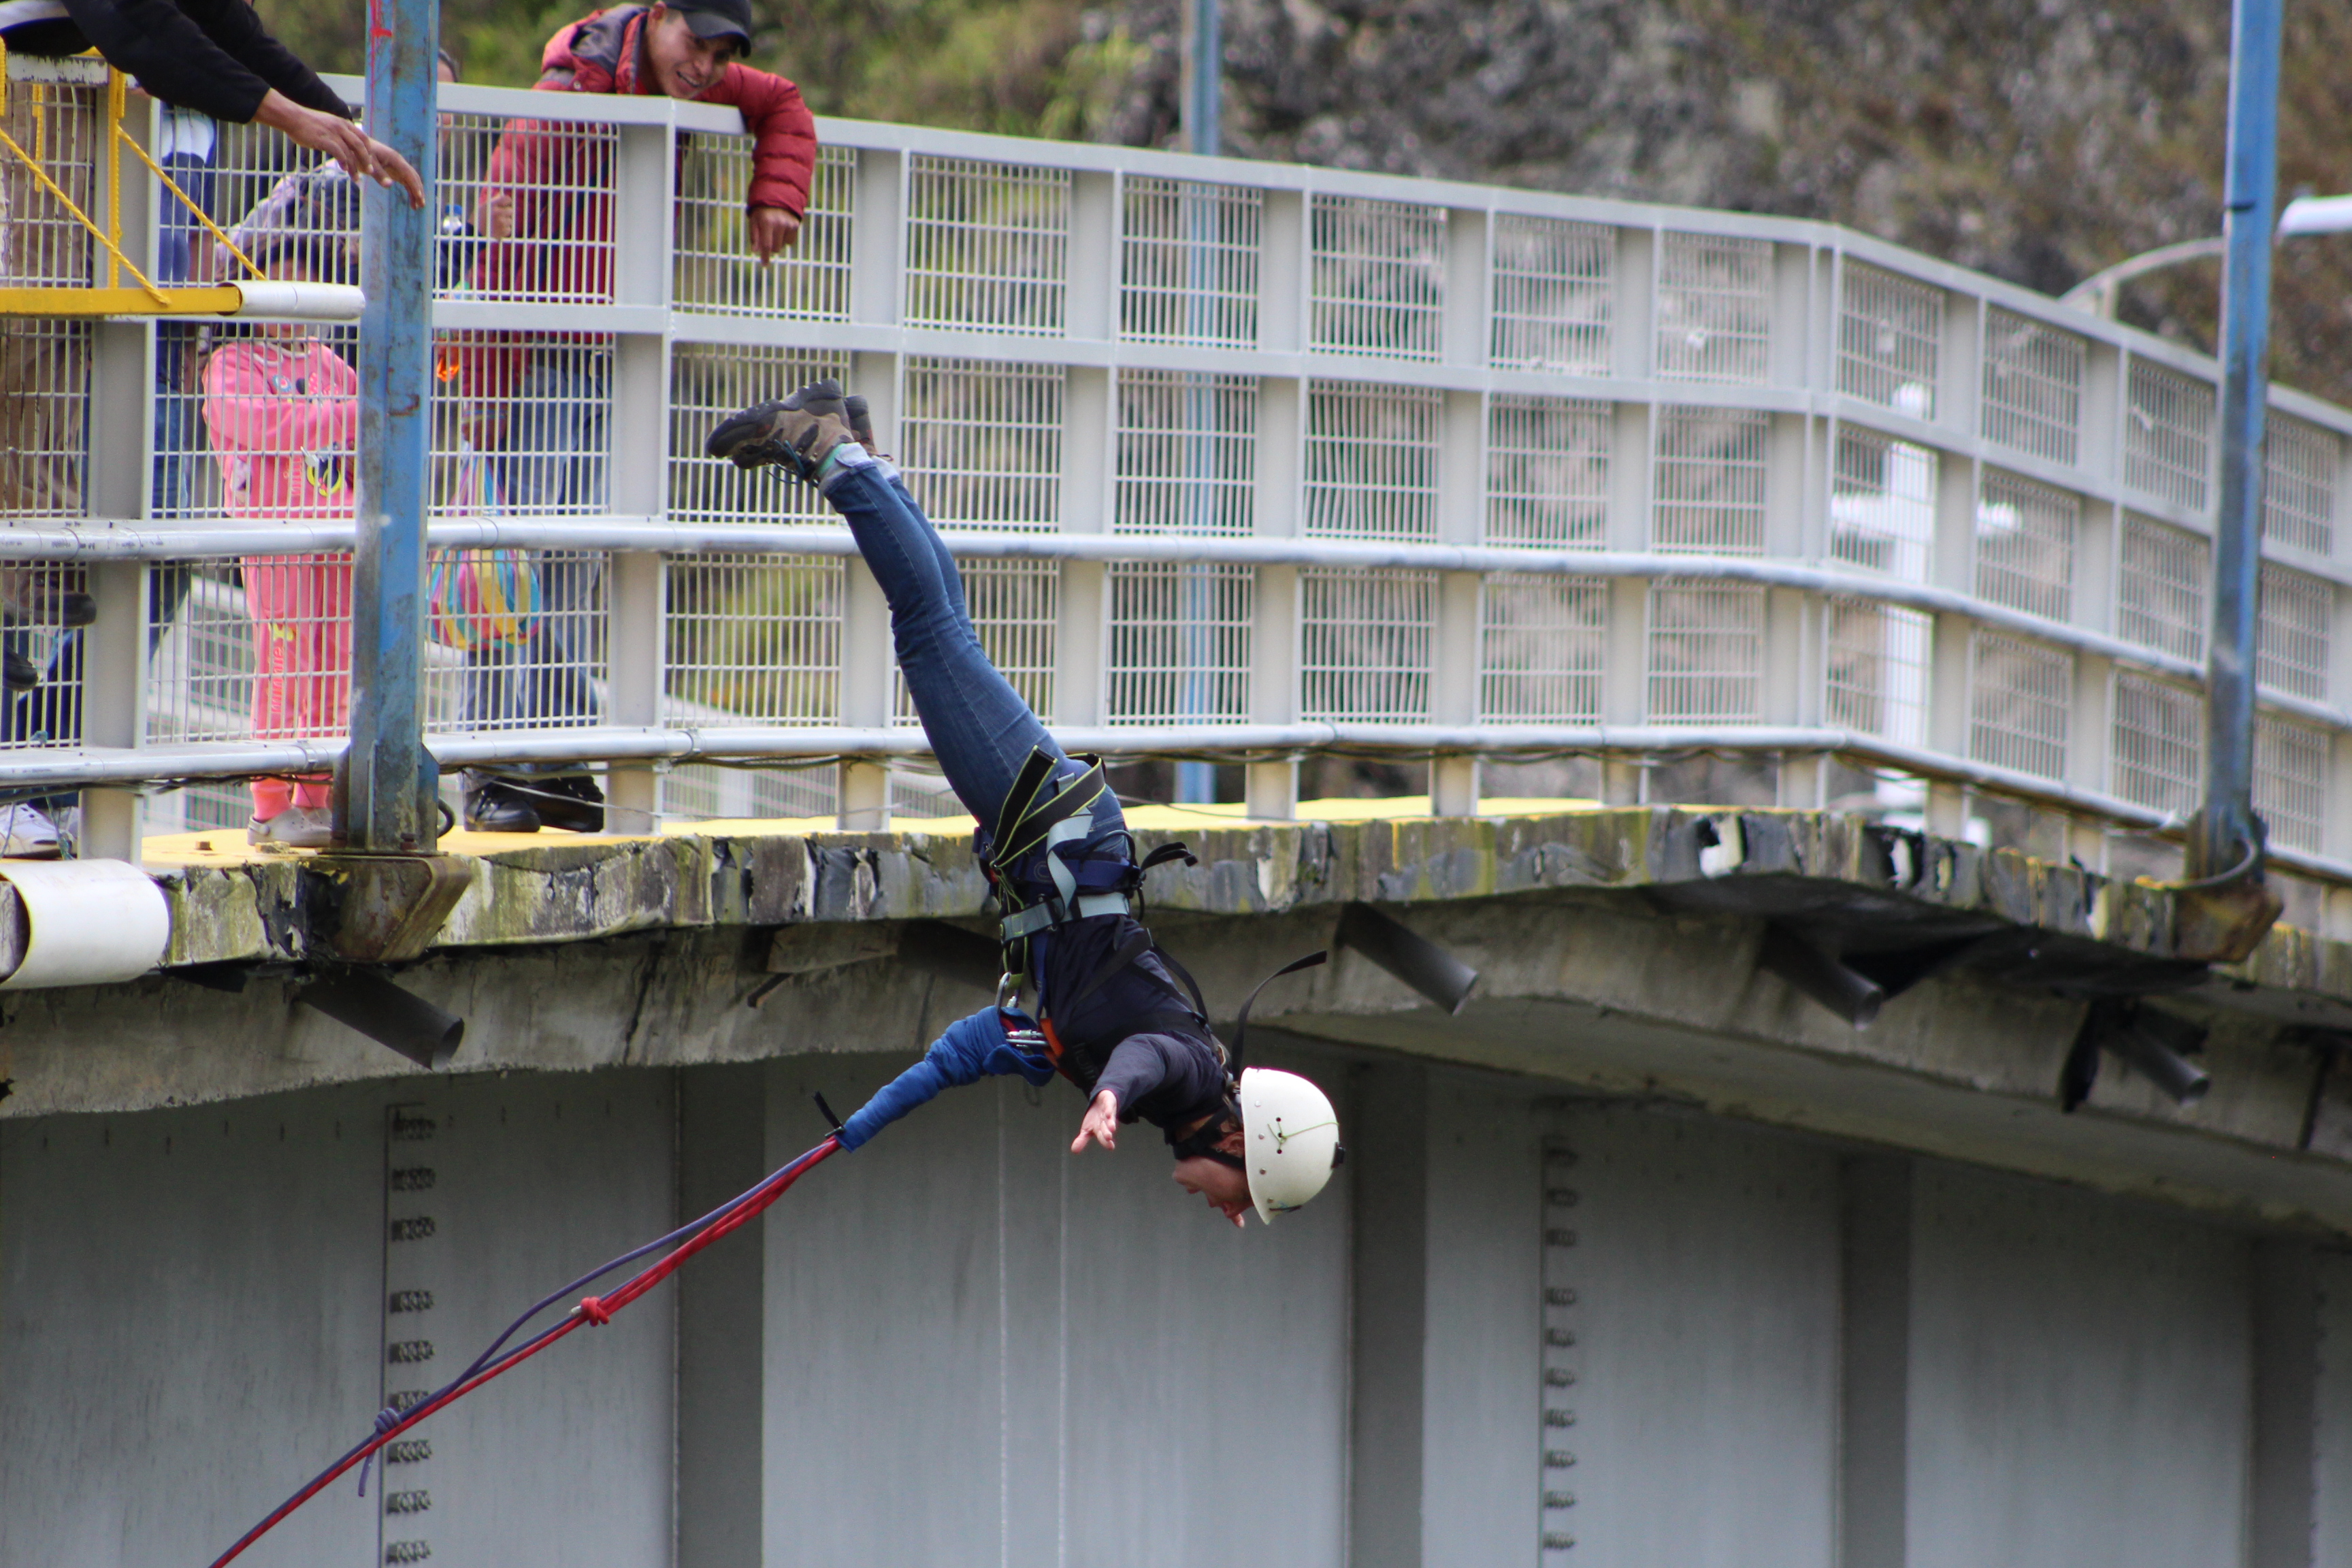 In Spanish the word Puente means bridge, the activity referred to as Puenting is a pendulum bridge swing.
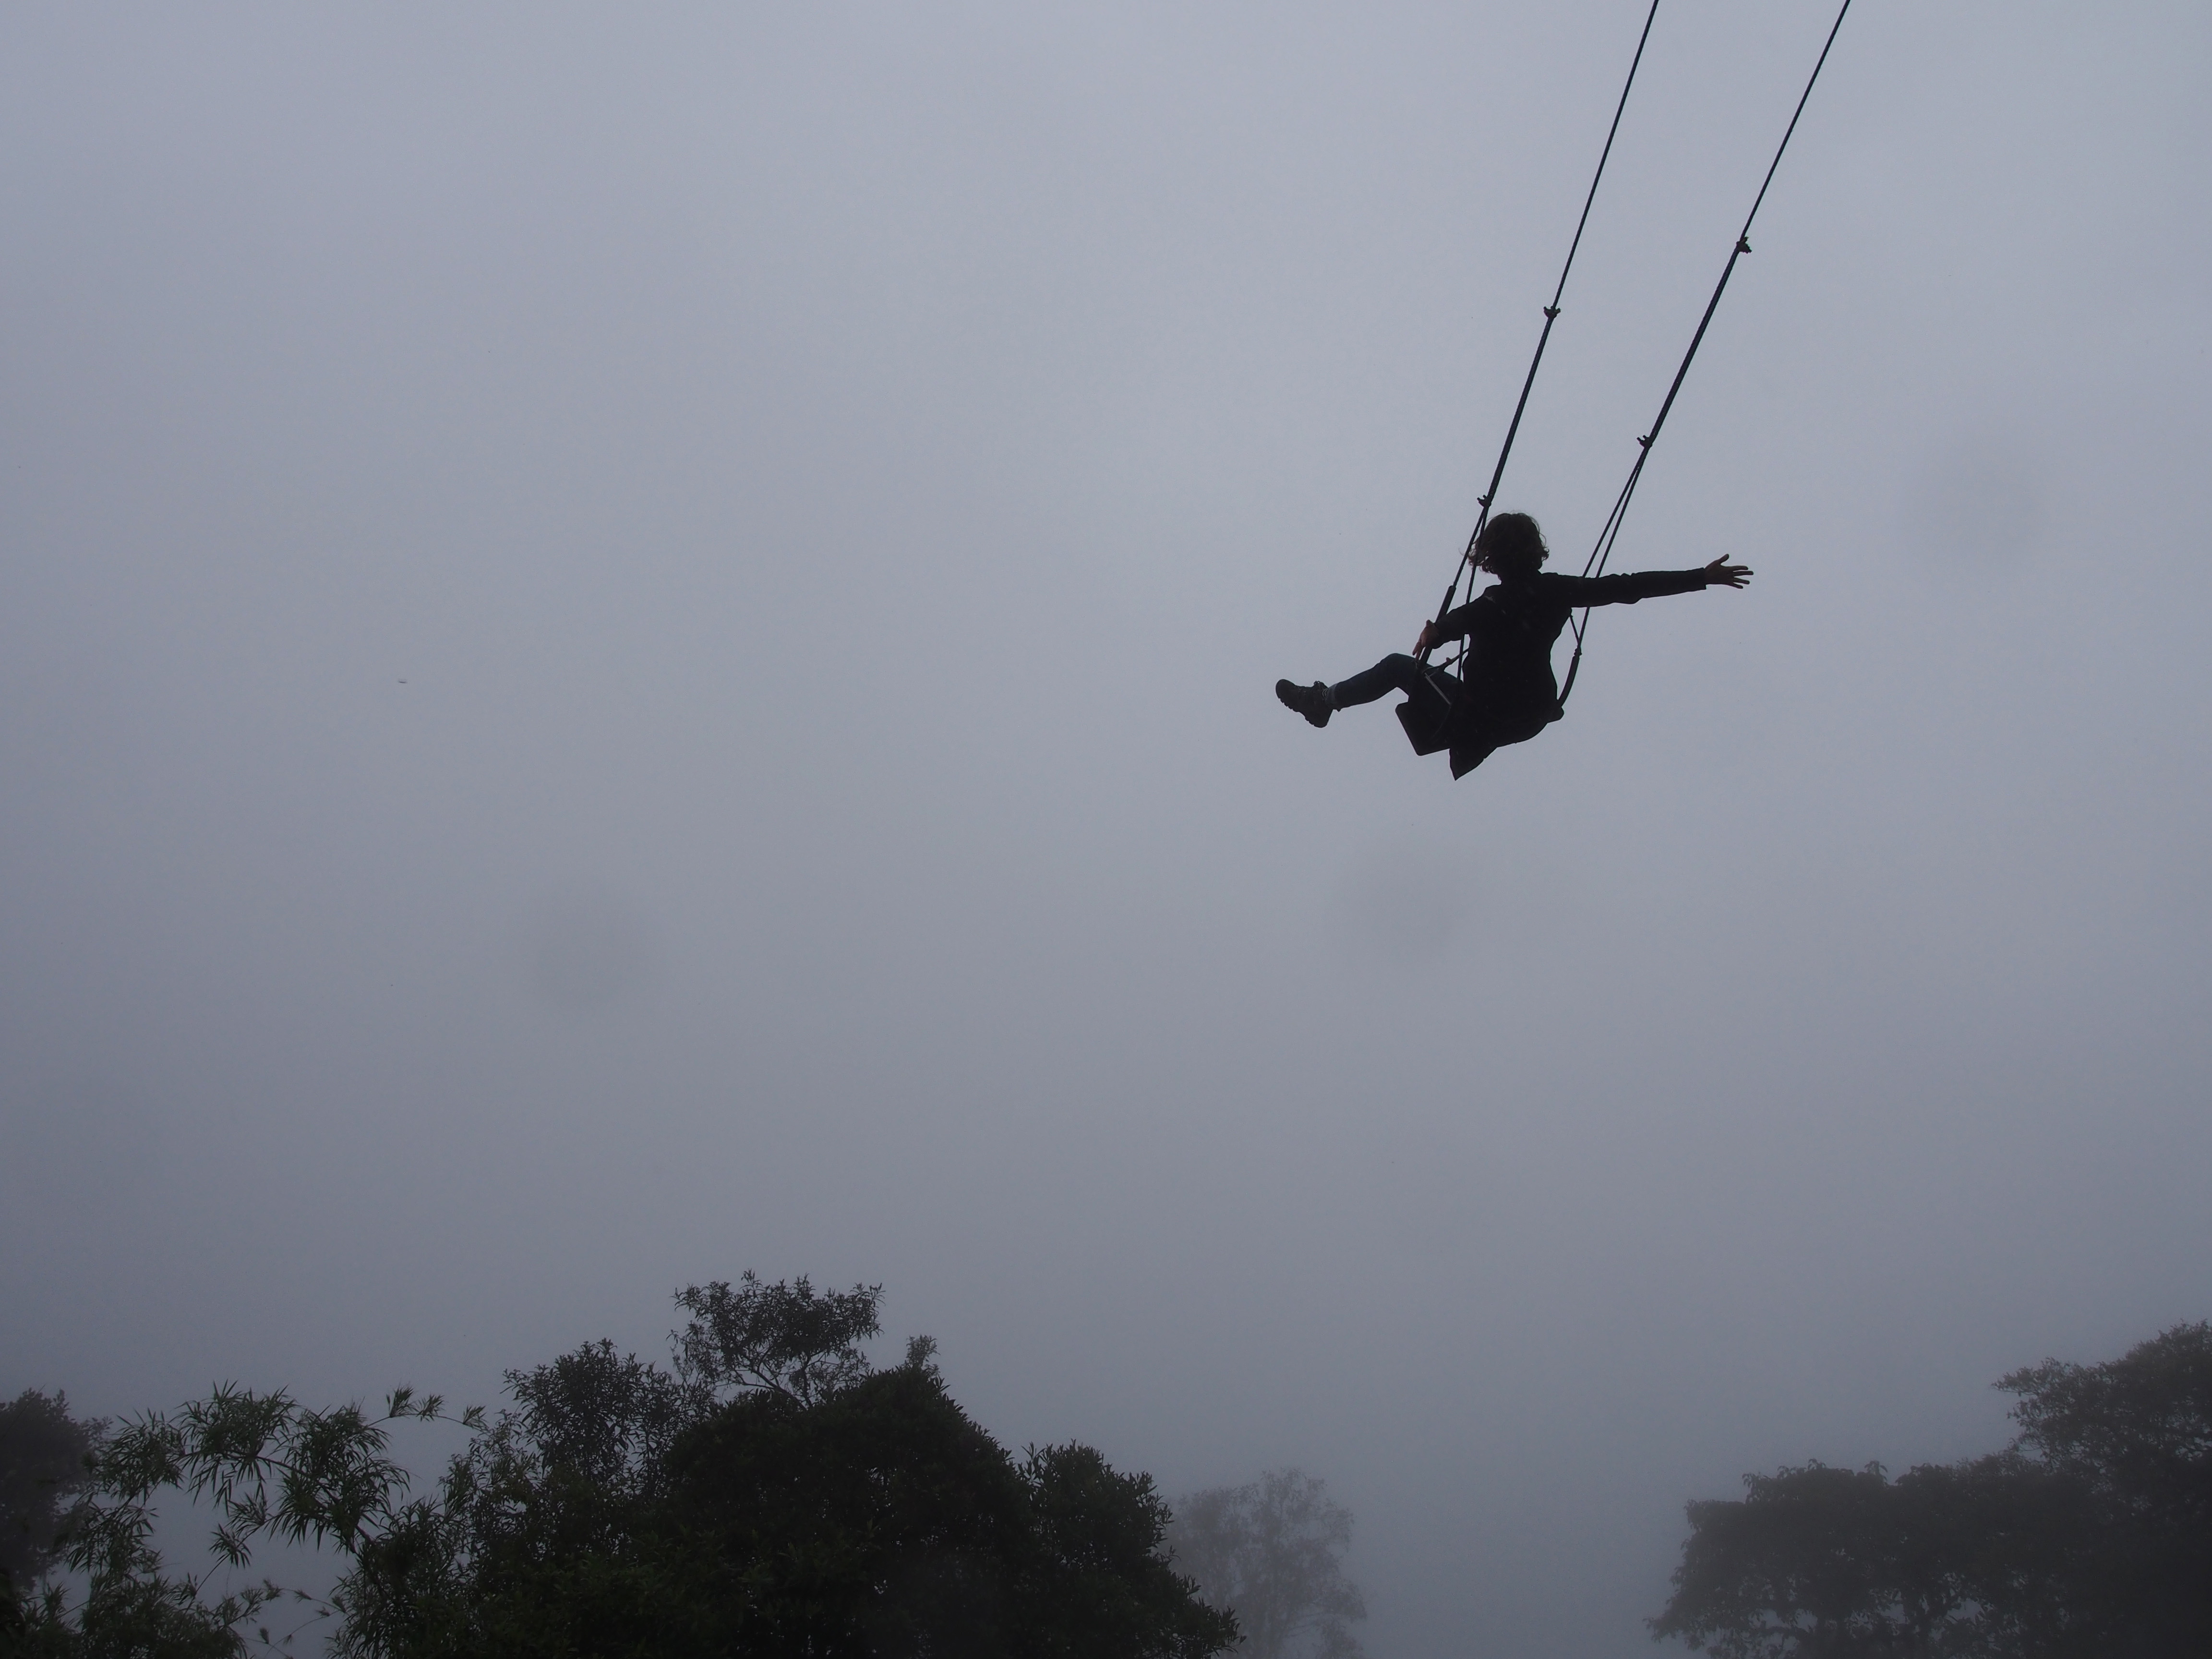 Casa Del Arbol is a treehouse on top of the hill overlooking Baños, with some swing attached. Perched on the hilltop, it appears as though you swing off the edge of the world.
 Ideally with enough time and good weather I would recommend renting a bicycle and cycling Ruta de Los Cascadas – the waterfall route. Alternately you can book a trip on a camioneta with any one of the adventure companies and they will transport you from place to place for approximately $6, not including entrance fees..
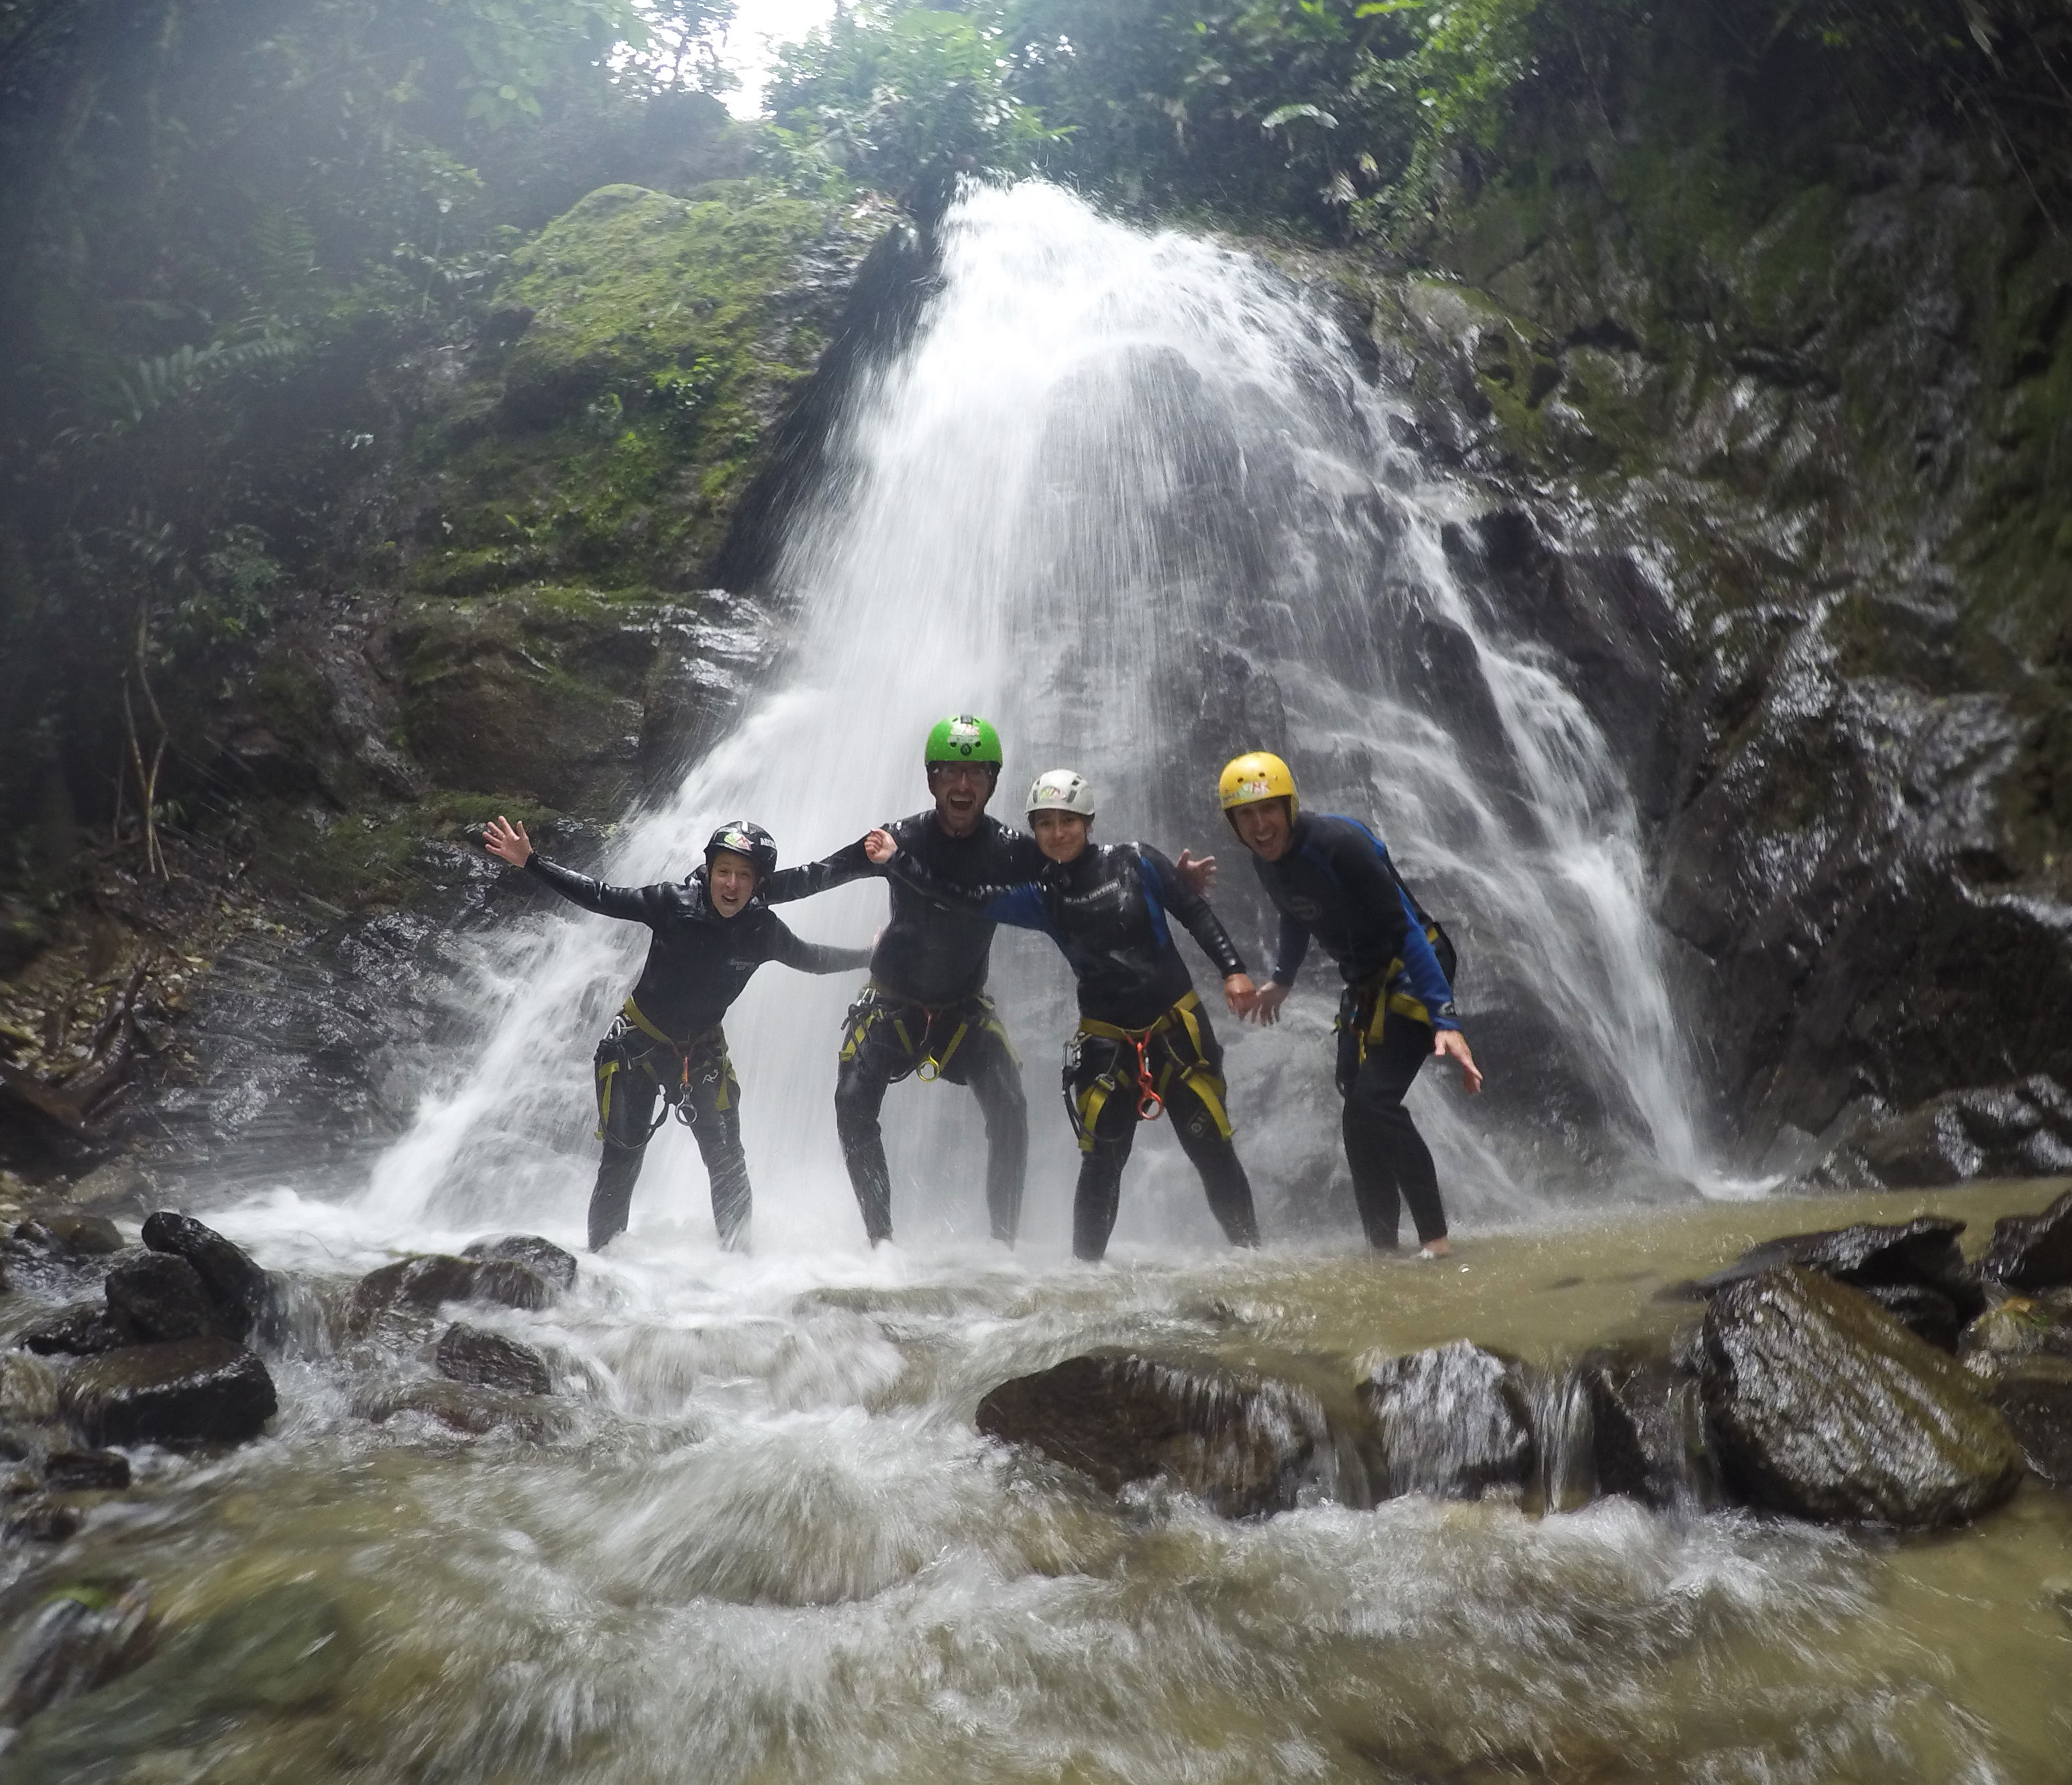 On the recommendation of so many people I have met, Canyoning was added to my To Do list in Baños. Again, basically every company offers half and full day canyoning adventures.